
In these past few months, we saw a lot of trends from dalgona coffee, to people sharing their tweaked versions of banana bread and now these heart-shaped cakes with a hammer. These 3-D looking cakes are called Pinata cakes and have taken the internet by a storm for a good reason. They’re incredibly fun to make and can be filled with anything you want- making for a great surprise.
I’ve been seeing the pinata cake everywhere and I’m very excited to be sharing my version today! As fancy as it may look, you only need two ingredients to make the shell. So let’s get to the recipe. And yes, don’t forget to share your creations with me on Instagram using #Bakewithshivesh.
Things that you need to make Pinata Cake
The best part about this trending Pinata cake is that you basically need only two ingredients to make the shell. I’m using compound white chocolate for my pinata cake because it doesn’t have to be tempered. I’m using white compound chocolate by morde because that’s the most readily available but you can use any white/dark compound chocolate you have in hand. You can also use any other variety of chocolate if you like tempering but I wanted to keep things simple so I used compound. You will also need a silicon 3-d mould and a hammer for making this cake. I got mine from Amazon.
Process for making Pinata Cake
Let’s understand the process to make this epic creation! To make the shell for this Pinata cake, we melt the white chocolate till it’s completely smooth and lump-free. Then we pour it into the heart-shaped mould and swirl it to make sure that the chocolate covers all the edges and corners of the mould. There’s no need for greasing as it’s a silicone mould and the chocolate will peel off easily. We pour off the excess chocolate back into the mould and refrigerate the mould for 10 minutes till the chocolate sets completely. After this first layer of chocolate sets, we pour some more chocolate and swirl it around to cover the entire mould. . If you feel that your layer of chocolate is thinner around the edges, you can use a pastry brush to brush some extra white chocolate around the edges. This goes back in the fridge for 10 minutes or until it firms up.
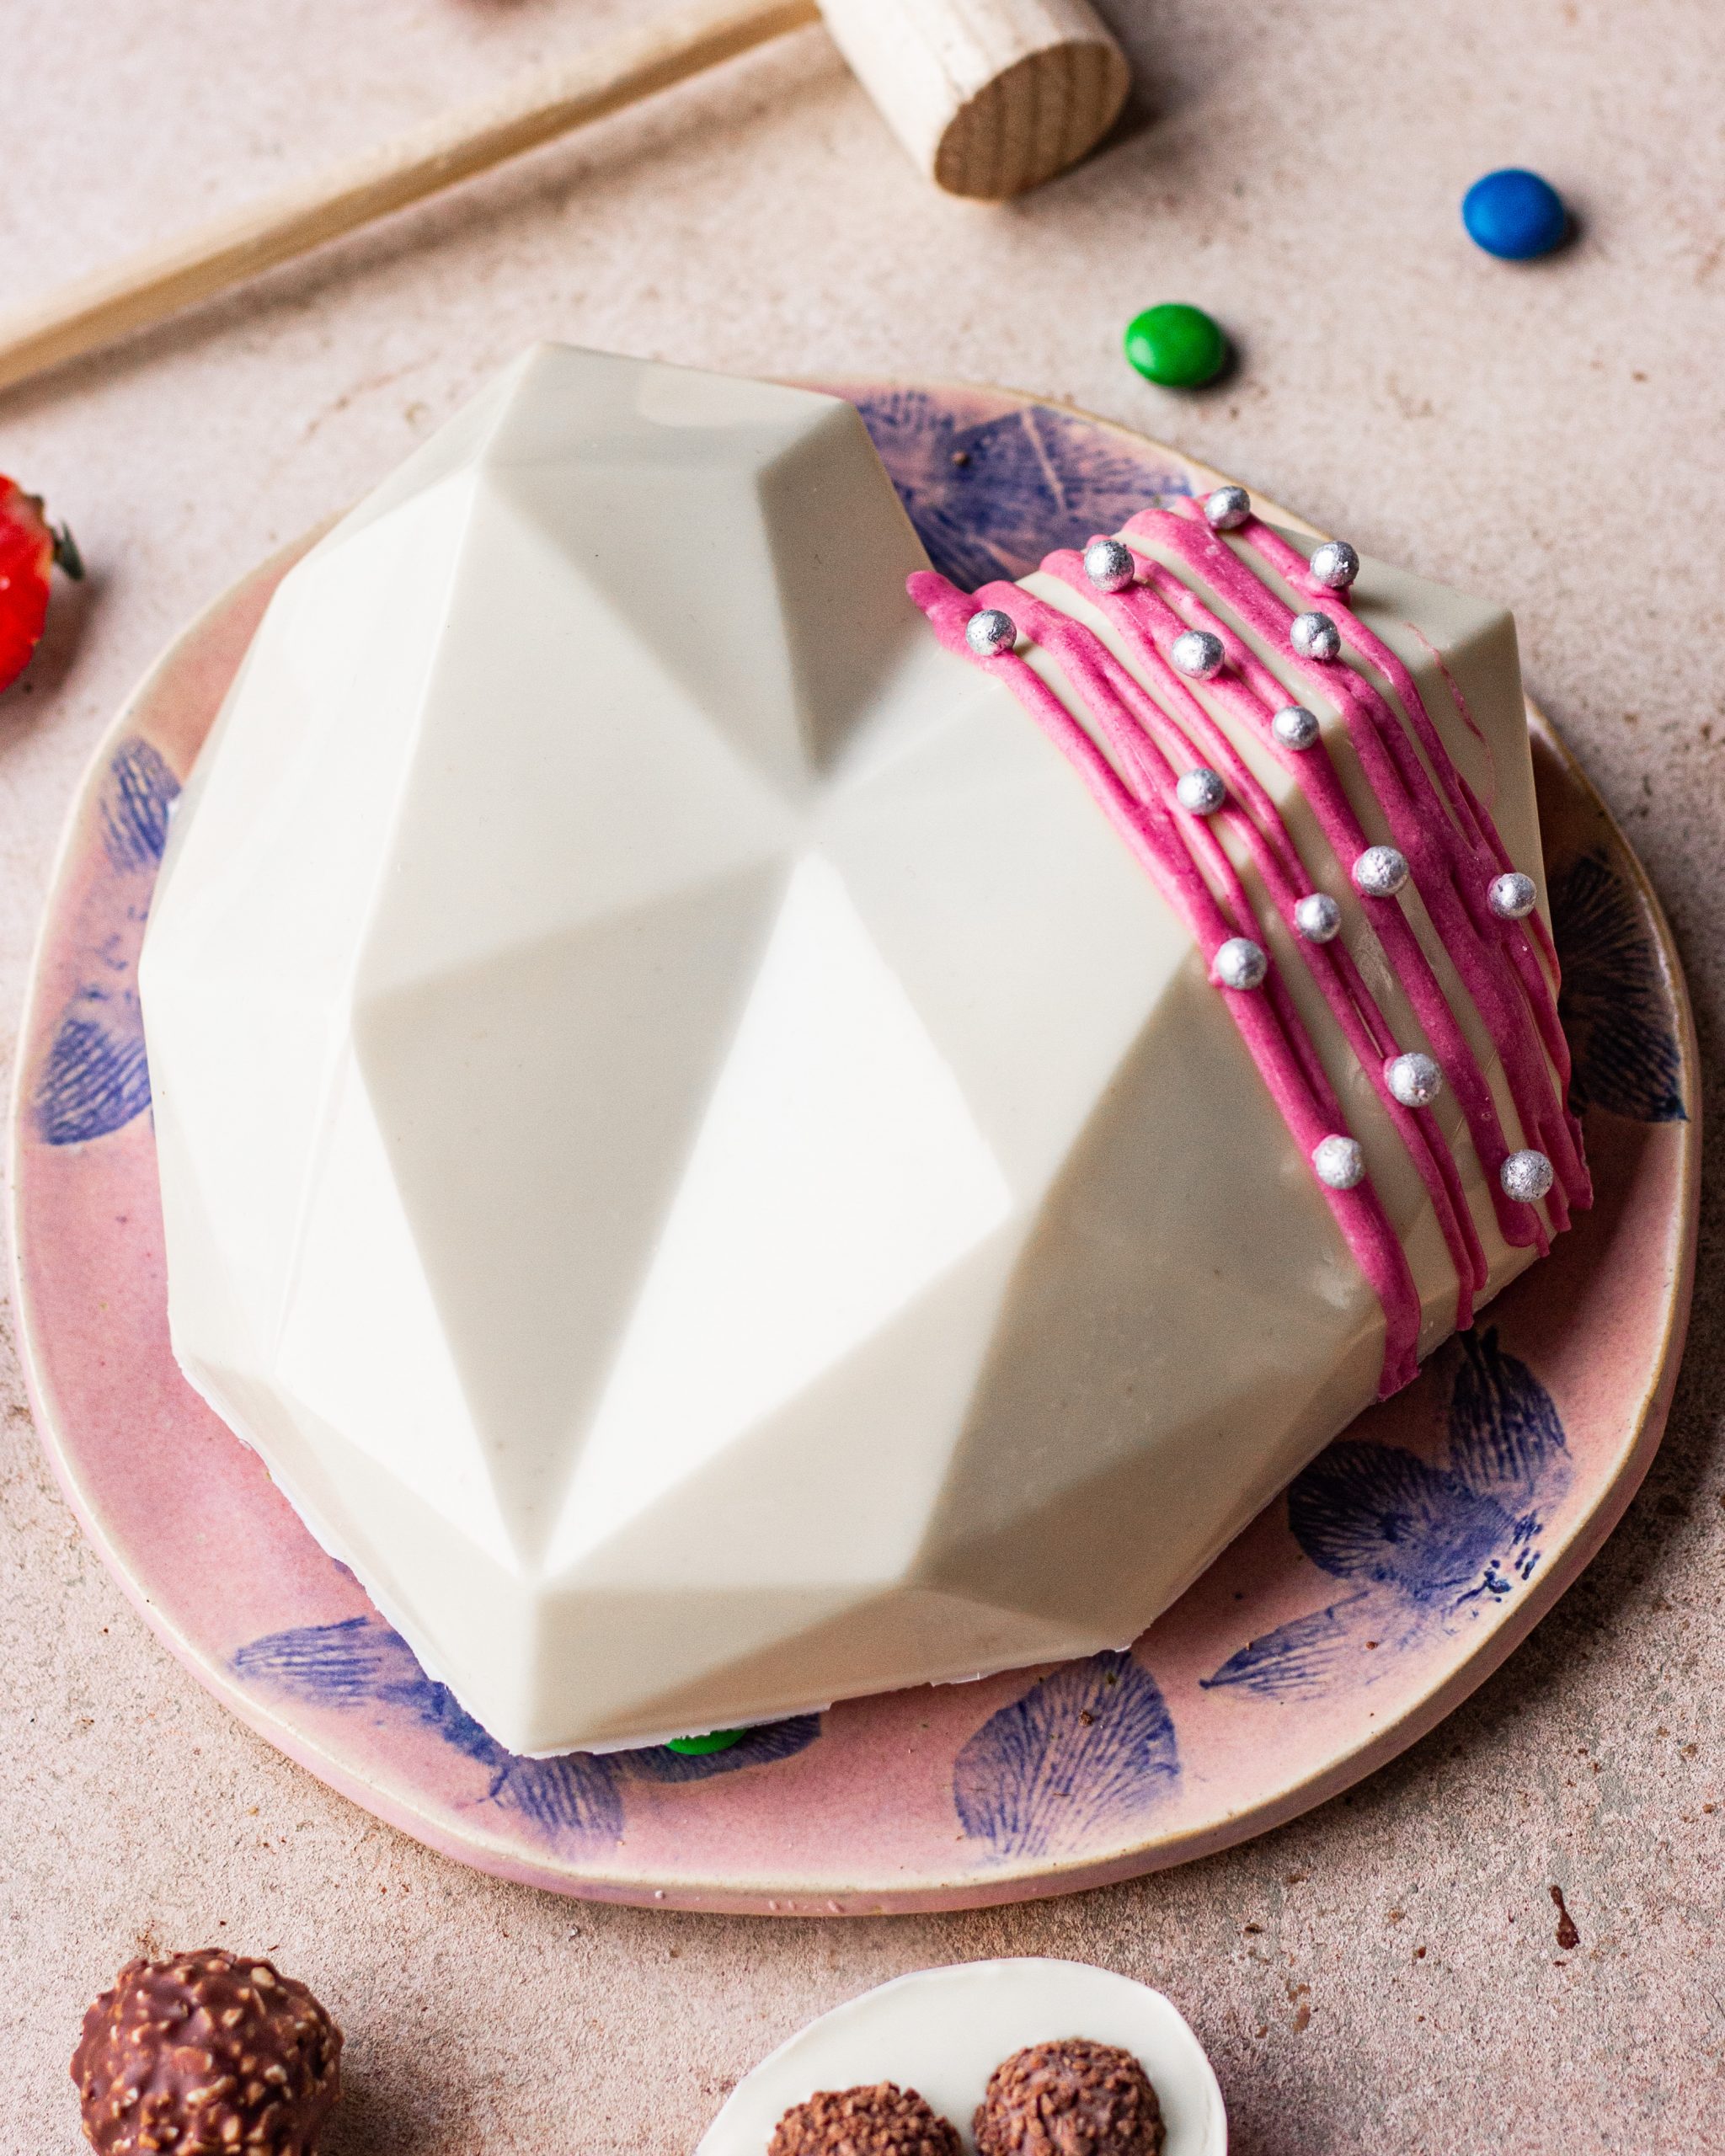
After this second layer of chocolate sets, we peel this off! Be very patient and slow while doing this and make sure you don’t apply any pressure or the layer of chocolate will crack. Once the chocolate is out of the mould, you can decorate it with anything you like! I used some more white chocolate (colored it pink) and some sprinkles to decorate my pinata cake.
Filling the Pinata Cake
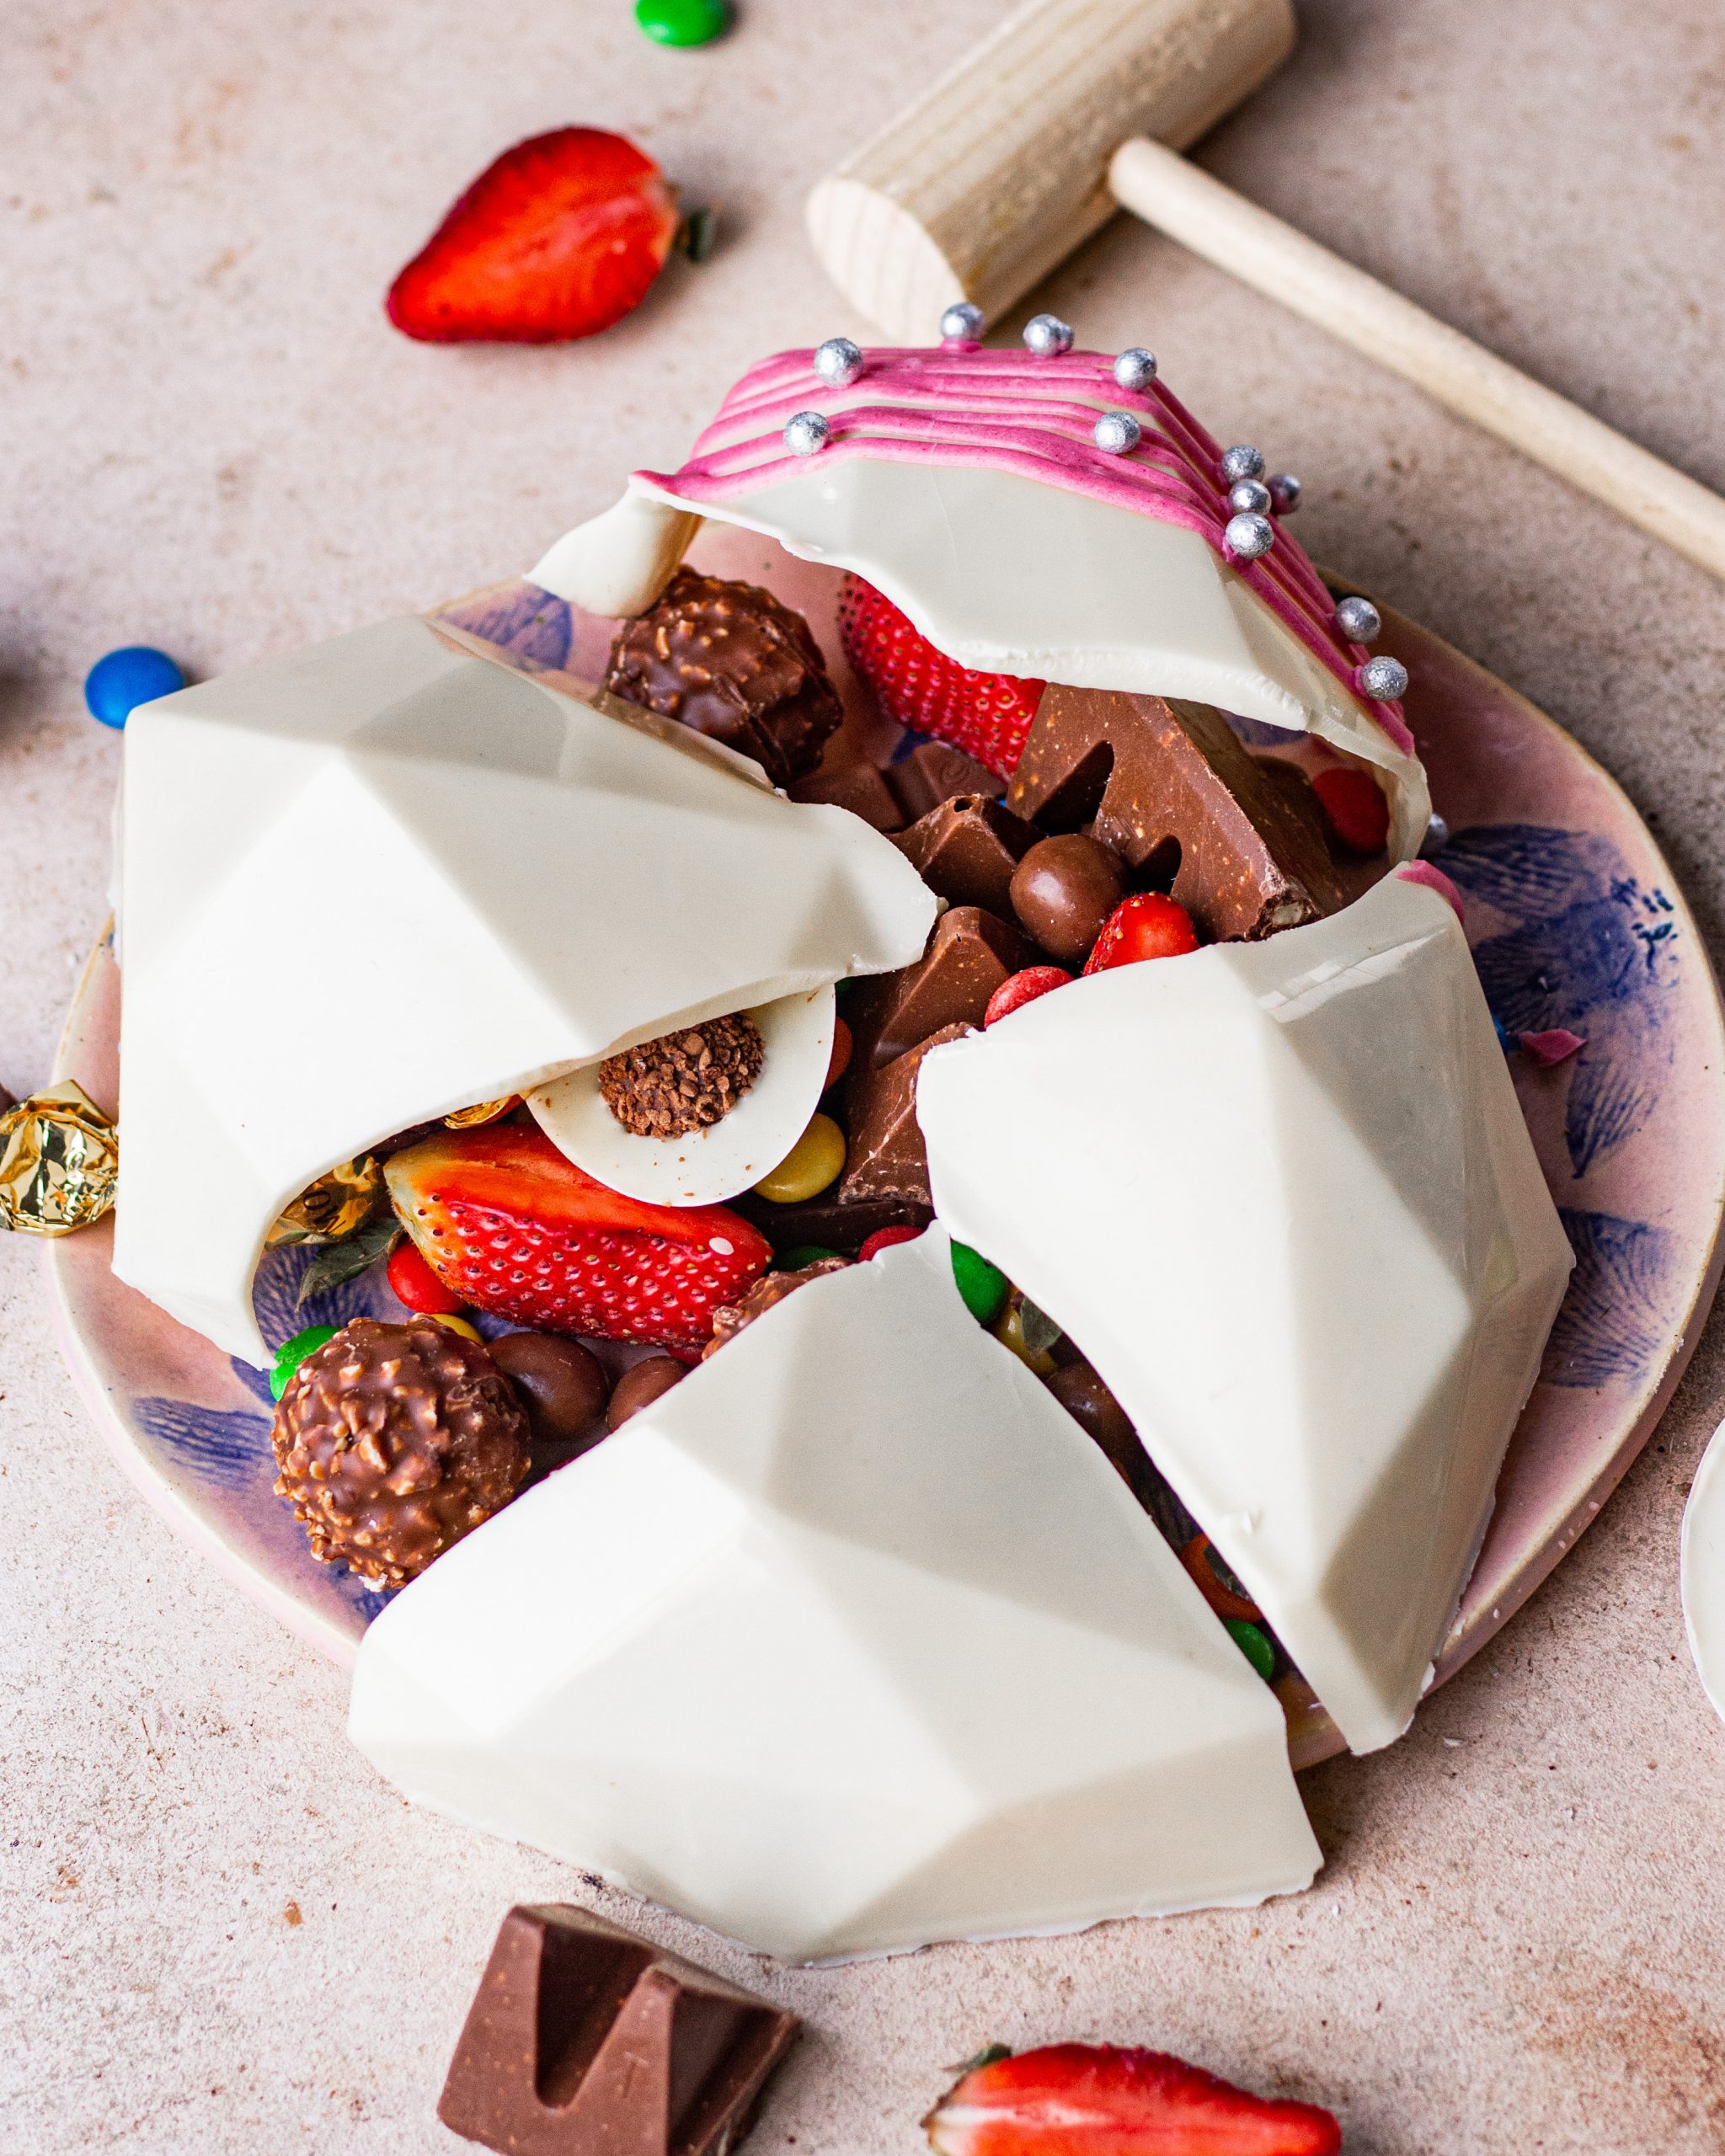
Now, this is the most fun part of making this pinata cake. I absolutely love chocolates and candies of all kinds, so I decided to fill my pinata cake with as many chocolates as I could get. After all, there’s nothing as too much chocolate. I pile them all up on a plate and carefully lift my chocolate mould and put it on top of the chocolates.
The sky is your limit here- you can get as creative as you want and fill your pinata cake with anything you like. You can even make a small cake/cupcakes and hide it inside the shell for a great celebration or surprise your loved ones with gifts. The options are endless! Hope you have a lot of fun making this recipe and breaking it open with a hammer- it was honestly my most favorite part of the recipe.
Other white chocolate recipes on the blog
If you like anything and everything that has white chocolate in it, then do check out these recipes –
- Pecan Bundt Cake with White Chocolate Glaze
- Cranberry and White chocolate cookies
- White Chocolate Truffles
Pinata Cake Recipe
- 200 grams white/dark/milk chocolate
- 3-D pinata mould
- Fillings for pinata cake
- To make the shell for this Pinata cake, melt the white chocolate till it's completely smooth and lump-free.
- Pour it into the heart-shaped mould and swirl it to make sure that the chocolate covers all the edges and corners of the mould.
- Pour off the excess chocolate back into the mould and refrigerate the mould for 10 minutes till the chocolate sets completely.
- After this first layer of chocolate sets, pour some more chocolate and swirl it around to cover the entire mould. If you feel that your layer of chocolate is thinner around the edges, you can use a pastry brush to brush some extra white chocolate around the edges.
- Refrigerate for 10 minutes or until set.
- After this second layer of chocolate sets, carefully peel the white chocolate off the mould.
- Once the chocolate is out of the mould, decorate it with some chocolate drizzle and some sprinkles.
- Fill up your pinata cake and enjoy!

Hello ji.I always follow your recipes .So happy when it gives good result.Thank you sooooo much for these recipes. I love baking. Please share more eggless recipes.❤❤
Hi..love this..how long can it sit out in room temperature?
It was everything I wanted and it tasted delicious. Thanks so much for the amazing cake , it was brilliant!
What is the shelf life of Pinata cake??
Can i make pinata cake before 2 days of use without filling?
Thanks for this wonderful recipe. Once the chocolate shell is done, do we need to store it in the fridge if I want to make the cake the next day?
Does it have to be in fridge ? Will the chocolate become too soft to break if left in room temperature for long time?
Great work sir, we loved this cake