Step into the realm of effortless indulgence, where simplicity meets decadence – the world of homemade peanut butter fudge. Picture this: a few basic ingredients coming together in a kitchen ballet, transforming into a velvety treat that’s both rich and comforting. If the idea of creating a delightful dessert without breaking a sweat sounds appealing, then you’re in for a treat.
Peanut butter fudge, with its no-fuss preparation and heavenly taste, is a testament to the joy of easy homemade pleasures. It’s the kind of sweet creation that sparks smiles without requiring culinary acrobatics. So, whether you’re a novice in the kitchen or a seasoned pro looking for a quick fix of sweetness, this is your invitation to a hassle-free journey into the world of irresistible peanut butter fudge.
INGREDIENTS USED IN PEANUT BUTTER FUDGE
CHOCOLATE CHUNKS
I used dark chocolate for making my peanut butter fudge but you can use any chocolate you like. Milk and white chocolate will also work well here. If you’re wondering about which chocolate to buy, then the most commonly available brands are Morde and Amul. I however use Callebaut chocolate for this peanut butter fudge. I would not recommend using compound because you need a silky, smooth chocolate mixture for your fudge to be lump free. If you want to know more about baking chocolate, I have got you covered. I wrote a blog post about all things chocolate that will help you through all your doubts!
CONDENSED MILK
Sweet condensed milk is also very commonly available in all local markets. You can use either Nestle’s Milkmaid or even Amul’s condensed milk. Both work equally well and give your fudge all the sweetness that it needs and also adds to its decadent and luscious texture.
BUTTER
Don’t worry about finding unsalted butter to make chocolate fudge. I use salted butter in all my recipes and they turn out great.
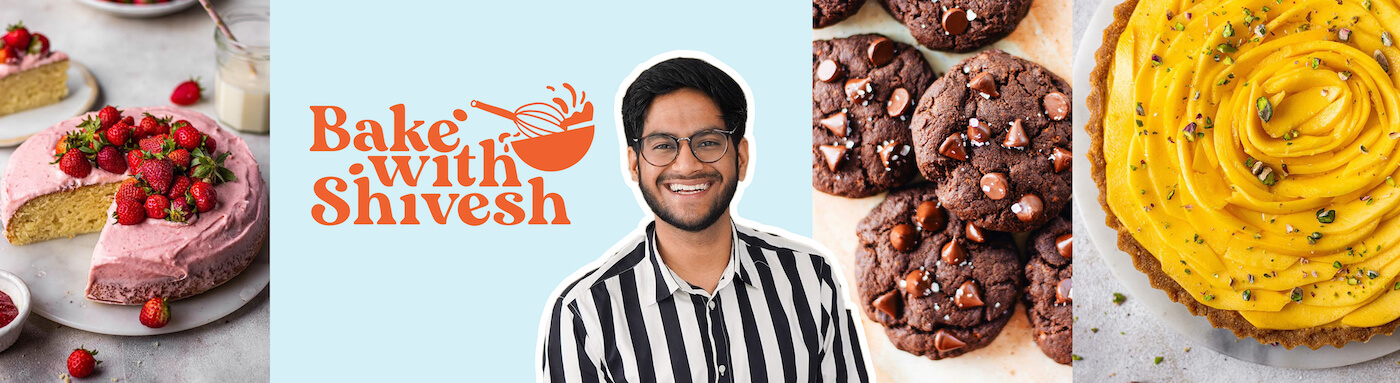
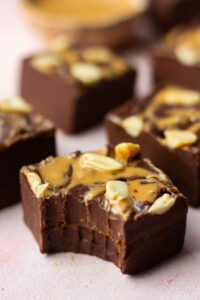
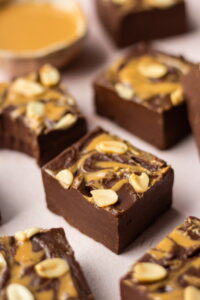
PEANUT BUTTER
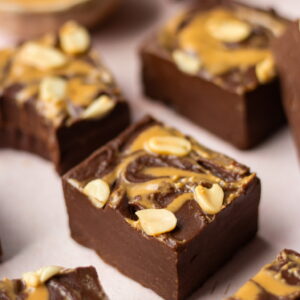
Lastly, I added the best ever peanut butter which is the most important ingredient for our peanut butter fudge and top them with some crushed roasted peanuts for that lovely crunch.
TIPS TO MAKE THE BEST PEANUT BUTTER FUDGE
This fudge is incredibly simple to make but here are a few tips which will make it even simpler for you –
1. DON’T SKIP ON THE SWEET CONDENSED MILK
I know the quantity of sweet condensed milk seems a bit much, but trust me you need all of this goodness to make the perfect fudge. When you mix your melted chocolate with sweet condensed milk you will see the mixture turn thick in no time and you would literally want to dive right into it. It is so good.
2. LINE YOUR PAN CORRECTLY
The process of making chocolate fudge is extremely easy. One thing you do need to take care of is lining your pan correctly. Make sure to spread some melted butter all over the base and sides of your pan. The parchment sheet that you will line your pan with needs to have handles on both sides so that once the fudge is set, you can easily pick it up and take it out of the pan.
3. MELTING YOUR CHOCOLATE
It is important to melt your chocolate nicely and evenly. My preferred way of melting chocolate is on a double boiler but you can also do it in the microwave in 10 second intervals. Be careful not to overheat and seize your chocolate.
4. REFRIGERATION IS IMPORTANT
Please don’t rush this step. Fudge needs time to set. I set mine for 3-4 hours, and you should do the same. You can also just let it set overnight in the fridge. The wait is well worth it. Trust me.
I don’t know about you, but I am a bit of a fudge fan.
RELATED RECIPES FROM THE BLOG
HOW TO STORE PEANUT BUTTER FUDGE
This fudge can be stored in your fridge very conveniently for 2 weeks when kept in an airtight jar and you can even cling wrap them separately. In the freezer, they are good for up to two months. Before having them, you just need to thaw the fudge properly. They can stick to each other so make sure you add parchment paper in between the layers. If your family or friends are coming over on a short notice, this refrigerator-stored fudge can then come handy! I know I happen to be in that situation quite often and that is why my fridge is always stocked with this biscoff fudge. They are not just festive treats but absolutely good for any day.
- Ingredients
- 1 cup chocolate chips/ chunks
- 1 tbsp melted butter
- ½ can / ½ cup condensed milk
- 2 tbsp peanut butter + more for swirls
- 1-2 tbsp roasted peanuts
- Heat 1 cup of chocolate in a microwave-safe bowl in 30 seconds intervals till no lumps remain.
- Add melted butter and peanut butter to the melted chocolate and mix till everything comes together.
- Add ½ can of Nestle Milkmaid to this mixture and mix to combine again.
- Pour it immediately into a square pan lined with parchment paper and smoothen it out into an even layer.
- Pipe or drizzle some more peanut butter on top and make swirls using a toothpick or a skewer.
- Finally, add some roasted peanuts on top and refrigerate for 4-5 hours till it's set.
- Using the parchment paper handles, carefully take out the fudge and cut it into neat bars right before serving.
If you liked this recipe of peanut butter fudge and happen to make it in your kitchen, then do share pictures with me by tagging me on Instagram using #bakewithshivesh.

Leave a Reply