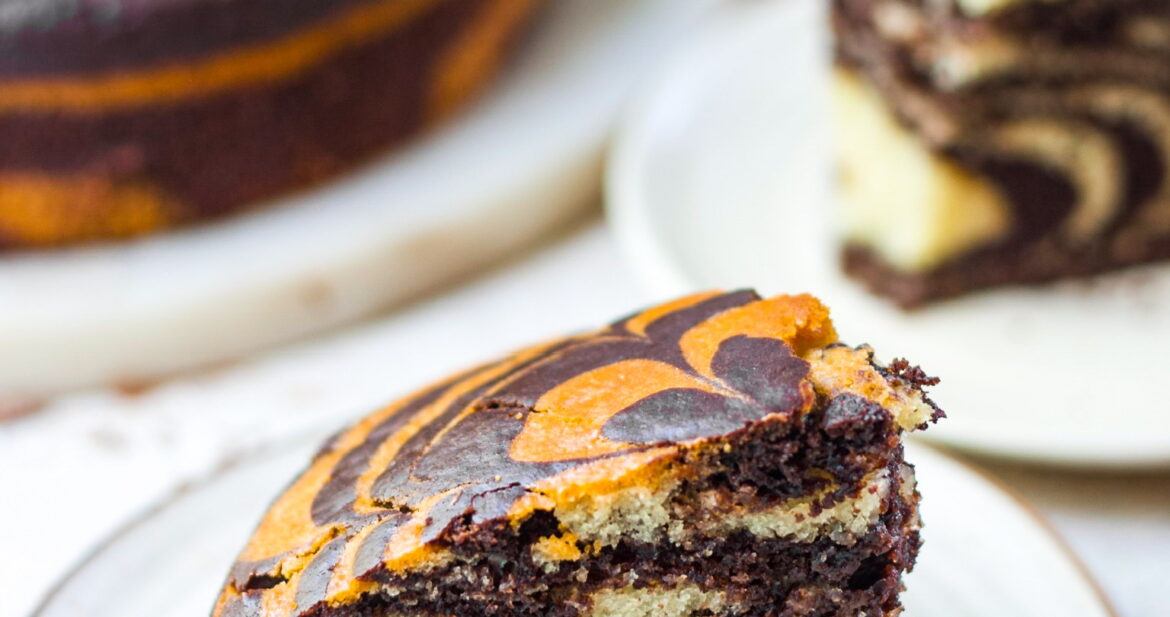
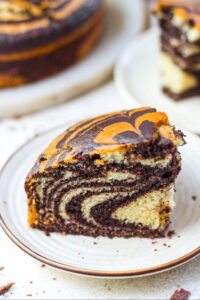
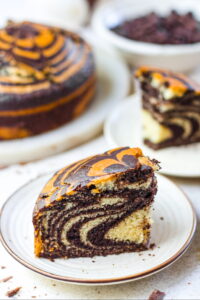
A world where moistness, richness, and egglessness harmonize into a symphony of flavor. Enter the realm of the Zebra Cake – a delectable treat that not only tantalizes the taste buds but also offers the satisfaction of a hassle-free baking experience. Picture this: layers of vanilla and chocolate intertwining seamlessly, resembling the distinctive stripes of a zebra,
What sets this cake apart is not just its visual appeal but also its exquisite taste and texture. Each bite promises a moist, tender crumb that practically melts in your mouth, leaving behind a lingering sweetness that is simply unparalleled. And the best part? It’s eggless. One of the most delightful aspects of the Zebra Cake is its ease of preparation. With a few simple ingredients that you likely already have in your pantry.
Let’s get to the ingredients you will need to make this cake.
INGREDIENTS NEEDED TO MAKE ZEBRA CAKE
YOGURT
To replace eggs in this recipe, the best substitute is yogurt or homemade dahi. When eggs are replaced with dahi, you get the perfect tender moist crumb which is achieved with eggs. In this eggless marble cake, you can either use regular homemade dahi (do not hang and remove water from it) or store brought yogurt. Both of them works well.
CASTOR SUGAR
I usually prefer castor sugar in all my recipe until mentioned otherwise. Castor sugar melts evenly, unlike granulated sugar. If you don’t have castor sugar in hand, feel free to substitute it with powdered sugar in this eggless zebra cake.
OIL
A regular flavourless oil is your best bet while baking. Any other oil usually leaves an after taste which you do not want in your dessert. I have used olive oil with chocolate in a chocolate cake recipe and it didn’t leave any after taste so if you would want to give it try, you sure can in this recipe of eggless zebra cake.
VANILLA EXTRACT
Using the best kind of vanilla has always made all the difference in any dessert. Please avoid using vanilla essence as it is not real but synthetic and chemically made vanilla flavour. Make sure you use good quality vanilla extract or bean for this eggless zebra cake. I recommend this one. To know more about vanilla and which vanilla to use for your desserts, you can check out my article Vanilla 101.
MILK
To make my eggless zebra cake moist, soft and light, I use Nestle milk in this recipe. Make sure it is a little warm and not cold straight from the fridge. Since every flour is different, you might need a tablespoon less or a tablespoon more of milk to adjust the consistency of the batter.
ALL PURPOSE FLOUR
I have used regular maida in this eggless zebra cake. Feel free to swap half of it for whole wheat flour or oat flour. Make sure you increase the quantity of milk in that case as these flours absorb more liquid in a recipe.
BAKING POWDER AND BAKING SODA
I have used both baking powder and soda in this eggless marble cake. Baking soda will react with the yogurt or homemade dahi and baking powder would react to the rest of the liquid in this recipe of eggless marble cake. I use this baking powder and this baking soda.
COCOA POWDER
Using a good quality cocoa powder is very important. I personally really like using Hershey’s, but you can use any good dark cocoa powder. Cocoa powder is actually one of the most significant ingredients in this eggless marble cake.
EQUIPMENTS USED TO MAKE ZEBRA CAKE
The kind of equipment you use when you’re baking makes a huge difference to the end result! I would recommend you to use good quality mixing bowls and other equipment so that your zebra cake comes out delicious!
To mix all my ingredients together in, I’m using Borosil’s 100% Borosilicate Glass Bowl which is microwave and oven safe, plus the bowls are super easy to clean and handle, which makes my baking process totally hassle free!
Not a single day goes in my kitchen when I don’t use a Silicon Spatula, this is the one I recommend. Same goes for my set of Measuring Cups and Measuring Spoons.
OTHER CAKE RECIPES FROM THE BLOG
TIPS FOR MAKING ZEBRA CAKE
- Properly Greased Pan: Make sure to thoroughly grease your baking pan, whether you’re using butter, oil, or parchment paper. This prevents the cake from sticking to the pan and ensures easy removal after baking.
- Consistent Batter Thickness: When alternating between pouring the vanilla and chocolate batters into the pan, aim for consistency in the thickness of each layer. This helps in achieving evenly distributed stripes in the final cake.
- Patience with Layering: Take your time while layering the batters to achieve clean, distinct stripes. Allow each layer to settle slightly before adding the next to prevent mixing.
- Preheat the Oven: Ensure your oven is preheated to the correct temperature before placing the cake inside. Consistent heat is crucial for even baking and achieving the desired texture.
- Central Pouring Technique: Pour the batter into the center of the pan for each layer, allowing it to spread naturally. Avoid spreading the batter with a spoon or spatula, as this can disrupt the pattern.
- 1+1/2 cups yogurt
- ½ teaspoon baking soda
- 1 cup caster sugar
- ¾ cup vegetable oil
- ½ cup milk
- 1 teaspoon vanilla extract
- 2 + ¼ cups all-purpose flour
- 1 +1/2 teaspoon baking powder
- 3 tbsp cocoa powder
- ¼ cup hot water
- Preheat oven at 180 degrees Celsius and line a 7 inch cake pan.
- In a bowl add yogurt and baking soda and let it sit for 5 minutes.
- Add sugar, oil, vanilla, milk and whisk it till all the sugar is dissolved.
- Fold the dry ingredients in without over mixing the batter.
- Divide the batter equally into 2 bowls. Make a slurry of cocoa powder and hot water and add it into the first bowl . Mix it well and your chocolate batter is also ready .
- Transfer the batter in the prepared tin with a scoop or piping bag , alternatively starting with chocolate and vanilla over it till all the batter is used .
- Bake for 40-45 mins or till a skewer inserted in centre comes out clean .
- Once the cake has cooled completely, demould and serve .
If you like my Zebra Cake recipe and happen to make them in your kitchen, , do tag me on Instagram and share pictures with me using #Bakewithshivesh. Happy Baking!

Leave a Reply