
Every year on mothers day it’s a tradition in my house now, that mom and I bake something together. It was cinnamon rolls this time. And oh my, it was divine. My other loves anything cinnamon, from using it in her savoury dishes to flavouring her desserts with it. Cinnamon rolls rose the family consensus. This cinnamon-y sugary goodness was perfect for the occasion and I covered it with my all time favourite cream cheese frosting. I can use this frosting with literally anything, I think it’s a problem, haha! And cinnamon rolls from scratch only sound scary, but trust me, these are super easy to make and will be a definite hit in the house!
Cinnamon rolls are so popular all over the world. I know so many of us go gaga over cinnabon cinnamon rolls and rightly so. But my recipe of cinnamon rolls from scratch is definitely a must try. It’s the perfect treat to go with your morning and evening coffee.While making these super soft, and heavenly rolls from scratch, there are a few things you need to keep in mind. I have some important points with all of you in this article and I can’t wait to see how you all recreate this recipe!
If you and your mom are not a fan of cinnamon, you can also check out some other super special Mother’s day recipes that I have prepared for all of you.
Things to keep in mind while making cinnamon rolls from scratch
All about yeast
The dough for the cinnamon rolls uses yeast. Don’t be intimidated by this. Yeast is super simple to work with. 1. We activated the yeast in the recipe using warm milk, NOT hot. Anything hotter than 110F will kill the yeast. 2. Feed the yeast sugar and let it do its work. It’s like a little snack for the yeast, it works faster after that. Granulated sugar works best while activating yeast. So use that instead of caster sugar. 3. Leave the yeast undisturbed. Do not stir or shake it. It needs to settle down and work up. 4. If your yeast doesn’t bubble up, it could be old or expired. Don’t use the yeast since it may not give the dough what it needs. This will lead to a bad end result. In such a case you will have to get more yeast from your supermarket.
Proofing the cinnamon rolls
Proofing the dough is an important step. The cinnamon rolls have a 2 step proofing process. This needs to happen in a place that is warm,cozy and undisturbed. I usually proof any sort of dough in my turned OFF oven. There is no draft in the oven, this ensures proper proofing of the dough. The cinnamon rolls will proof once the dough is ready and next when we have filled the dough, rolled it up and sliced it.
Importance of the filling
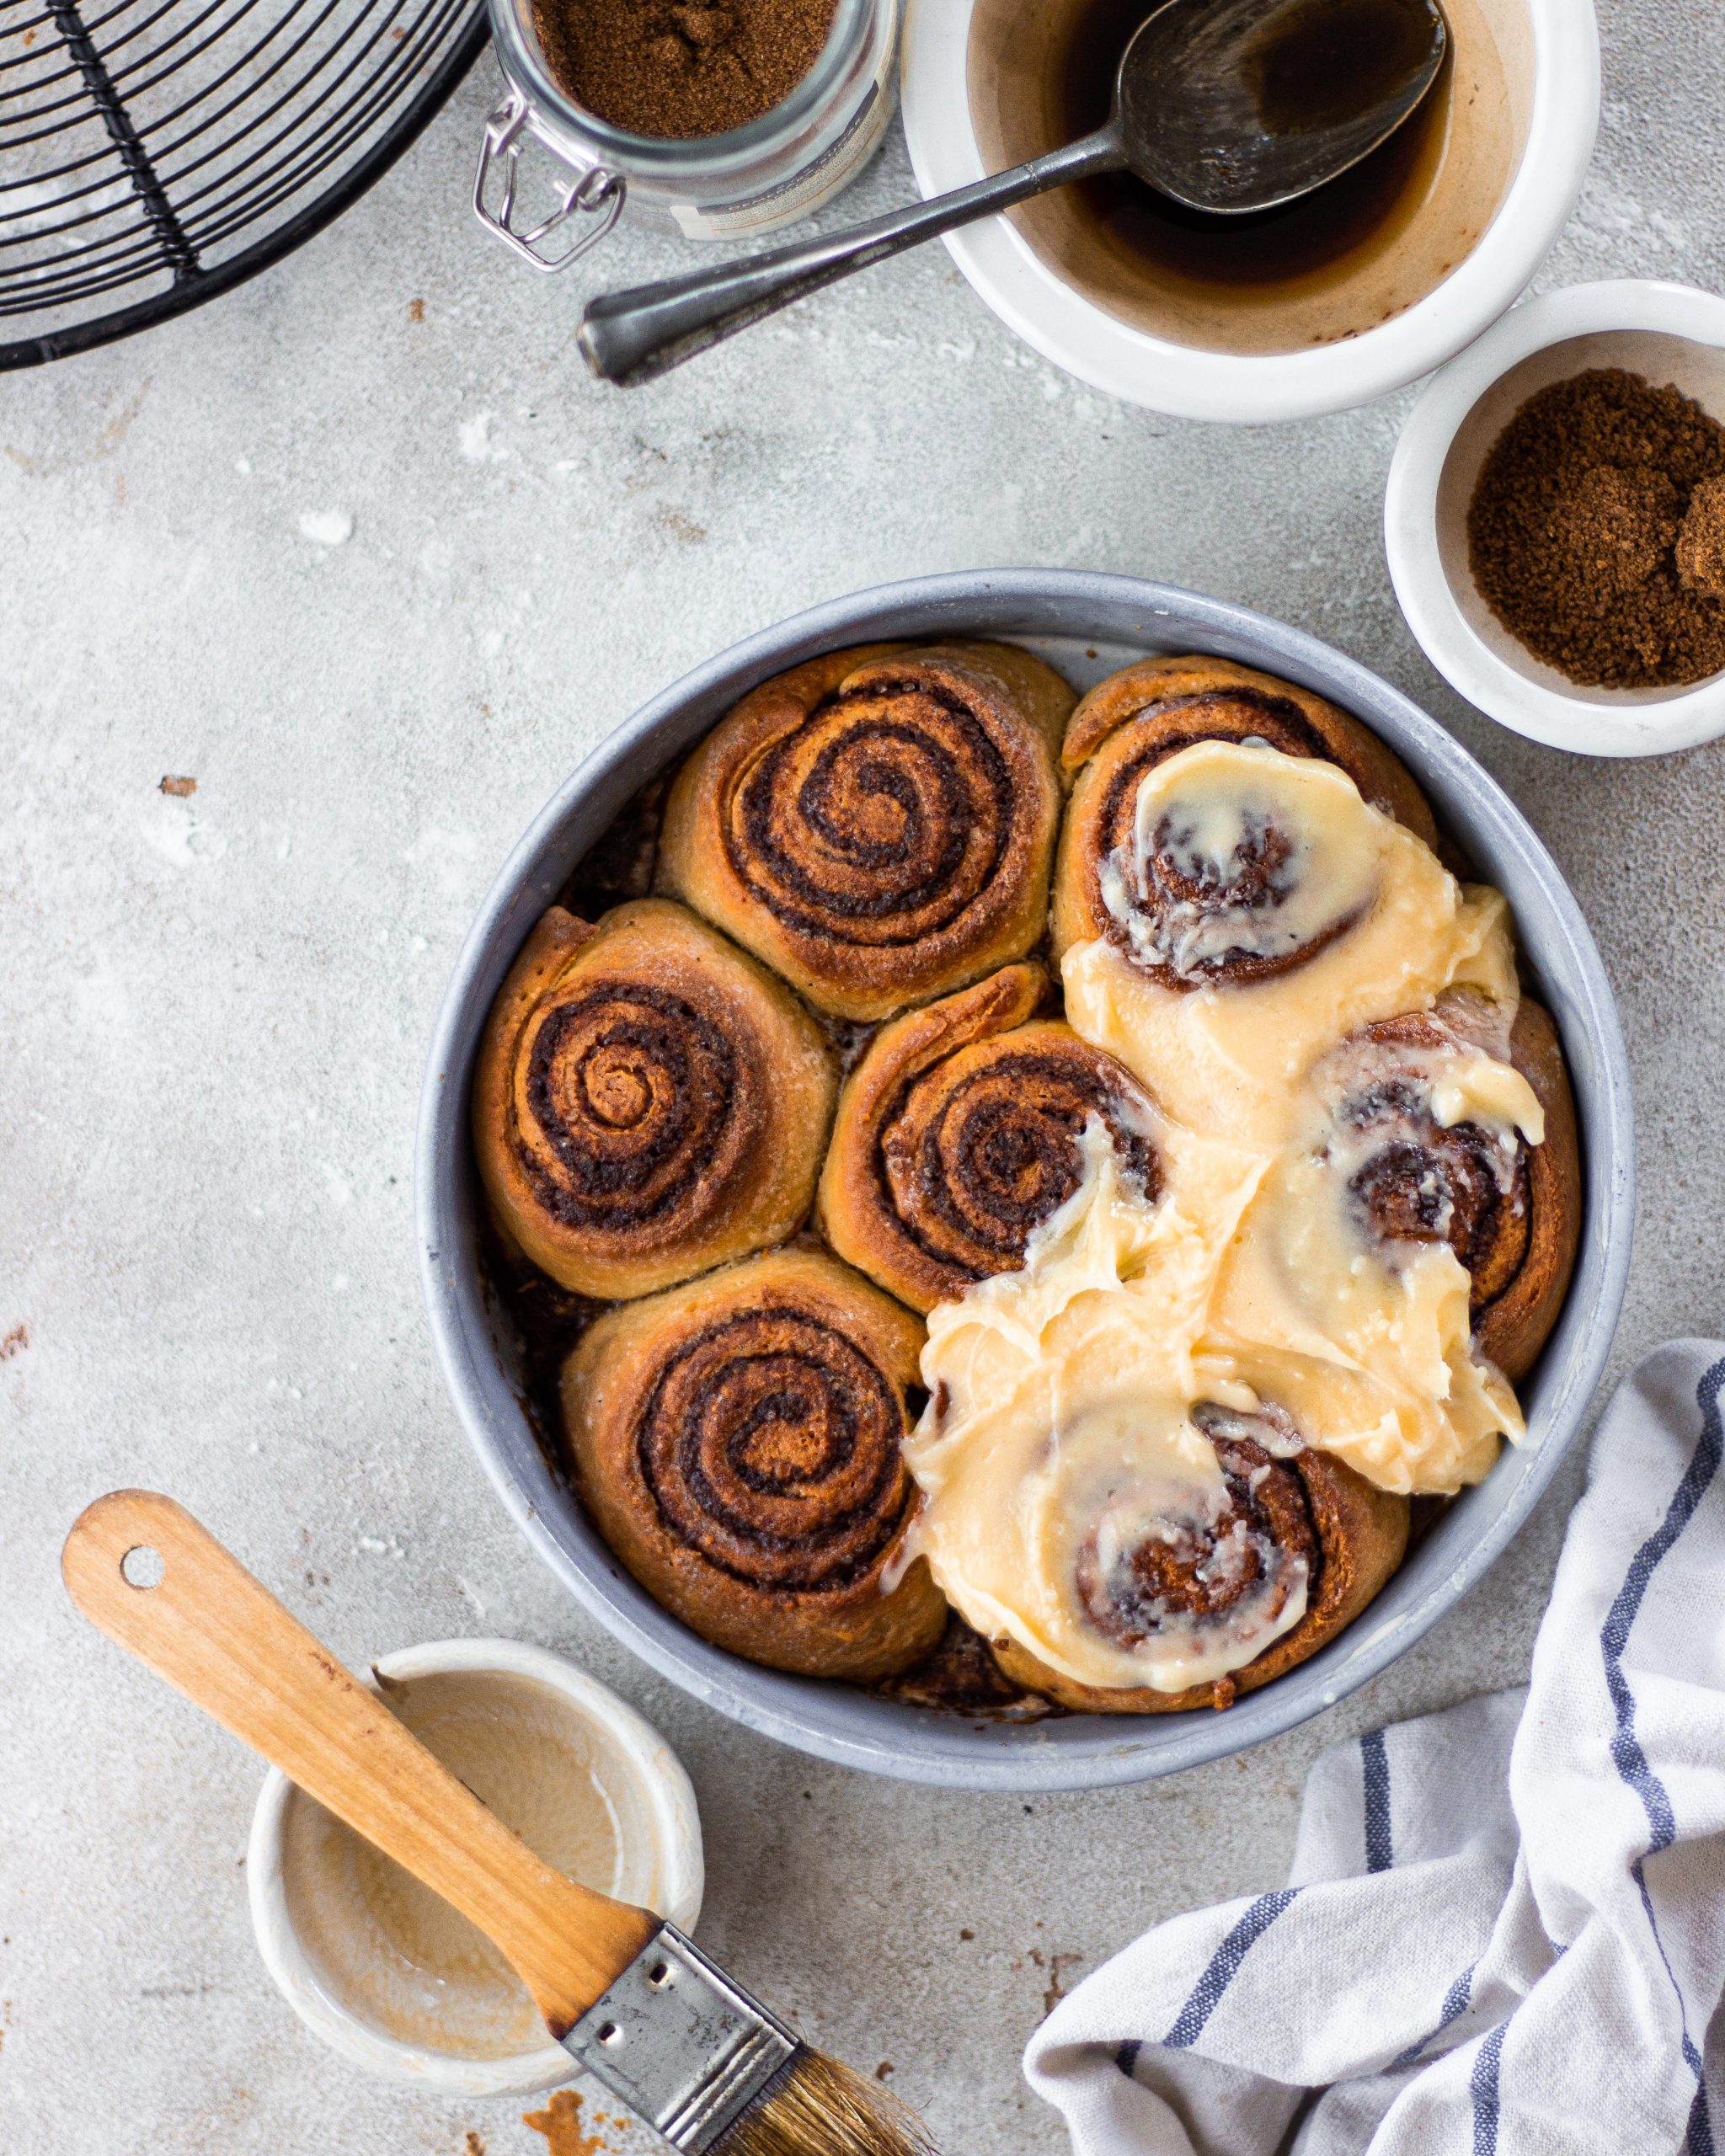
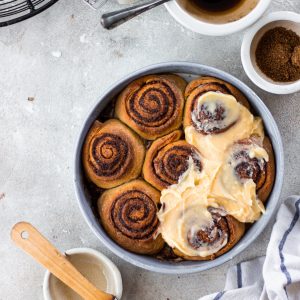
The star of the cinnamon rolls in all honesty is the filling. Do we all agree? This is where they get their name from. Its buttery, sugary goodness with lots of cinnamon. Things to keep in mind while making the filling for these dreamy rolls are- Make sure the butter is softened, this will allow it spread evenly. If the butter is too soft or melted all the filling will ooze out and it will be a mess. oops! Use good quality fresh cinnamon, this is the key ingredient. Let’s make it shine.
The Assembly of the Cinnamon Rolls
The final assembly is what intimidates some people. This is crucial to get those perfect looking cinnamon rolls. My secret tip to get the beautifully layered cinnamon rolls is using a dental floss or a clean thread. YES! You do not need a knife to cut the rolls into small portions. Using the floss or a thread will ensure to keep the layers in place. Using a knife will squish all the layers making the buns look sad and sloppy. When you place them in a pan, place them 1’ apart. Since the rolls will prove again, keeping them apart will allow them to prove better.
Also, the icing of cinnamon rolls is a crucial part of it. Traditionally the icing that is used for the cinnamon rolls is super simple and only uses 2 or 3 ingredients. These include milk, icing sugar, and vanilla essence or extract. But I wanted to add my own twist to these cinnamon rolls from scratch. This is why I added cream cheese to mine. Doesn’t cream cheese make everything a little extra special? The texture and taste that cream cheese adds to the icing here is phenomenal. Yes, it is not traditional but it is SO good that you have to try it for yourself. And when you do don’t forget to send them through to me @shivesh17 on Instagram. I would love to know that you are convinced.
I hope you all will enjoy making these cinnamon rolls from scratch and get over your fears of using yeast and how to deal with it. If you love cinnamon as much as I do, you can also check out some of the cinnamon recipes that are already there on the blog. Eggless Cinnamon Sugar Churros, Classic French Toast, Breakfast Cake with Cinnamon.
Happy Baking!
- 1 cup milk
- 1⁄2 cup granulated sugar
- 1+1⁄2 tablespoons dry active yeast
- 1⁄2 cup butter, melted
- 3 eggs
- 4 + 3⁄4 cups all-purpose flour
- ⅓ cup softened butter
- 1 cup brown sugar
- 2.5 tsp cinnamon powder
- 1 cup (225gm) cream cheese, softened
- ½ cup (100gm) butter, softened
- Seeds from half vanilla pod 1
- ½ cup icing sugar, sifted
- In the bowl of the stand mixer, add the milk (heated to 110F/43C), sugar and yeast. Let this mixture stand undisturbed for 10-5 minutes. When you see little bubbles forming, the yeast is ready to be used.
- Attach the bowl to the machine, using the dough hook add the melted butter and start mixing slowly. Next add in the eggs one by one and let the mixer mix them well.
- To the wet mixture, add the flour in installments with the mixer running at all times. Mix it until the dough comes together. Rest the dough in a well oiled bowl, covered with a damp tea towel for about 2 hours. I let the dough in the turned off oven.
- While the dough rests. Prepare the filling by mixing the butter, sugar and cinnamon using a spatula and mixing until well combined.
- After the dough has rested and doubled up in size, divide it in half and roll it on a well dusted surface. Once rolled into a rough rectangle, spread the filling all over it. Roll the dough into a cylinder now starting from the longer edge. Cut it into slices using dental floss or a clean thread. The slices should be about 2-3’ thick.
- Place it into a 9’ pan, keeping a distance of an inch between them. Proof them for 2 hour, covered. Once doubled in size bake it @200C for 20-25 minutes.
- For the icing, beat the cream cheese, butter and vanilla using a hand mixer. Add sugar to the mix in pats and beat until light and fluffy.
- Apply a generous layer of the icing on top of the warm cinnamon rolls and enjoy!

If we donot hv a dough mixer, can weuse a regular mixer
How many cinnamon rolls do we expect from the recipe? The yield? Also if its possible, henceforth can you please mention the prep time, total time and the no. Of servings?/ Yield/ pieces
gonna try this todayyyyyyyyyyyy!!!!!!
SUPER nervous!!!!!!!!!!!!