I am not somebody who bakes a lot of bread or any dough products. In fact, I dread making breads because it is time consuming and sometimes, the result isn’t what we wish for. But for those, who love making bread, who find bread making therapeutic, I developed a recipe that is healthy and foolproof.
Dough making is enjoyed by a lot of people. It gives a feeling of calmness, so I’ve been told. And to be honest, I didn’t hate the process as much too. In fact, realising that I could make a loaf of bread all by myself was a big achievement. The tricky part here was using 100% whole wheat flour but with extra hydration, I was able to achieve a dough that did wonders while baking.
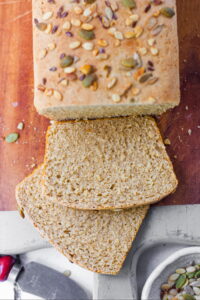
As comforting as a warm hug and as nourishing as a stroll through a sun-kissed wheat field, this 100% whole wheat bread holds a special place in the hearts and homes of many. With its rich, nutty taste, earthy aroma, and satisfyingly dense texture, it’s a staple that transcends trends and fads, embodying the essence of simple, honest baking.
So, join me as I knead, shape, and bake our way to bread-making bliss, one loaf at a time. From my kitchen to yours, let’s savour the simple pleasures of homemade bread and rediscover the joy of wholesome, nourishing fare. Here’s to the timeless tradition of 100% whole wheat bread—a true staple of the human experience, and a delicious reminder of the beauty of simplicity.
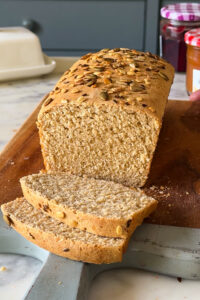
INGREDIENTS USED IN 100% WHOLEWHEAT BREAD
Whole Wheat Flour
Whole wheat flour is particularly rich in dietary fibre, which is essential for digestive health. Whole wheat flour can add a slightly nutty and hearty flavour to the bread. While whole wheat flour contains less gluten than white flour, it still contributes to the dough’s elasticity and helps trap gases produced by yeast during fermentation, resulting in a soft and springy crumb. Wheat can absorb more liquid during the bread-making process, resulting in a dough with the proper hydration level. Proper hydration is essential for developing gluten and achieving the desired texture in the finished loaf.
Milk and milk powder
Milk contains proteins and fats that can tenderize the structure of the bread, making it more delicate and less dense. This results in a softer and more enjoyable texture. I have used Nestle toned milk for this recipe. You can swatch it with any kind of milk. Bread made with milk tends to stay fresher longer than bread made with water alone. The fats and sugars in milk help to retain moisture in the bread, slowing down the staling process and extending its shelf life.
Milk and milk powder are rich sources of protein, vitamins, and minerals, including calcium and vitamin D. By incorporating milk into the bread dough, you are adding additional nutrients that contribute to the overall nutritional profile of the bread.
Yeast
Instant yeast is responsible for leavening the bread dough, causing it to rise and expand during fermentation. As the yeast feeds on the sugars in the dough, it produces carbon dioxide gas as a byproduct.
Unlike active dry yeast, which requires proofing in warm water before being added to the dough, instant yeast can be mixed directly into the dry ingredients. This saves time and streamlines the bread-making process, allowing for faster fermentation and proofing. Instant yeast activates more quickly and efficiently than active dry yeast, which can help speed up the rising time and shorten overall production time.
Overall, instant yeast is an indispensable ingredient in whole wheat bread-making, providing efficient leavening action, faster fermentation, consistent results, and versatility in a variety of recipes.
Water
Water hydrates the flour, enabling the proteins (gluten) and starches in the wheat to absorb and form a cohesive dough. Yeast cells require water to metabolize sugars and multiply, leading to the release of carbon dioxide bubbles that cause the dough to rise. Water is essential for gluten development, which gives the bread its structure and texture. Steam is released as water evaporates from the surface of the dough in the hot oven. This steam “sets” the crust early in the baking process, allowing the bread to continue expanding and rising before the crust hardens.
Sugar
While yeast primarily feeds on carbohydrates such as starches, small amounts of sugar can help kickstart the fermentation process by providing a readily available energy source. This can be particularly beneficial when using whole wheat flour, which contains fewer simple sugars than refined white flour.
In bread-making, sugar helps to hold onto water molecules, preventing the bread from drying out too quickly and extending its shelf life. This can result in a softer and more tender crumb, particularly in whole wheat bread, which tends to be denser and drier than bread made with refined white flour.
Oil
Oil helps to tenderize the crumb of the bread, making it softer and more palatable. It also helps to improve the texture of the bread by lubricating the gluten strands and preventing them from sticking together too tightly. This results in a lighter and airier crumb, with a more open and uniform structure. Oil applied to the surface of the dough before baking can help to soften the crust of the bread, resulting in a more tender and chewy texture.
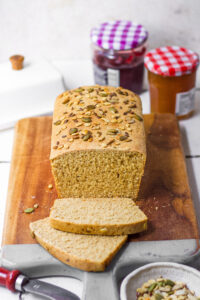
EQUIPMENTS USED FOR MAKING 100% WHOLEWHEAT BREAD
The kind of equipment you use can hugely impact the final product. So, make sure to always use the best of the equipment that is available.
Measuring Cups and Measuring Spoons. are an integral part of any baker’s kitchen and it’s very important to measure ingredients with precision.
I used a whisk and a wooden spoon to combine all the ingredients. This equipment are basics and you can find them at any shop near you. They come in handy in so many recipes.
I used an Alda loaf pan to make this 100% Wholewheat Bread.
Finally, I baked 100% wholewheat bread in my Borosil 60L oven.
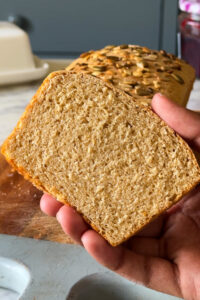
OTHER RELATED RECIPES FROM THE BLOG
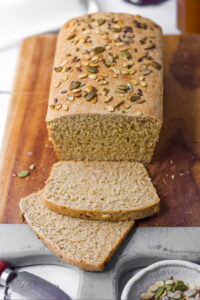
TIPS TO MAKE 100% WHOLEWHEAT BREAD
- You can make this recipe with completely all-purpose flour as well. Although, the amount of liquid will be used less with refined flour.
- Whole wheat flour tends to absorb more liquid than white flour. Make sure to hydrate the flour properly by adding enough water or other liquids to the dough. This will prevent the bread from being too dry and dense.
- Proper kneading is essential for developing the gluten in the dough, which gives the bread its structure and texture. Knead the dough until it is smooth and elastic, which may take longer than with white flour dough.
- Whole wheat bread can brown quickly due to the natural sugars in the flour. To prevent over-browning, bake the bread at a slightly lower temperature than you would for white bread, and cover it loosely with foil if it starts to darken too much.
- Use an instant-read thermometer to ensure that the internal temperature of the bread reaches around 190-200°F (88-93°C) before removing it from the oven.
- Allow the bread to cool completely on a wire rack before slicing. Cutting into warm bread can cause it to become gummy and lose its structure.
- 3 cups wholewheat flour
- 2 tbsp sugar
- 2 tsp instant yeast
- 2 tbsp milk powder
- ⅛ tsp salt
- 1 cup water
- ¼ cup milk
- 2 tbsp oil
- Milk, for brushing
- Mixed seeds, for top
- Add flour, sugar, yeast, milk powder and salt in a large bowl and give it a quick whisk.
- Now, add in the water, milk and oil and mix again using a wooden spoon or your hands to form a rough dough.
- Knead it in a clean, floured surface or in a stand mixer for 10-15 mins till the dough formed is smooth and non-sticky. Feel free to add one or two tablespoon of water if the dough is too tight. Or, add more flour if the dough is too sticky. Check for window pane for doneness.
- Once the dough is formed, transfer it in a large bowl greased with oil. Cover the bowl with a cloth and let it proof for 1 hour or till doubled in volume.
- Knock down the dough after the first proofing and knead again for 2 mins.
- Roll out the dough into a rough rectangle of ½ inch thickness. Then, starting from one shorter end, roll in the dough to form a log. Make sure the pinch and lock the dough after every turn.
- Transfer this log in a greased 8X4 inch loaf pan and cover again for second proofing. Let it proof for another 45 mins or till doubled in volume.
- Meanwhile, preheat the oven at 190 degrees Celsius.
- Once the dough has risen, brush some milk on top and sprinkle mixed seeds over it.
- Bake for 15-20 mins or till the top is golden-brown.
If you like my 100% Wholewheat Bread recipe and happen to make them in your kitchen, do tag me on Instagram and share pictures with me using #Bakewithshivesh. Happy Baking!

 Hello. I'm Shivesh Bhatia, a food blogger and food stylist from Delhi, India. Welcome to Bake With Shivesh, where I'll help you create magic in your kitchens with my simple recipes.
Leave a Reply