In a world where pre-packaged treats dominate the dessert landscape, there’s something truly magical about crafting your own ice cream cones from scratch. It’s a chance to slow down, unleash your inner artist, and create edible masterpieces that delight the senses and warm the soul.
Imagine the excitement of mixing together simple ingredients—flour, sugar, milk and butter—and transforming them into golden-brown cones that crackle with every bite. Whether you prefer a classic cone with a hint of vanilla, a chocolate-dipped delight, or a sprinkle-covered sensation, the possibilities are as endless as your imagination.
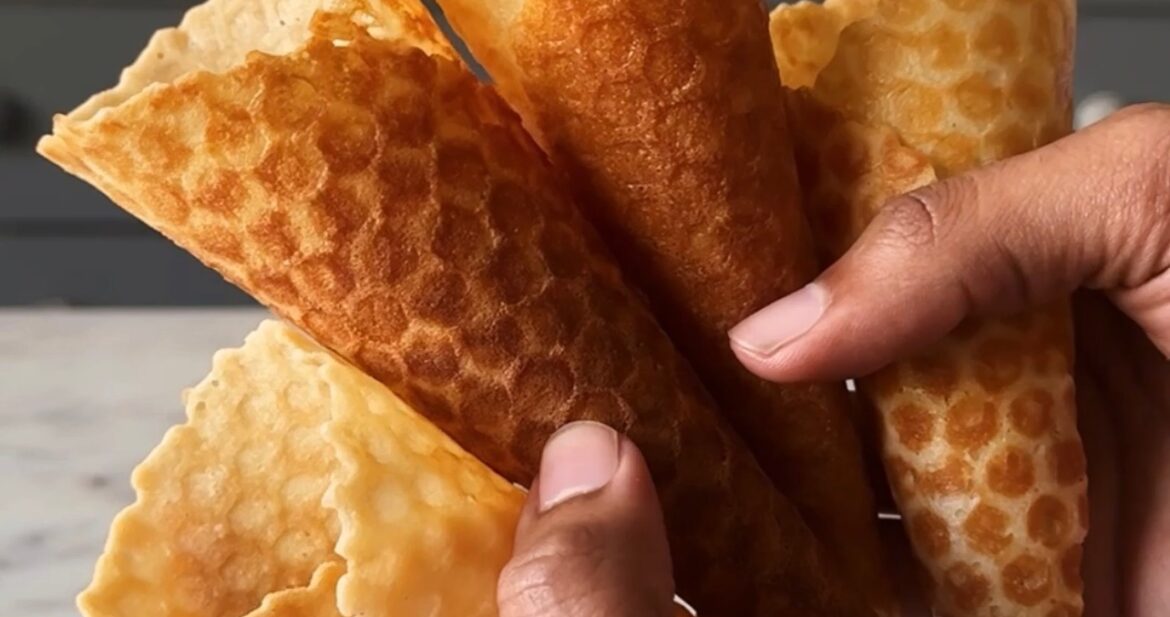
It’s the perfect recipe to try out with your friends and spend a summer evening devouring on fresh warm ice cream cones along with any ice cream of your choice.

INGREDIENTS USED IN ICE CREAM CONE
All-purpose flour
All-purpose flour provides the main structure for the ice cream cone batter. It acts as a binding agent, helping to hold the other ingredients together in the batter. It binds with liquids, fats, and sugars to create a cohesive mixture that can be shaped and cooked into cones. All-purpose flour has a neutral flavour, allowing other ingredients, such as sugar and vanilla extract, to shine through in the final product. This ensures that the flavour of the cone complements, rather than overwhelms, the flavour of the ice cream it holds.
Milk
Milk adds moisture to the ice cream cone batter, contributing to its overall texture. It helps create a smooth and slightly creamy batter that spreads easily and evenly on the cooking surface. This moisture also helps prevent the cones from becoming too dry or brittle, resulting in a more enjoyable eating experience. The sugars and proteins in milk can contribute to the browning of the ice cream cones during cooking, adding depth of flavour and visual appeal. You can use dairy-free alternatives like almond milk or coconut milk for a vegan-friendly version of ice cream cones.
Butter
Butter adds rich, buttery flavour to the ice cream cone batter. The fats in butter aid in the browning process during baking, giving the ice cream cones a golden-brown colour and deliciously caramelized flavour.
Sugar
Sugar adds sweetness to the ice cream cone batter, balancing out the flavours and enhancing the overall taste of the cones. Sugar helps create a crispy texture in the ice cream cones. During cooking, the sugar melts and caramelizes, forming a thin layer on the surface of the cones that adds crunchiness and crispiness. This textural contrast between the crunchy exterior and tender interior is characteristic of well-made ice cream cones.
EQUIPMENTS USED IN MAKING ICE CREAM CONE
A few kitchen equipment are necessary to wake the ice cream cones.
Measuring Cups and Measuring Spoons are the first thing that anybody who in cooking or baking needs. The right quantities will help in the desired outcome so these two things are a must. A mixing bowl and whisk are important to bring the batter together.
You will need a waffle cone maker to make the ice cream cone and a shaping tool is also necessary to mould the cones in their desired shape.

RELATED RECIPES FROM THE BLOG
TIPS TO MAKE THIS ICE CREAM CONE
- Preheat your waffle cone maker or cone-forming equipment according to the manufacturer’s instructions. This helps ensure that the cones cook evenly and develop a golden-brown colour.
- Allow the batter to rest for a few minutes before using it. This allows the flour to hydrate fully, resulting in a smoother batter and better cone texture.
- Keep a close eye on the cones as they cook to prevent them from overbrowning or burning.
- If you’re using a cone-forming tool, work quickly to shape the cones while they’re still hot and pliable. This helps prevent them from hardening before you can shape them into the desired cone shape.
- Allow the cones to cool completely before filling them with ice cream. This helps them retain their crispness and prevents the ice cream from melting too quickly.
- Store any leftover cones in an airtight container to keep them fresh and crispy. They can be stored at room temperature for a few days.
- 2 tbsp sugar
- 2 tbsp butter, melted
- ¼ cup milk
- ¼ tsp vanilla
- ¼ cup all-purpose flour
- Combine sugar, melted butter, warm milk, vanilla extract, and all-purpose flour in a bowl. Whisk until a smooth batter forms.
- Heat the waffle cone maker on medium flame and pour a ladle full of batter onto it. Close the maker and cook it from both the sides by flipping the cone maker.
- Cook for approximately 2 minutes or until golden brown.
- Remove carefully and shape it into a cone using a cone mould. Be careful as it may still be hot, but shape it quickly before it hardens.
If you like my Ice Cream Cone recipe and happen to make them in your kitchen, do tag me on Instagram and share pictures with me using #Bakewithshivesh. Happy Baking!
Craving more tasty treats? Grab one of my published books from the links below and let’s get baking!
- Bake with Shivesh- Here
- A Cookbook For Special Days, Special People – Here
- Eggless Baking With Shivesh- Here
- Desserts For Every Mood- Here

Leave a Reply