
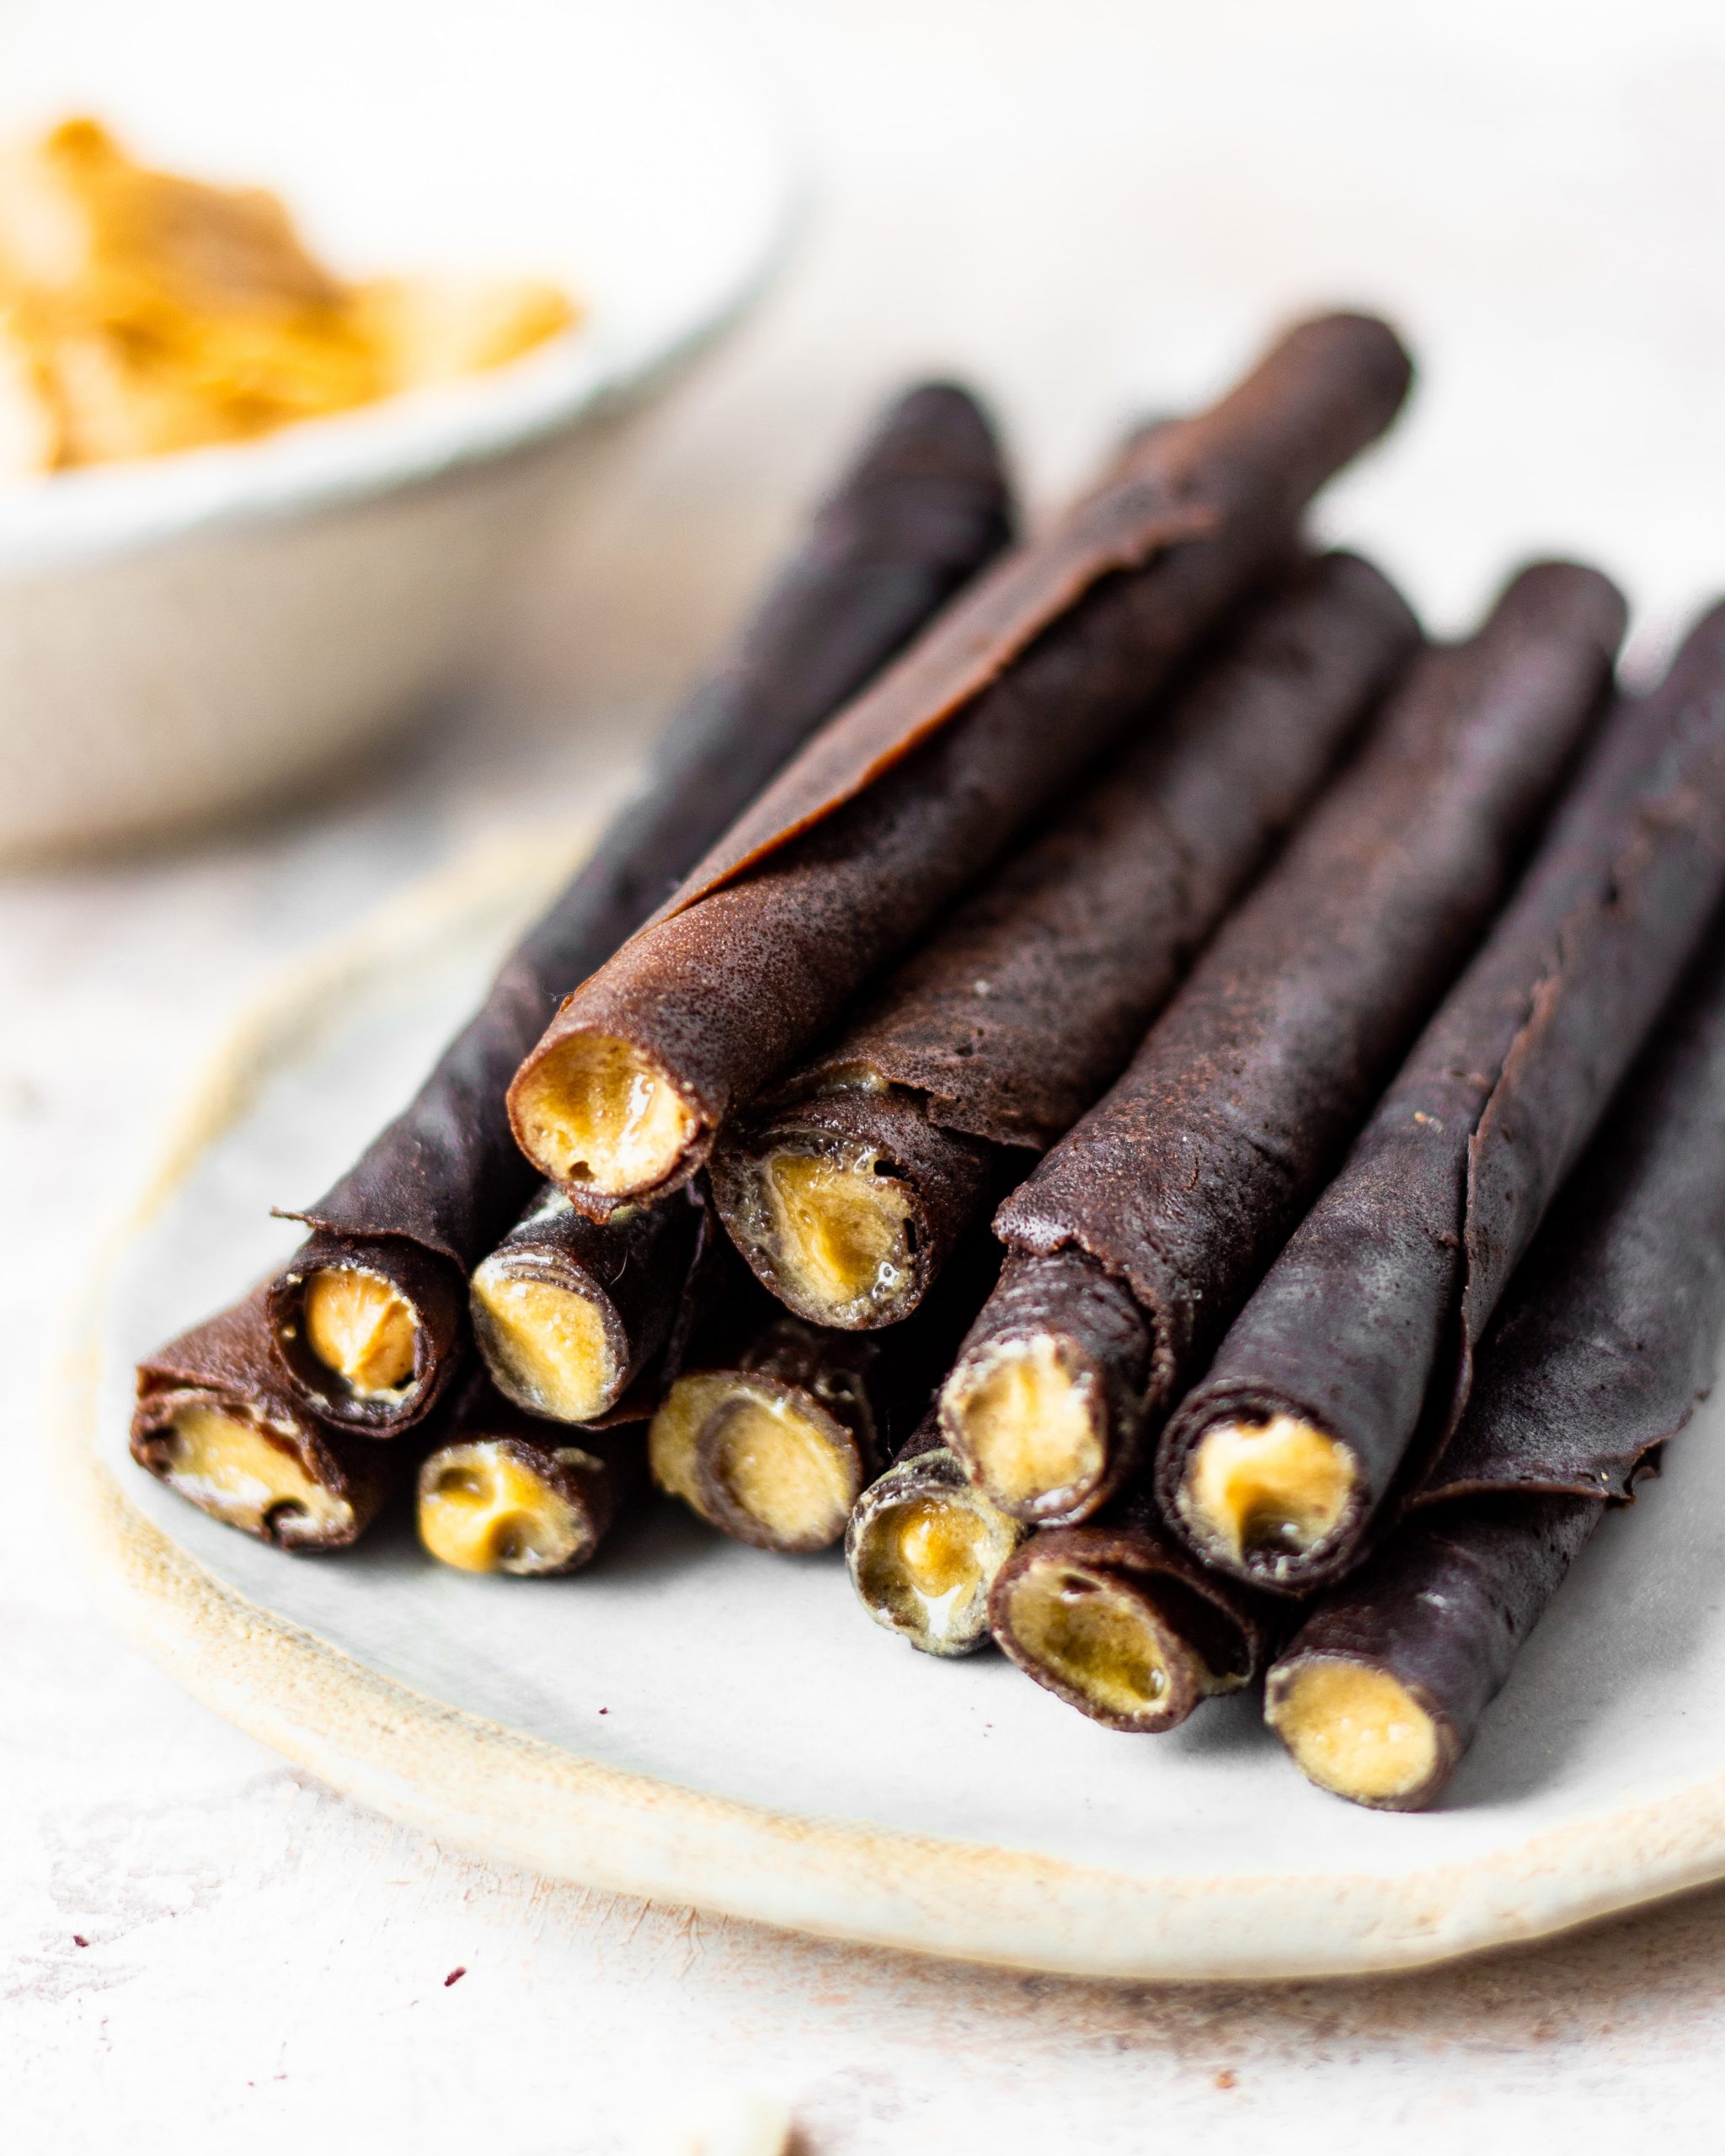
You know, when we were kids, one of the most exciting candy boxes used to be Waffy! You know what I am talking about don’t you? The crispy, crunchy, super thin chocolate rolls that used to come in a tub. They made for the perfect quick chocolate treat and today I am taking my childhood love and creating my own version of homemade chocolate wafer rolls
I know they look too professional to make and something they make in factories, but actually, making chocolate wafers at home is not technical and requires very basic ingredients!
Ingredients needed for homemade chocolate wafer rolls
To make these wafers, you need minimal in), some ingredients that you probably already have on hand. You will need some all purpose flour (maida), some whole wheat flour (atta), icing sugar, cocoa powder, vegetable oil, and milk.
Flours: All purpose and whole wheat
A mix of both all purpose flour and whole wheat flour makes my batter a little less runny and it’s easier to handle when we later cook the wafer rolls. Whole wheat flour is much more absorbent than all purpose. This means that when we add wet ingredients like oil and milk in the batter, whole wheat flour will absorb them more and make the batter slightly thick. A slightly thick batter is much more easy to maneuver and use on the stove rather than a runny batter.
Icing sugar
Since the batter requires very little mixing, you want to add ingredients that will mix in instantly and form a smooth batter. Icing sugar is very finely ground white sugar which dissolves quickly. If you do not have icing sugar, you can simply make some at home by grinding white sugar till it reaches a powdered consistency.
Cocoa powder
We can’t make chocolate wafer rolls without the chocolate! I used natural cocoa powder. You can use any that you have on hand. Brands like hersheys, weikfield, cadbury, all work great. While adding in cocoa powder, if you want to be extra careful about not having any lumps in your batter, you can sieve and then add it. You can apply the same step for icing sugar as well.
Wet ingredients: Oil and Milk
You need something to bind everything together. Oil and milk work perfectly here. I used regular milk and sunflower oil. Sunflower oil is a flavorless oil that makes sure no unwanted flavors are getting added into the batter. You can use any vegetable oil you like. Soybean oil is also a good option.
Components of homemade chocolate wafer rolls
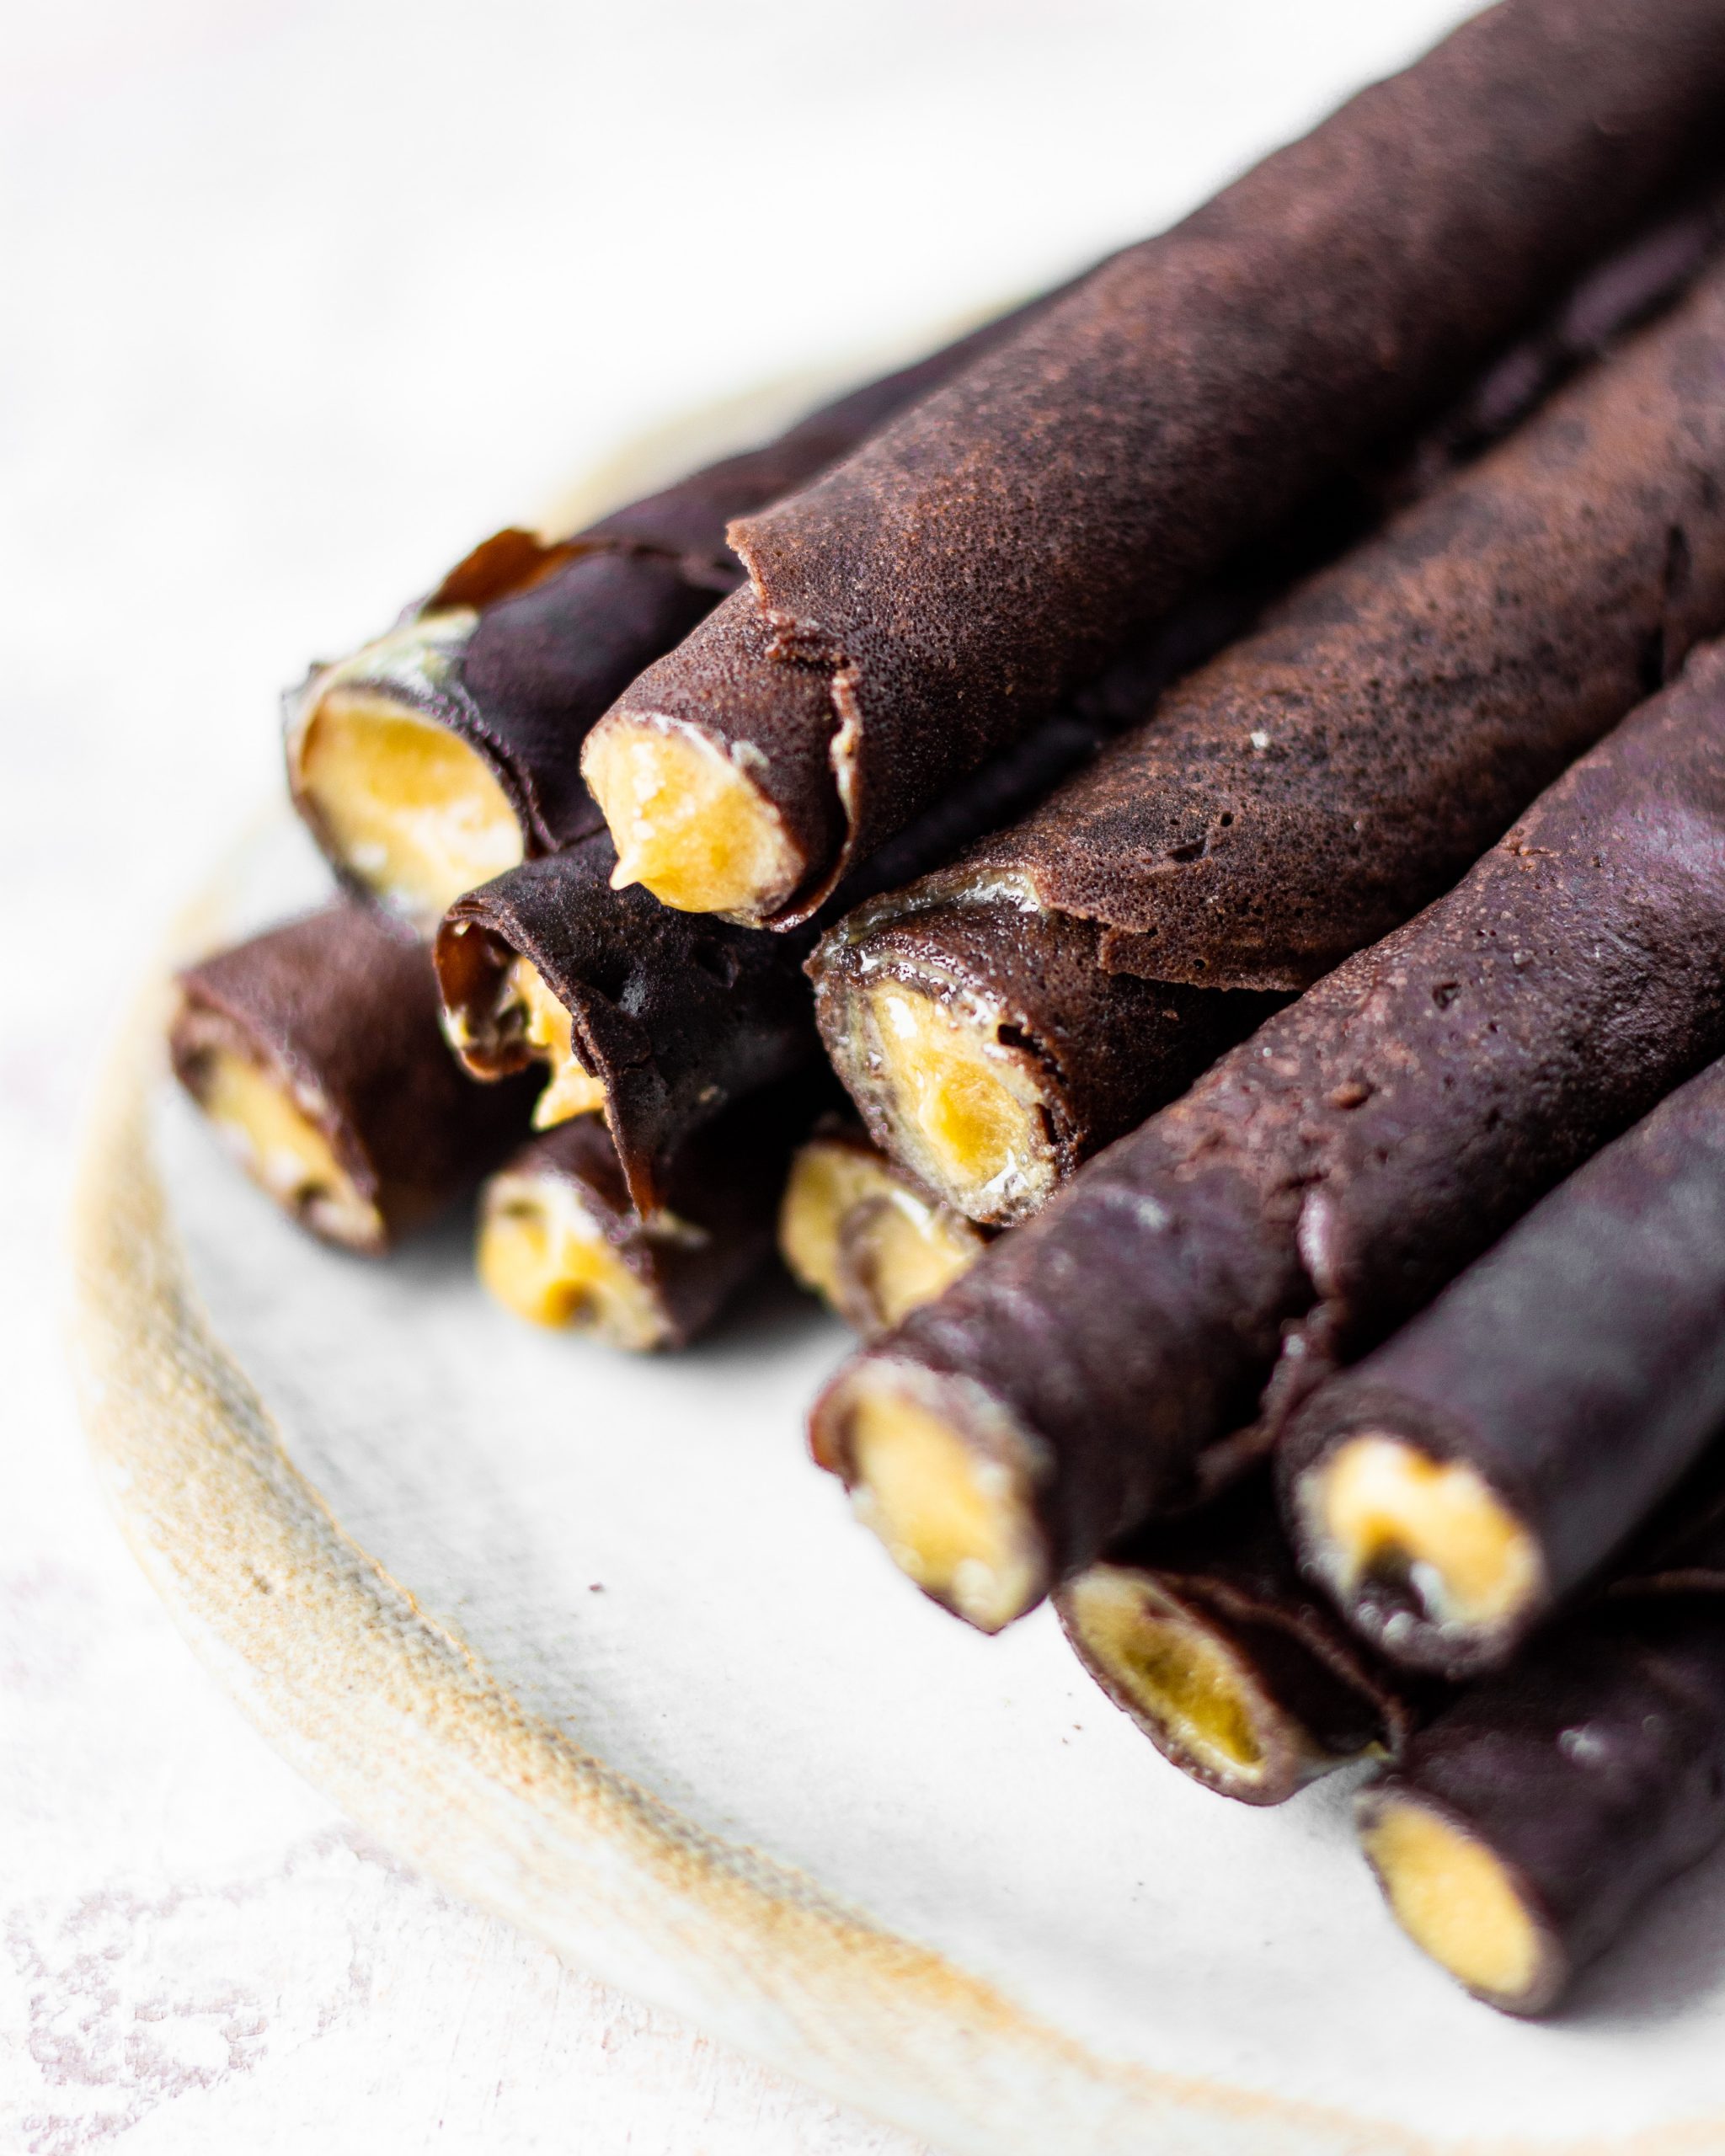
The wafer roll
Now we have already discussed the ingredients of the main element, the chocolate wafers. To make the wafer rolls, all you need to do is first combine the dry ingredients, then make a well in the centre, and add in wet ingredients. Use a whisk to combine dry and wet ingredients and bring the batter together in a smooth, lump free consistency. Once your batter is ready, you gently cook it in circular sheets, roll them and let it cool down. For final cooking steps, the wafers are also baked in the oven to get rid of any moisture.
The filling
Chocolate wafers are incomplete without an equally delicious filling to go with them! I filled mine with peanut butter. Chocolate and peanut butter go really well together and I think more people need to try out this combination. I know you will like it too. Once the rolls have baked and completely cooled down, you fill them with your favorite filling and enjoy!
Things to keep in mind
To ensure a lump free batter, mix in your dry ingredients, make a well in the center, and then add in wet ingredients. If you add warm milk, it will mix in much more evenly and lumps won’t form.
I added a mix of all purpose flour and whole wheat flour but this is up to personal preference. If you want, you can make the batter with just all purpose flour. I would not recommend making it with just whole wheat flour. Whole wheat flour absorbs more water and your batter will be thicker than it should be.
While cooking the wafer batter, you want to make sure you put just enough batter on the pan so that the roll is neither too thick, nor too thin.
Also ensure that you are using a non stick pan for it. It will just be easier to take off the rolls from the pan and you will have a smooth cooking process. I always use my induction to cook things in my kitchen. You can cook these over the stove top too.
While pouring batter on the pan, make sure the pan is low the lowest heat. Minimal heat gives you time to move around the batter in a smooth fashion and make a neat circle. If the pan is too hot, the batter will start to cook immediately and you won’t be able to spread it around to form the perfect shape.
Start rolling the wafers the moment they come off the heat. These are malleable only while they are warm. As they cool down, they will become firm and make it almost impossible to roll up without cracking or breaking.
If the rolls are not sticking at the meeting point, brush the end with some water and then seal it.
If you do not have an oven, you can skip the part of baking the rolls. Technically the rolls are fully cooked on the stovetop itself. The oven helps with removing excess moisture and making the rolls more crunchy.

Other easy recipes on the blog
There are so many more easy and nostalgic recipes on the blog!
My Favorite Chocolate Chip Cookies
- ½ cup (60gms) maida
- ¼ cup (30gms) atta
- ½ tsp (2gms) baking powder
- 3 tbsp )22gms) cocoa powder
- ½ cup (65gms) icing sugar
- 3 tbsp (45ml) vegetable oil
- 1 cup (240ml) milk
- Peanut butter (for filling)
- In a bowl sift in maida, atta, baking powder, cocoa powder, and icicng sugar. Make a well in nthe centre.
- Add in oil, and milk and use a spatula to combine the batter.
- Take a non stick pan and bring it up to low heat. Add in two tablespoons of the batter and use a pastry brush to spread the batter in a thin circle.
- Once cooked on the bottom, flip it and cook it on the other side.
- Take it off the heat and immediately start rolling the sheet into a cylindrical shape. Keep a straw at one edge and roll with the help of it. Set it aside and let it firm up.
- Repeat till all your rolls are ready and firm. Take out the straw from each.
- For extra crispiness, place the rolls on a baking tray and bake at 200 degree C for 5 minutes.
- Once baked, let them cool down completely.
- Transfer smooth peanut butter in a piping bag and fill the chocolate wafer rolls!

Leave a Reply