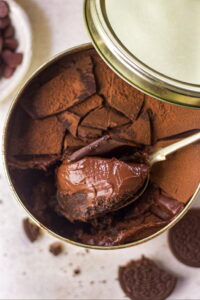
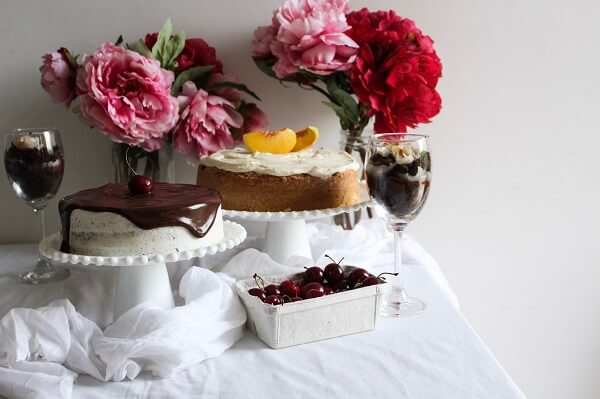
Welcome to the world of indulgence with my latest creation—Oreo Dream Cake! If you’re a chocolate lover or a fan of Oreos, this cake is truly a dream come true. This Oreo Dream Cake takes a simple biscuit and transforms it into an irresistible, elegant dessert that’s perfect for any occasion, from birthdays to weekend treats.
What makes this recipe special is that it doesn’t require any fancy ingredients or baking techniques. You don’t even need an oven! The humble pressure cooker becomes your kitchen ally, baking the Oreo sponge to perfection. Each step is designed to bring out the rich flavors of chocolate, while keeping the cake light and airy with the right balance of moisture and texture. Whether you’re new to baking or a seasoned pro, this no-fuss recipe is perfect for anyone looking to create a show-stopping dessert with minimal effort. Plus, the final touch of cocoa powder dusting gives it a sophisticated finish that will impress everyone.
This recipe is more than just a cake—it’s a nostalgic tribute to the cookies we’ve loved since childhood, elevated into something luxurious and unforgettable. Ready to indulge? Let’s get started on making your own Oreo Dream Cake! 
WHAT YOU’LL LOVE ABOUT THIS
- Low effort
- Minimium ingredients
- No oven
- Eggless
- Kid friendly

INGREDIENTS USED IN OREO DREAM CAKE
Oreo biscuits
The Oreo biscuits serve as the primary base for the cake batter. Unlike traditional cakes that use flour, these cookies (after being crushed into a fine powder) provide the structure in place of flour. The cocoa content in Oreos also adds a rich chocolate flavor to the cake. The absence of the cream filling ensures that the cake has a smooth, non-greasy texture. The finely crushed biscuits create a dense yet tender crumb that mimics a cake-like structure. The combination of sugar, fat, and starch in the cookies serves to bind the cake together.
Milk
Milk acts as the liquid that binds the crushed biscuits into a smooth, cohesive batter. It hydrates the dry Oreo crumbs, creating a batter that is easy to whisk and pour. Milk also adds some moisture to the cake, preventing it from becoming too dry and dense. The fat in milk contributes to a richer taste and slightly creamier texture.
Once the cake is baked, brushing it with milk helps moisten it, making the cake more tender and ensuring that it remains soft rather than dry after cooling.
Dark chocolate
Dark chocolate is the key ingredient in the ganache, providing a rich, deep chocolate flavor. It balances the sweetness of the Oreo sponge and gives the ganache its silky, smooth texture. Dark chocolate has a higher cocoa content, which results in a firmer and smoother ganache once cooled. It also lends a glossy finish to the cake when the ganache is poured over the sponge.
The additional melted chocolate is used to create a top layer on the cake after the ganache has set. It adds a firmer, crisp layer on top of the soft ganache, offering a textural contrast. The melted chocolate hardens in the refrigerator, forming a thin, shiny shell on the surface of the cake. This adds a pleasant crispness when cutting through the cake, contrasting with the softness of the sponge and the creaminess of the ganache
Fresh cream
The warm cream helps to melt the chopped dark chocolate, creating the smooth ganache that will coat the cake. Fresh cream adds richness and a luxurious texture to the ganache. The cream is essential in emulsifying the chocolate and creating a smooth, pourable consistency. Cream adds a rich, velvety mouthfeel and balances out the bitterness of the dark chocolate, making the ganache more palatable and indulgent.
Cream makes the ganache silky and smooth, ensuring that it’s easy to spread or pour over the cake. It also gives the ganache a soft, rich texture that contrasts nicely with the dense cake.
Baking powder
Baking powder is the leavening agent in this recipe. It reacts with the milk and the other ingredients to produce carbon dioxide gas, which helps the cake rise and become light and fluffy. It ensures that the cake isn’t overly dense or flat. Without baking powder, the cake would be heavy due to the lack of gluten from flour, and this ingredient compensates for that by adding air and lift to the structure.

EQUIPMENTS USED IN MAKING OREO DREAM CAKE
Basic equipment includes mixing bowls in various sizes for mixing ganache, and combining ingredients.
My set of Measuring Cups and Measuring Spoons always come in handy and are the most important part of any recipe.
A cooker is required to make the dream cake sponge. The tins I have used to make these oreo dream cake is linked here.

RELATED RECIPES FROM THE BLOG
TIPS TO MAKE THIS OREO DREAM CAKE
- Ensure you remove the whistle and gasket from the cooker lid, as this helps regulate heat properly while baking.
- Add milk little by little to control the consistency. You want it to be a thick batter, not too runny.
- Since every cooker heats differently, start checking the cake with a toothpick/skewer after 20 minutes. It should come out clean when the cake is done.
- To avoid the top of the cake getting too dry in the cooker, you can loosely cover the cake tin with foil.
- Allow the ganache to set completely in the fridge before adding the final melted chocolate layer. This will ensure clean, distinct layers.
- Add additional toppings like crushed Oreos, nuts, or berries for extra texture and flavour.
- For the sponge
- 20 oreo biscuits
- ¾ cup milk
- ½ tsp baking powder
- 3 tbsp milk, for soaking
- For the ganache
- ¾ cup dark chocolate, chopped
- ¾ cup fresh cream, warm
- ⅓ cup dark chocolate, melted
- Cocoa powder, for dusting
- Remove the whistle and rubber of a cooker lid and set the cooker on low-medium heat. Add a layer of salt in the bottom of it and place a stand in the middle. Close the lid and preheat this for about 10 mins.
- Scrape the cream off the Oreo biscuits and collect the cookies separately. Crush them using either a rolling pin or in a grinder till it resembles fine powder.
- Add milk and baking powder to the crushed biscuits and whisk to form a smooth batter.
- Transfer the batter into a dream cake tin or any steel/tin container and cook in the preheated cooker for 20-25 mins. Alternatively, you can also bake it an oven at 180 degrees Celsius for 20-25 mins or till a skewer inserted in the centre comes out clean.
- Meanwhile, make the chocolate ganache by pouring the warm cream over chopped chocolate and mixing till all the chocolate is melted and the ganache is smooth, shiny and lump-free.
- Once the cake is baked and cooled, brush it with some milk to soak it nicely.
- Pour the ganache over the sponge cake layer and refrigerate till the ganache sets (2-3 hrs)
- Pour a thin layer of melted chocolate over the set ganache and let it set in the refrigerator as well.
- Dust it with some cocoa powder for final look.
If you like my Oreo Dream Cake recipe and happen to make them in your kitchen, do tag me on Instagram and share pictures with me using #Bakewithshivesh. Happy Baking!

 Hello. I'm Shivesh Bhatia, a food blogger and food stylist from Delhi, India. Welcome to Bake With Shivesh, where I'll help you create magic in your kitchens with my simple recipes.
Leave a Reply