
Today, I’m taking you on a delectable journey into the world of one of my all-time favorite desserts: tiramisu. If you’re a fan of creamy, coffee-infused goodness, then you’re in for a treat!
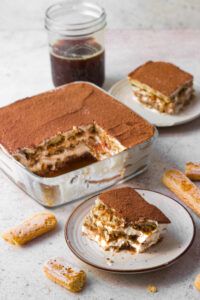
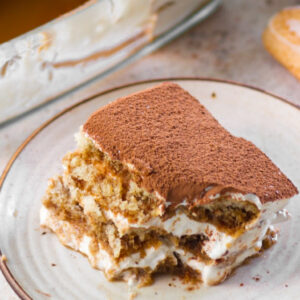
First things first, let’s talk about what tiramisu actually is. Originating from Italy, tiramisu is a heavenly concoction that combines layers of espresso-dipped ladyfingers with a rich mascarpone cheese mixture, dusted with cocoa powder for that perfect finishing touch.
Now, here’s where the magic happens: making your own homemade mascarpone cheese. Trust me, it’s easier than you think, and the results are absolutely worth it. Not only does it elevate the flavor of your tiramisu, but there’s something incredibly satisfying about creating your own cheese from scratch. Go ahead, gather your ingredients, roll up your sleeves, and embark on your own tiramisu adventure. Your taste buds will thank you!
MASCARPONE CHEESE AT HOME
Making mascarpone cheese at home is not only surprisingly simple but also incredibly rewarding. With just a couple of basic ingredients and a little bit of patience, you’ll soon find yourself savoring the luxurious creaminess of homemade mascarpone, elevating your tiramisu and other desserts to a whole new level of deliciousness.
You just need 2 ingredients to make mascarpone cheese at home
Fresh cream
The main ingredient in making mascarpone cheese is fresh cream, which provides the rich, creamy base for the cheese. The high fat content in fresh cream contributes to the luxurious texture of mascarpone cheese, giving it its characteristic smoothness and richness. I used Amul’s fresh cream for this recipe.
Lemon juice
Lemon juice plays a crucial role in the process of making mascarpone cheese at home. When added to the heated cream, the acidity of the lemon juice reacts with the proteins in the cream, causing it to thicken and curdle. This process is essential for transforming the cream into cheese.
INGREDIENTS USED IN MAKING MASCARPONE FILLING
Homemade mascarpone cheese
The creamy, rich homemade mascarpone cheese provides the luxurious base for the filling, adding a velvety texture and a delicate flavor to the dessert.
Icing sugar
Icing sugar, also known as powdered sugar, is used to sweeten the mascarpone filling, adding a subtle sweetness that balances the richness of the cheese and enhances the overall flavor of the dessert.
Whipped cream
Whipped cream is folded into the mascarpone cheese mixture to lighten the texture and add a fluffy consistency to the filling. It also contributes to the smoothness and creaminess of the dessert.
Store bought lady finger
Ladyfingers, also known as sponge fingers are light, airy biscuits that are used to create layers in tiramisu. They absorb the coffee soak and soften to create a delicate, sponge-like texture in the dessert.
Coffee soak
The coffee soak is a mixture of water and coffee powder that is used to soak the ladyfingers. It adds a rich, aromatic coffee flavor to the dessert, infusing each layer.

EQUIPMENTS USED IN MAKING TIRAMISU
The kind of equipment you use when you’re baking makes a huge difference to the end result! I would recommend you to use good quality mixing bowls and other equipment so that your Peanut Butter Cookies comes out delicious!
To mix all my ingredients together, I’m using Borosil’s 100% Borosilicate Glass Bowl which is microwave and oven safe, plus the bowls are super easy to clean and handle, which makes my baking process totally hassle free!
Not a single day goes in my kitchen when I don’t use a Silicon Spatula, this is the one I recommend. Same goes for my set of Measuring Cups and Measuring Spoons.
A 6 inch square glass dish to assemble the tiramisu.
TIPS TO MAKE TIRAMISU
- Don’t soak the ladyfingers for too long in the coffee mixture. A quick dip is all they need to absorb the flavor without becoming too soggy.
- Take your time when layering the ingredients. Evenly spread each layer of mascarpone filling and ladyfingers to create a balanced dessert with consistent flavors and textures.
- Allow your tiramisu to chill in the refrigerator for at least a few hours, preferably overnight. This allows the flavors to meld together and the dessert to set properly, resulting in a deliciously creamy texture.
- Just before serving, dust the top of your tiramisu with cocoa powder using a fine mesh sieve. This adds a touch of bitterness and enhances the visual appeal of the dessert.
- For the mascarpone cheese
- 2 cups fresh cream
- 1 tbsp lemon juice
- For the filling
- 1 cup homemade mascarpone cheese
- ½ cup icing sugar, sifted
- 1 cup whipped cream (1/2 cup whipping cream whipped to stiff peaks)
- 25-30 store bought lady finger biscuits
- Coffee soak-
- 1 cup water
- 2 tbsp coffee powder
- Cocoa powder, to dust
- Warm the fresh cream in a saucepan set over low–medium heat and bring it to a light simmer. Stir occasionally.
- Add the freshly squeezed lemon juice and stir constantly. After a minute or so, the cream will thicken and is coating the back of your wooden spoon or spatula.
- Take the cream off the heat and pour it over a sieve that is covered with a piece of muslin.
- Let this sit in the refrigerator for at least 12 hours, or up to 24 hours for best results. Your mascarpone cheese is ready.
- For the coffee syrup, in a bowl add in water and coffee powder. Mix this really well and set it aside.
- For the mascarpone filling- in a bowl, add homemade mascarpone filling, icing sugar and whipped cream. Combine everything really well and set aside.
- For the assembly- take 7 inches square dish. Start by soaking store bought lady fingers in coffee syrup and place them on the base of the dish. Put a generous layer of mascarpone filling over these soaked ladyfingers and spread it evenly.
- Repeat this layering till you reach the top of the dish and dust the top with cocoa powder. 9. Let it rest in the fridge overnight and serve chilled.

Leave a Reply