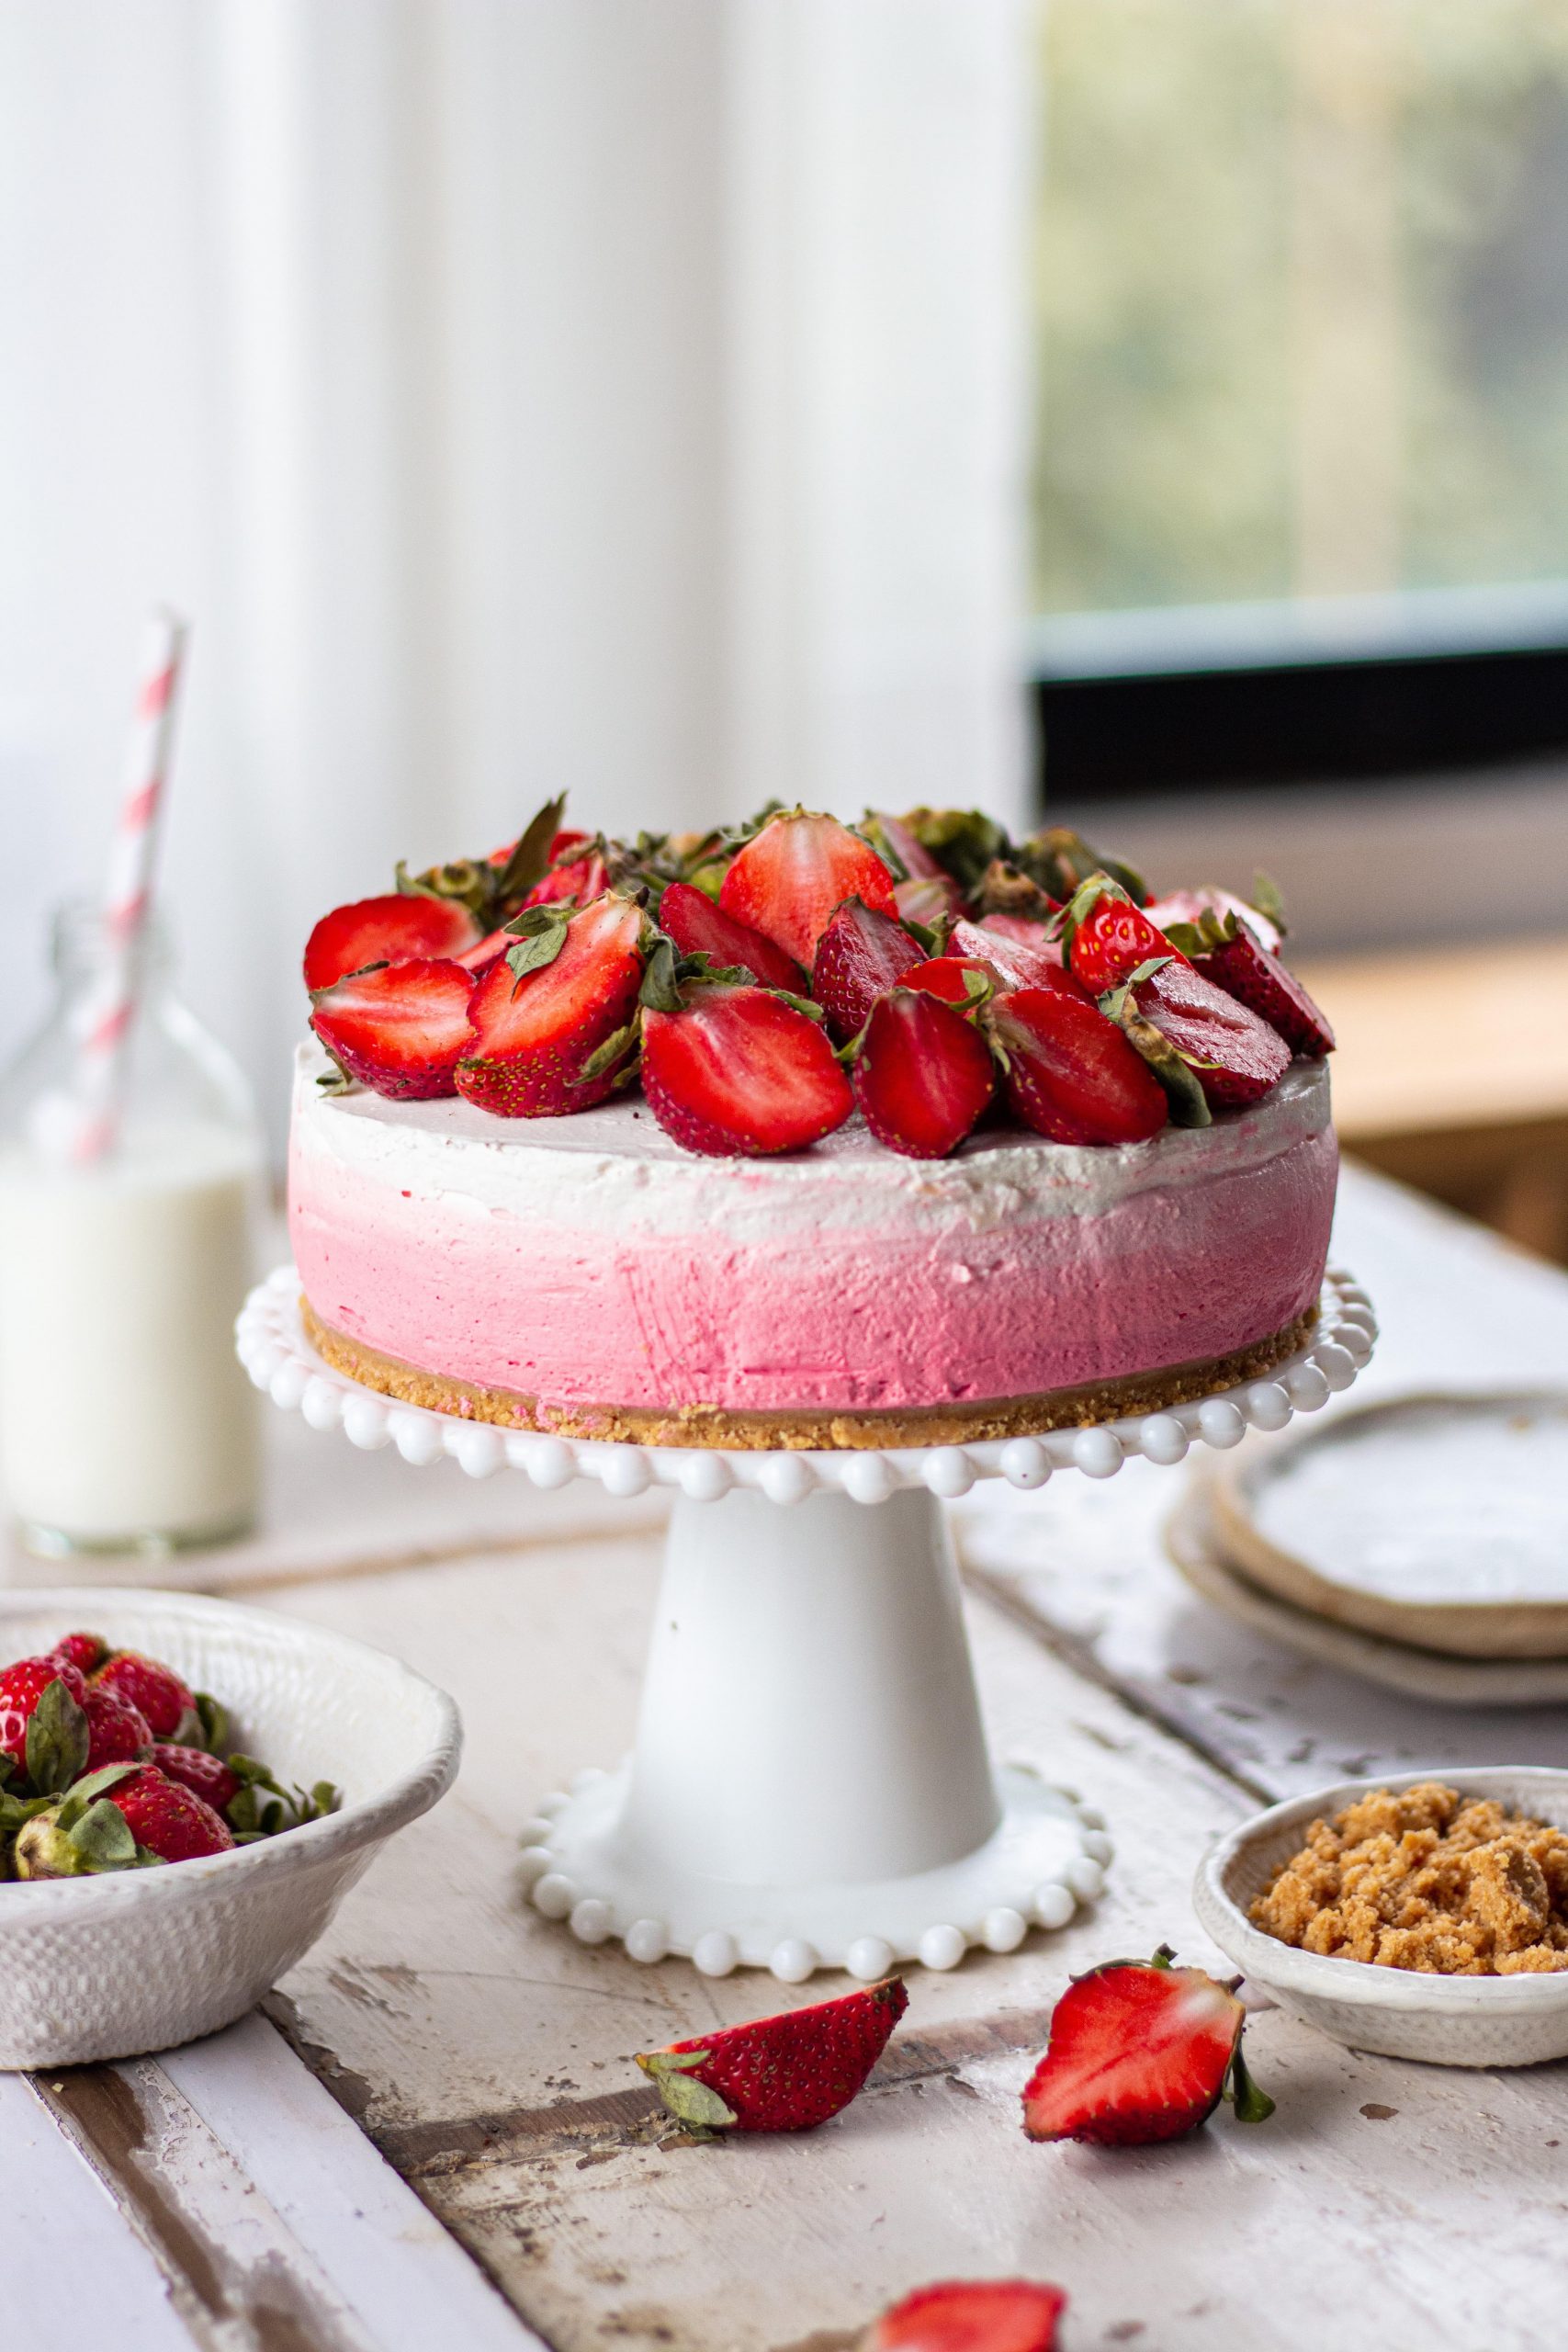
The saddest thing is happening because the strawberry season is coming to an end. While I adjust myself to go into denial, you can make this amazing Strawberry Ombre Cheesecake! This cheesecake is everything about strawberries- from the color to the flavor. This happens to be my favorite part about this Strawberry Ombre Cheesecake because you know I love my strawberries! What is more special is that it is Valentine’s Week, y’all! What is possibly better than something THIS YUM for your special one?
I believe that strawberries deserve the ‘best berry award’. They are so yum and so lovely to bite into! They are utterly perfect in desserts or with desserts. Also perfectly healthy for snacks and for diets! Strawberries are super pumped with antioxidants, and are fat and cholesterol-free too! If your dietitian tells you to not eat strawberries- say thank you, next and move on! Haha! Coming back to the point, there are multiple textures to this Strawberry Ombre Cheesecake. Strawberries obviously add a beautiful and unique texture. In addition, there is the mousse-y texture and the soft crunch of the biscuit base. We all know that biting into a dessert with multiple complementing textures feels out of this world!
And so, if you do end up baking this gorgeous and decadent Strawberry Ombre Cheesecake, please do not forget to tag me on Instagram!
Ingredients of this Strawberry Ombre Cheesecake
Some basic tips and tricks for the perfect Strawberry Ombre Cheesecake are below. Please remember to follow the recipe ardently. Where most people mess up is with the recipe. Get your tools out and your ingredients out before-hand to be ever ready. Especially with such recipes like this Strawberry Ombre Cheesecake, wherein most of you will be baking it for the first time, please be mentally prepared. Although this happens to be a foolproof recipe, you may go wrong with the temperature or a minor step. That is okay. Get yourself up and try your hand at it again!
For the base
Standard recipe and nothing difficult. Just crush them biscuits and melt that butter. Just remember that for this particular base, you need a fine base. Thus, grind your biscuits to a fine powder-like texture. I have used digestive biscuits because they do not add that extra sweetness quotient. But, go ahead and use that Parle-G or Marie Biscuits. You do you!
For the filling
Here is what you should be paying attention to- the filling is the most important part- obviously! It gets some percentage complicated here for newbies- but hang on! Understand the basics and you’re good to go.
To start with, your cream cheese should be fresh. You can use Britannia or Mooz. However, I really prefer Britannia because it’s easily available and super affordable. for the Gelatine powder, there is one from ‘Blue Bird’ and one from ‘Solar’. Just keep your gelatine powder properly sealed for further usage. There is also a pink gel color that we used. Almost every basic grocery store may have food coloring. But, please ensure that you use a good quality one. Low-quality food coloring is harmful to your health and is not even as pigmented. Brands like KitchenAid, Sprig, and CCDs have food coloring of great quality!
All these ingredients are basic and easy to get. However, in case you don’t get any of these in a store near you, don’t fret. You can easily order all these ingredients from online grocery stores like Big Bazaar, Nature’s Basket, Modern Bazaar, and even Amazon Pantry!
Tips for the perfect cheesecake!
- Make sure all your ingredients are at room temperature as room temperature ingredients incorporate much better and make the process much easier.
- You can also add 1 tbsp of flour or cornflour to your filling batter so that it binds well and you get the required texture.
- It’s really important that you grind your biscuits finely for the crust as big chunks of biscuits will completely ruin the smooth texture of the cheesecake.
- To avoid cracks in your cheesecake, gently set the cheesecake down to rest on the counter very carefully and allow it to come to room temperature, before refrigerating.
Ingredients for this Strawberry Ombre Cheesecake
Most of all the tools required for this recipe are your everyday baking tools. Electric hand mixer or standing mixer to make the cream cheese filling, mixer grinder for crushing the biscuits, and a pan for your Strawberry Ombre Cheesecake.
To make your baking adventures easier, I have put together an article of all the baking tools you must have, on the blog. Do check it out, I’m sure it’ll be helpful!
Recipe for Strawberry Ombre Cheesecake
- 1¼ cup crushed digestive biscuits
- ½ cup melted better
- 1½ cups cream cheese
- ½cup icing sugar
- 2 teaspoon vanilla extract
- 2 cups whipped cream
- 1 tablespoon gelatine powder + 4 tablespoons of water.
- Pink gel colour
- 10-11 strawberries
- To make the crust add the crushed biscuits and the melted butter in a bowl and mix until well combined.
- Line a 6 inch spring form pan with parchment paper.
- Press down the butter biscuit mixture into the prepared pan. Refrigerate for 15 minutes.
- In a small bowl add the gelatine over the water to let it bloom.
- To make the filling beat the cream cheese and icing sugar in a bowl together until smooth.
- Add the vanilla extract and mix.
- Gently fold in the whipping cream and mix well.
- Microwave the bloomed gelatine for 20 seconds and add it to the filling and mix well.
- Divide the cream cheese filling equally into 5 different bowls.
- In the first bowl add one drop of pink gel colour, in the second bowl add two drops, in the third bowl three drops and the fourth bowl four drops and let the last bowl be white.
- Add the filling of the first bowl to the crust and spread evenly. Now repeat this step for rest of the filling.
- Refrigerate the ombre cheesecake for 2-3 hours.
- Once chilled, top the cheesecake with fresh strawberries

Is there a substitute foe gelatin powder?