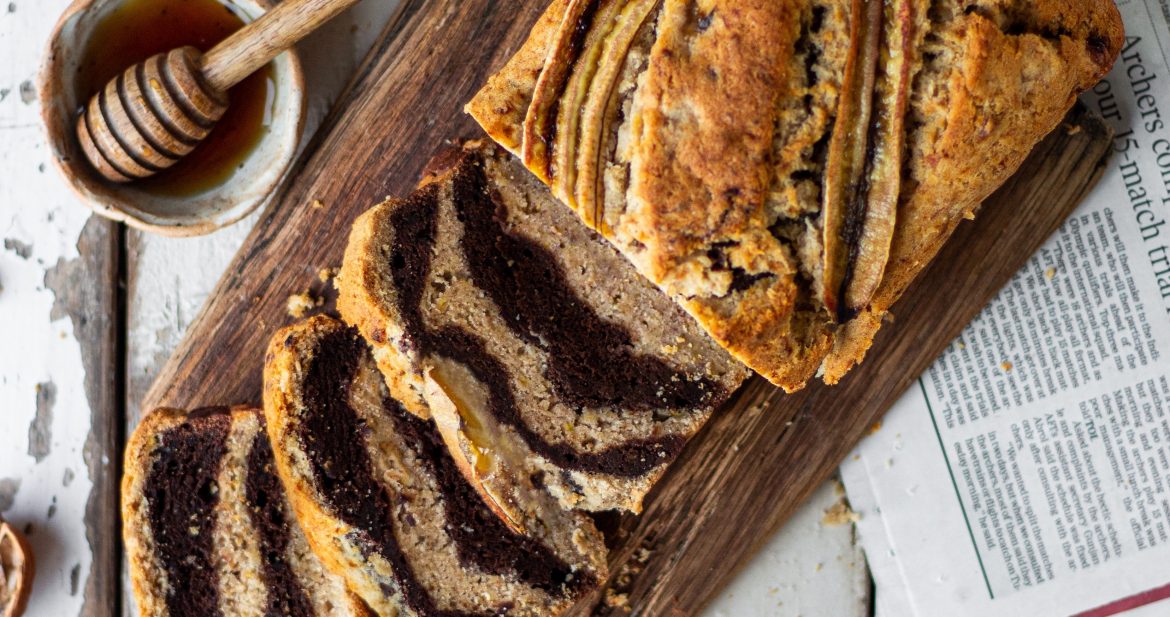

Did you know that the number one reason for baking disasters happens to be wrong settings of your oven/OTG? Baking at the wrong settings, temperature, and in the wrong way spoils the perfect dessert and nothing is worse! Being a baker, I share exciting recipes each and every week and when I see someone failing- I know there’s more to it than the wrong batter. Believe it or not, the most amount of complaints are regarding the settings of an oven/OTG. I get it- so many rods and so many settings ought to have anyone confused. And so, for the same reason, today- we are going to discuss how to use oven for baking! These rules apply to OTGs too so you have nothing to worry if you have one.
All you baking enthusiasts out there are always asking me questions about which oven do I have, how to set and use various oven functions, and how to make the best use of the oven that you have. I have always used an Oven, Toaster, Griller in my kitchen and today I am going to be telling you everything there is to know about how to use oven for baking like a pro!
First step in understanding how to use oven for baking
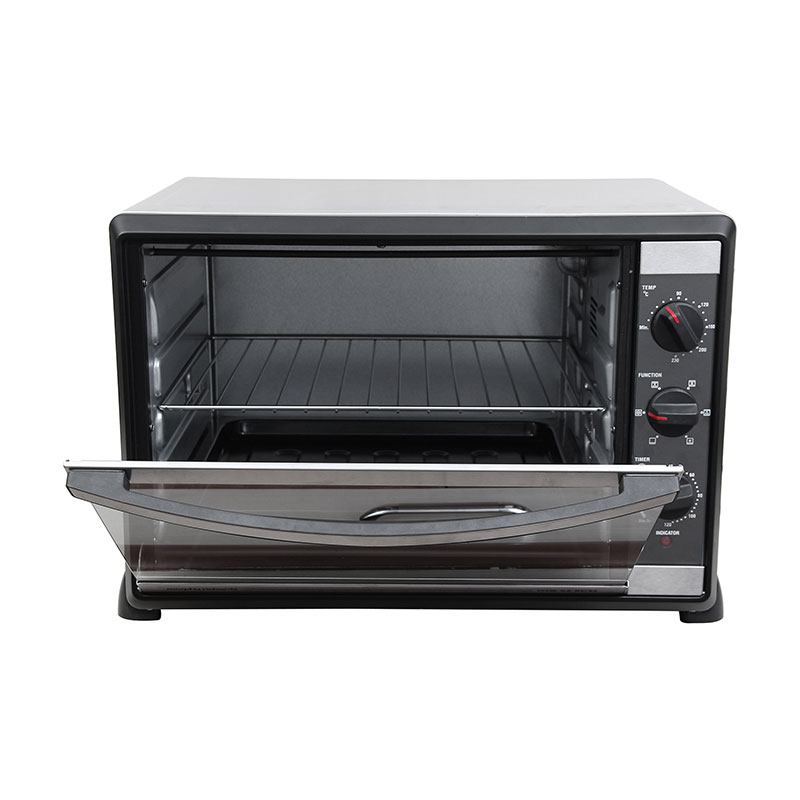
While figuring out How to use oven for baking, the first step is to pick the right oven or OTG. The market selling ovens and OTGs is humongous and if you are going out to buy one, you can be tempted to pick something not so ideal. The best type of in-built ovens or OTGs are provided by brands like Faber, Kaff, and Glen. However, I use an OTG. First things first and I think the most asked question on my youtube channel is – which oven do I use. I used a Borosil Prima 42L OTG for the longest time and I have loved baking in it. But, recently I have been wanting to upgrade to a bigger one so now I use a Morphy Richards 52L OTG which is absolutely perfect for all my baking needs! Borosil and Morphy Richards are the front runners when it comes to OTGs and they are truly unbeatable. If you are starting off as a home-baker, you can go for a smaller size too!
Know more about OTG/Oven sizes
OTGs and oven are available from 20 Litres to 60 Litres.
There are three common sizes available-small, medium, and large.
Small OTGs
20-28L comes under the “small oven”category. These ovens can only incorporate one tray at a time and the width of the oven is very small so you can only bake in a small 6inch cake pan and about 4 cookies at a time.
Medium OTGs
30-42L ovens come in the medium size category and I used a medium sized OTG for the longest time but now I use a large size OTG.
Large OTGS
Large OTGs range from 45L-60L. You can bake in more than one tray at a time, saving lots of time and energy.
Accessories that come along with every OTG
With every OTG or oven comes various accessories that you need while baking. In order to understand how to use oven for baking like a pro, you need to understand these baking accessories which include the following.
A baking tray
Since the baking tray is made in a way that it conducts heat, you can use it to directly bake things that don’t require a special mould. But you can also use it as a base on which you can put your cake moulds and tart moulds and bake.
Cooling tray/rack
Every dessert needs to be cooled down slightly before it can be demoulded or consumed. This is why you will always get a wired rack with your oven. If you mould or cut into desserts when they come right out of the oven, they will definitely crumble and you might end up slightly burning your hands. So always be careful.
Motorised rotisserie
If you want to use your oven for savory dishes as well then this will be perfect for grilled rotisserie or other meat items.
Skewer rods
Skewer rods are another tool for savory items like kebabs or tikkas.
Tongs
This is a great tool to handle hot trays, you are scared of coming in direct contact with heat by wearing oven mitts. These tongs hook onto this tray firmly and make your process easy!
Materials used for baking
Understanding how to use oven for baking is not enough. You need to also be aware of the materials being used to yield the best results. Some of the most common materials used for baking are metal, ceramic, silicone, and temperature safe glass. My preferred material is metal since it is a good conductor of heat it ensures even heating. I don’t often bake in glass or ceramic ware because it doesn’t heat properly and leads to inconsistent cooking and colour. Silicon on the other is the best for moulding your desserts easily but it doesn’t give me that golden brown colour which I love!
Types of Utility Knobs in an Oven
Now once you’ve bought your oven, it is extremely important that you understand all that your oven can do. Every oven will have three kinds of utility knobs: temperature knob, function knob, and timer knob.
Function knob
It helps you select the functional heating you are looking for. Most of the ovens have 6 basic heating options. These include:
– Both top and bottom rods are on along with the fan heating mode
– Only top rod heating mode
– Heating while only bottom rod is on
– Heating both rods without the fan
I bake all of my desserts using the first kind i.e. heating both rods with the fan on. The fan symbol stands for convection which means even distribution of heat in the oven throughout the baking time. Even heat makes sure your desserts are cooked all the way through and there is no sinking of desserts or over/under baking.
Temperature knob
It is used to fix the temperature. Usually ovens have a range of 50 degree C – 250 degree C but this can vary from oven to oven and how much heat it can handle.
Timer knob is used to fix the total time for baking your desserts. When the timer knob reaches zero minutes, your oven makes a ‘ting’ sound. This indicates the time you had set is now over and the oven starts to cool off.
The Preheating Process
No matter what you are baking, preheating your oven is always a step that needs to be done. And the temperature at which you preheat your oven needs to be the exact same as the temperature that you will be baking at.
This step ensures when you put your dough or batter in the oven, it immediately reacts with the heat and initiates the baking process. If you put your desserts in a cold oven, it will take extra time to rise up to the set baking temperature which will ultimately increase your total baking time and also affect the final texture of your dessert.
Also, I like to take out my baking tray from the oven and then start the preheating process.
How to preheat my oven/OTG
So, to preheat your oven, all you need to do is use the temperature knob to set the desired temperature and then use the timer knob and set it at 15-20 minutes. Any longer than this will lead your oven to overheat, which is good for no one! Cracked cake tops are an issue faced by many bakers and it mainly happens because of this. The top cooks faster while the bottom is still rising and baking, hence causing cracks. My top tip? While your oven is preheating, prepare your batter and get ready to roll!
Best way to understand how to use oven for baking is to get to Know Your Oven
The points that I have shared with you so far are about the fundamentals of using an OTG. In addition to knowing these, it is very important to keep in mind that depending on the size, the model and the brand of your OTG, it will function in its own way.
Read the recipe and its baking instructions
Every recipe comes with instructions about the time and temperature at which the dessert should be baked at. These instructions are based on the oven they have used. Now it’s very much possible that you are using a completely different oven and this is why these instructions should always be taken as a reference point and not as a definite requirement.
For instance, if you are baking a cake and the recipe says to bake it for 30 mins, but you can see that your cake has gotten a golden brown color, has risen properly and seems to be completely baked within 20 minutes, then simply take it out of the oven. Don’t wait for the instructed time to get completed or you will end up overbaking it and that’s never fun.
Understanding heat and its role in baking
The way heat is distributed can also differ from one oven to another. This is why it is possible that sometimes your cookies or cakes are cooking very fast from the bottom but they seem undercooked from the top. This means that your oven is creating more heat in the bottom rods. Use the function knobs to your advantage to deal with this issue.
Understanding and changing settings
There can be times when the bottom of your dessert takes longer to cook than the top. In such a situation, you will use the third option i.e. when heating is on for the bottom rod. This will help you ensure that the bottom is cooked perfectly without burning the top of your dessert.
One thing you can do here is use the function knob to change heating settings halfway through baking time and only put the top heating rod on to make sure your cookie is baked all the way through.
Being patient
The only way to know what works best for your oven is to be patient, to always observe how its baking something and in how much time. All of this comes with practice and the more you bake, the more confident you will get in using all of the settings and functions that your oven has to offer.
Know more about super cool baking hacks. To view more such informational videos, please visit my Youtube channel!

Hey very informative post on OTG. Thanks for sharing. Have a question I have Bajaj Majesty 45 Ltr while baking should u have all 3 trays in the oven or just the one that has to be baked?
Hello shivesh
How are you ? I’m a rather silent follower of you on instagram and youtube.
I just bought the Morphy Richards 52 litre rcss and it is giving me a hard time ?
Could you please do a video or maybe just a article dedicated to this exact oven because as far as I have seen this oven is very popular and alot of people have it. I’m sure it will be quite helpful to your other followers as well.
Even if you couldn’t make a seperate article ( I understand your schedule must be very busy and that you plan your videos and blogs beforehand ) could you just give me a few tips and advice here in the comment.
It would be really helpful. I’ve already burnt two recipies and now I’m intimidated by my oven. ?
hi sir, …… mene abhi new kenstar ka otg liya he……usme bottom rod heating (bake) ka function nahi he……baki sabhi function he……please bataiye mujhe cake bake karne ke liye konsa function set karna chahiye..
Great!
Can you please suggest a good all rounder oven?
Thanks!
We are using a buit in OTG, we baked a cake. 160 degree for 30 minutes. Conventional cooking with fan. The Cake didn’t rise and it was uncooked at the center what were the things we did wrong
I am planning to buy morphy richards 60lit luxe range
But it doesn’t come with lower rod mode
Should i buy that??
Hi very informative ,
I just purchased Morphy rechards besta black 52l and I am.failed to cook any thing.Every time I cake any thing it is uncooked from bottom and burnt from top .if I reduce the temperature i eneded to greater time but still the cake and cookies are uncooked at bottom .can I change the rods.please help
Hii…I have morphy rechards 60litre otg.
I am baking tea time cake in bread pan.I am setting temperature 160degree for 25 min,with top rod on for about 7 min and then i turned off top rod.
My top middle cake is rising and cracking..can you please tell me reason behind this uneven rising and breaking.