
I think by now we all know how much I love Delhi winters, it truly is the most wonderful time of the year with layers and layers of winter cozies accompanied by endless mugs of hot chocolate. But the winters have made lazier and hungrier for the most decadent desserts. Especially when the late night cravings hit me and I am the comfiest in the warmth of my blankets, the last thing I want to do then is to stand in front of my oven and wait for my desserts to be done already. Which is when my 40 seconds microwave cupcakes come to the rescue.
Yes you have read it right, these beautiful and ultra fluffy chocolate cupcakes come together in just under a minute. These are perfect for your midnight snack marathon or just as a quick dessert for when you are running out of time. These microwave cupcakes are simple, super low effort and sooo delicious. It’s amazing how light and fluffy they are without even using an oven. So let’s dive right in!
Ingredients you would need for the microwave cupcakes
- I am using vegetable oil instead of butter. Oil based desserts are much lighter and have a fluffier sponge. They also have a longer shelf life than desserts made from butter.
- Superfine sugar is the same as caster sugar and that is what I have used in this recipe. I would advise you to not use granulated sugar in dessert recipes. It has big sugar chunks which never fully dissolve into your dessert and you end up with sugar chunks in the end.
- Yogurt is a very important ingredient in this recipe because it is responsible for adding structure and texture to the eggless chocolate cupcakes. In a normal recipe, this would be done by eggs. Now I know a lot of you are always wondering whether to use Greek yogurt or not. I always use normal homemade yogurt/dahi. Sometimes homemade yogurt can be too watery. If that is the case you should separate the thick yogurt portions and use that. In times of when homemade yogurt is just slightly watery, you can use it just as is. There is no need to strain it. Hope you don’t rush to the market to buy Greek yogurt the next time you need to use yogurt in a recipe, haha!
- For my dry ingredients I used all purpose flour, cocoa powder, salt, baking soda, and baking soda. Whenever I am making an eggless dessert, I make sure to sift in my dry ingredients. What this does is, make the dry ingredients that you are adding slightly lighter and therefore incorporates more air into your batter. A decent amount of air is needed in eggless desserts to help them get a better rise.
- The last ingredient that I add is milk. Remember, whenever you are adding liquids to your batter, it should be room temperature or warm. Adding cold liquid makes it harder to incorporate into the batter and can lead to uneven mixing of ingredients. Milk softens the cupcake and helps us reach the ideal cupcake texture.
How to cook microwave cupcakes
To make these simple 40 seconds microwave cupcakes even simpler, we are going to be cooking these on your basic microwave reheating function. So there is no need to get technical about the convention mode or the temperature or even preheating. Once your batter is ready and set to go, you can simply place the cupcakes in the microwave and press the quick start button. This is the same function you would normally use to reheat your food. Start with 40 seconds and depending upon the power and strength of your oven it may take 40-60 seconds for these cupcakes to cook.
Important thing to keep in mind while microwaving is to do it in 10 seconds intervals once you have crossed 40 seconds. Since 40 seconds is the minimum amount of time you will need to cook the cupcakes, anything longer has to be done in a 10 seconds interval since it is very very easy to overcook these. And trust me when I say they are super easy to over and burn, cause we did burn a few batches. Haha!
Silicone moulds
Since we are going to be cooking the microwave cupcakes on the regular reheating mode, we will be cooking the cupcakes in a silicone cupcake mould. I also decided to add cupcake liners for a smoother demoulding and a hassle free cleaning job later. The cupcake liners are totally optional and you can skip these. It is extremely crucial to only fill half way through the mould or liner cause these cupcakes will rise a LOT in the microwave.
Unlike filling the mould to ⅔ like we do for when we bake, ½ way is perfect for these microwave cupcakes. And I am telling you from my past mistakes, of filling the mould way too high and having to clean the microwave of so much cupcake batter. Hahaha!
Please do not use any metal trays or cupcake moulds in the microwave for this recipe and mode of cooking cause this can be very hazardous. Only while cooking in convection mode you can use metal in the microwave. If you do not have silicone moulds, you can simply bake these small glass ramekins or any microwave safe mould/bowl.
Do not overmix the batter
Mixing of the batter causes gluten in the flour to develop, that gives your cupcakes their texture. More gluten development due to over mixing leads to a denser texture. While making eggless chocolate cupcakes, you also need to be careful while mixing dry ingredients so that you do not knock out air from the batter. Air will help form a soft and fluffy cupcake in the end. This is why, rather than mixing fast, you can try to fold in the dry ingredients into the wet ingredients. Folding helps retain as much air as possible.
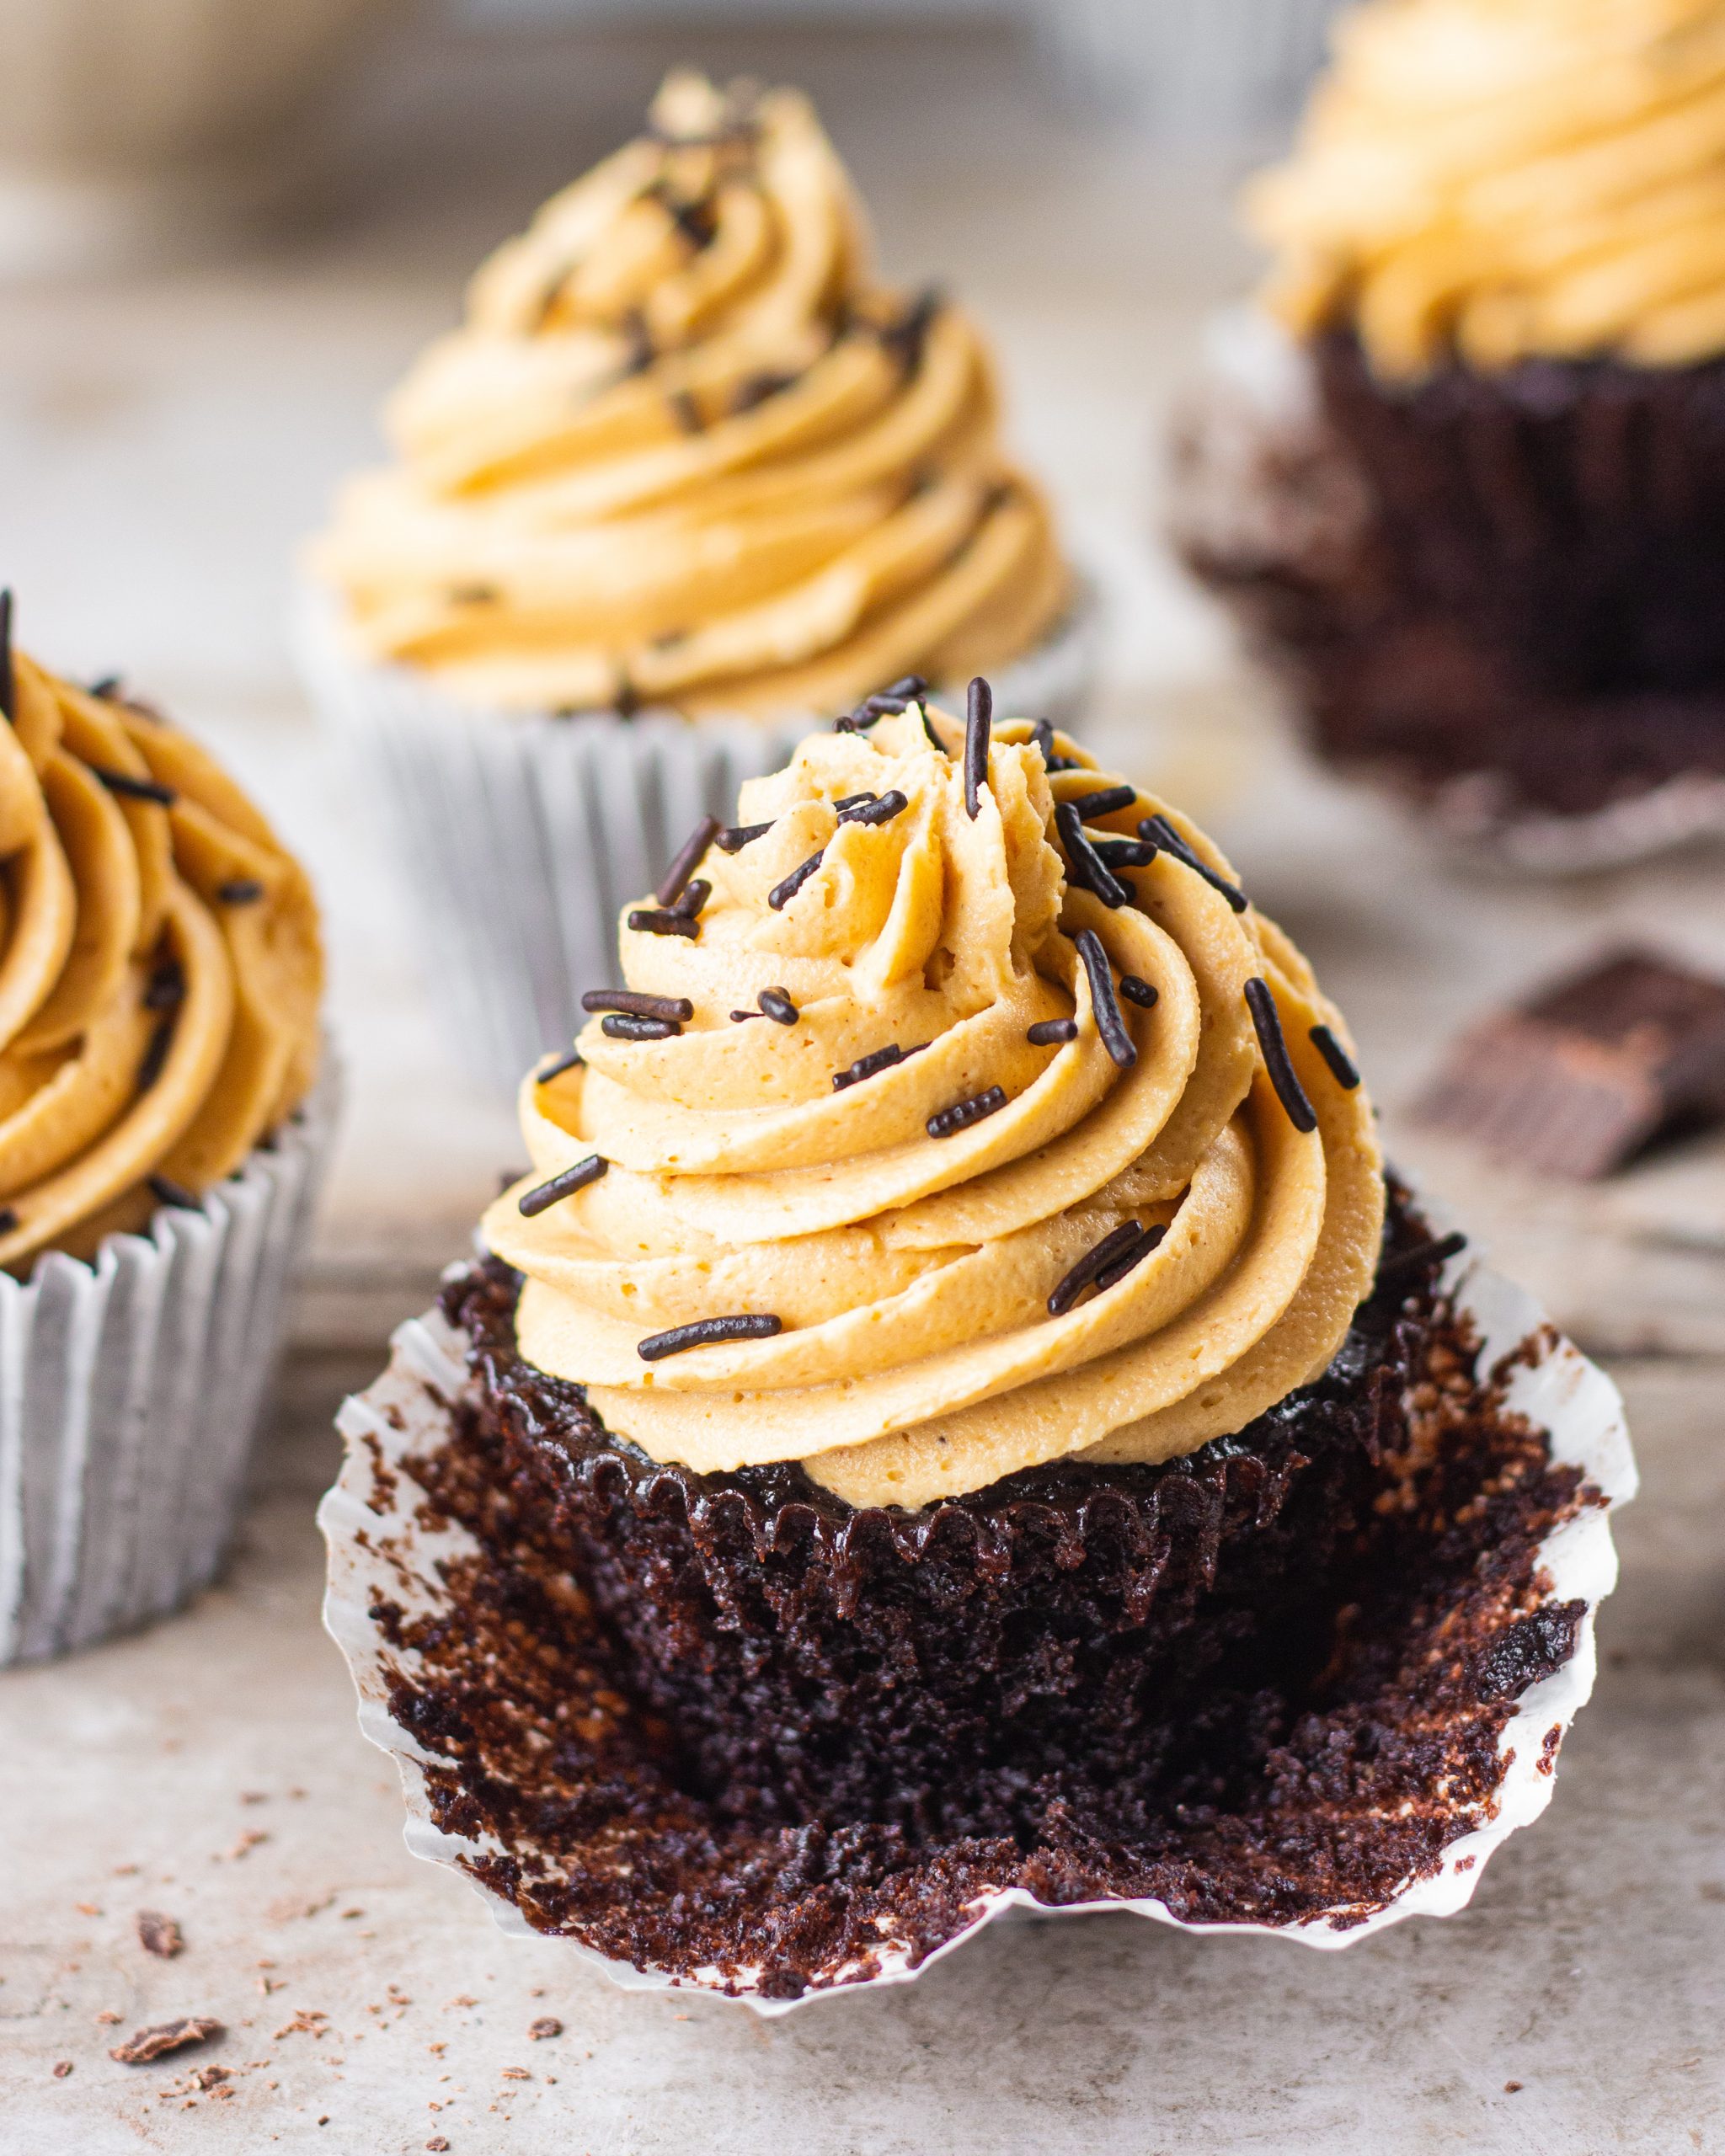
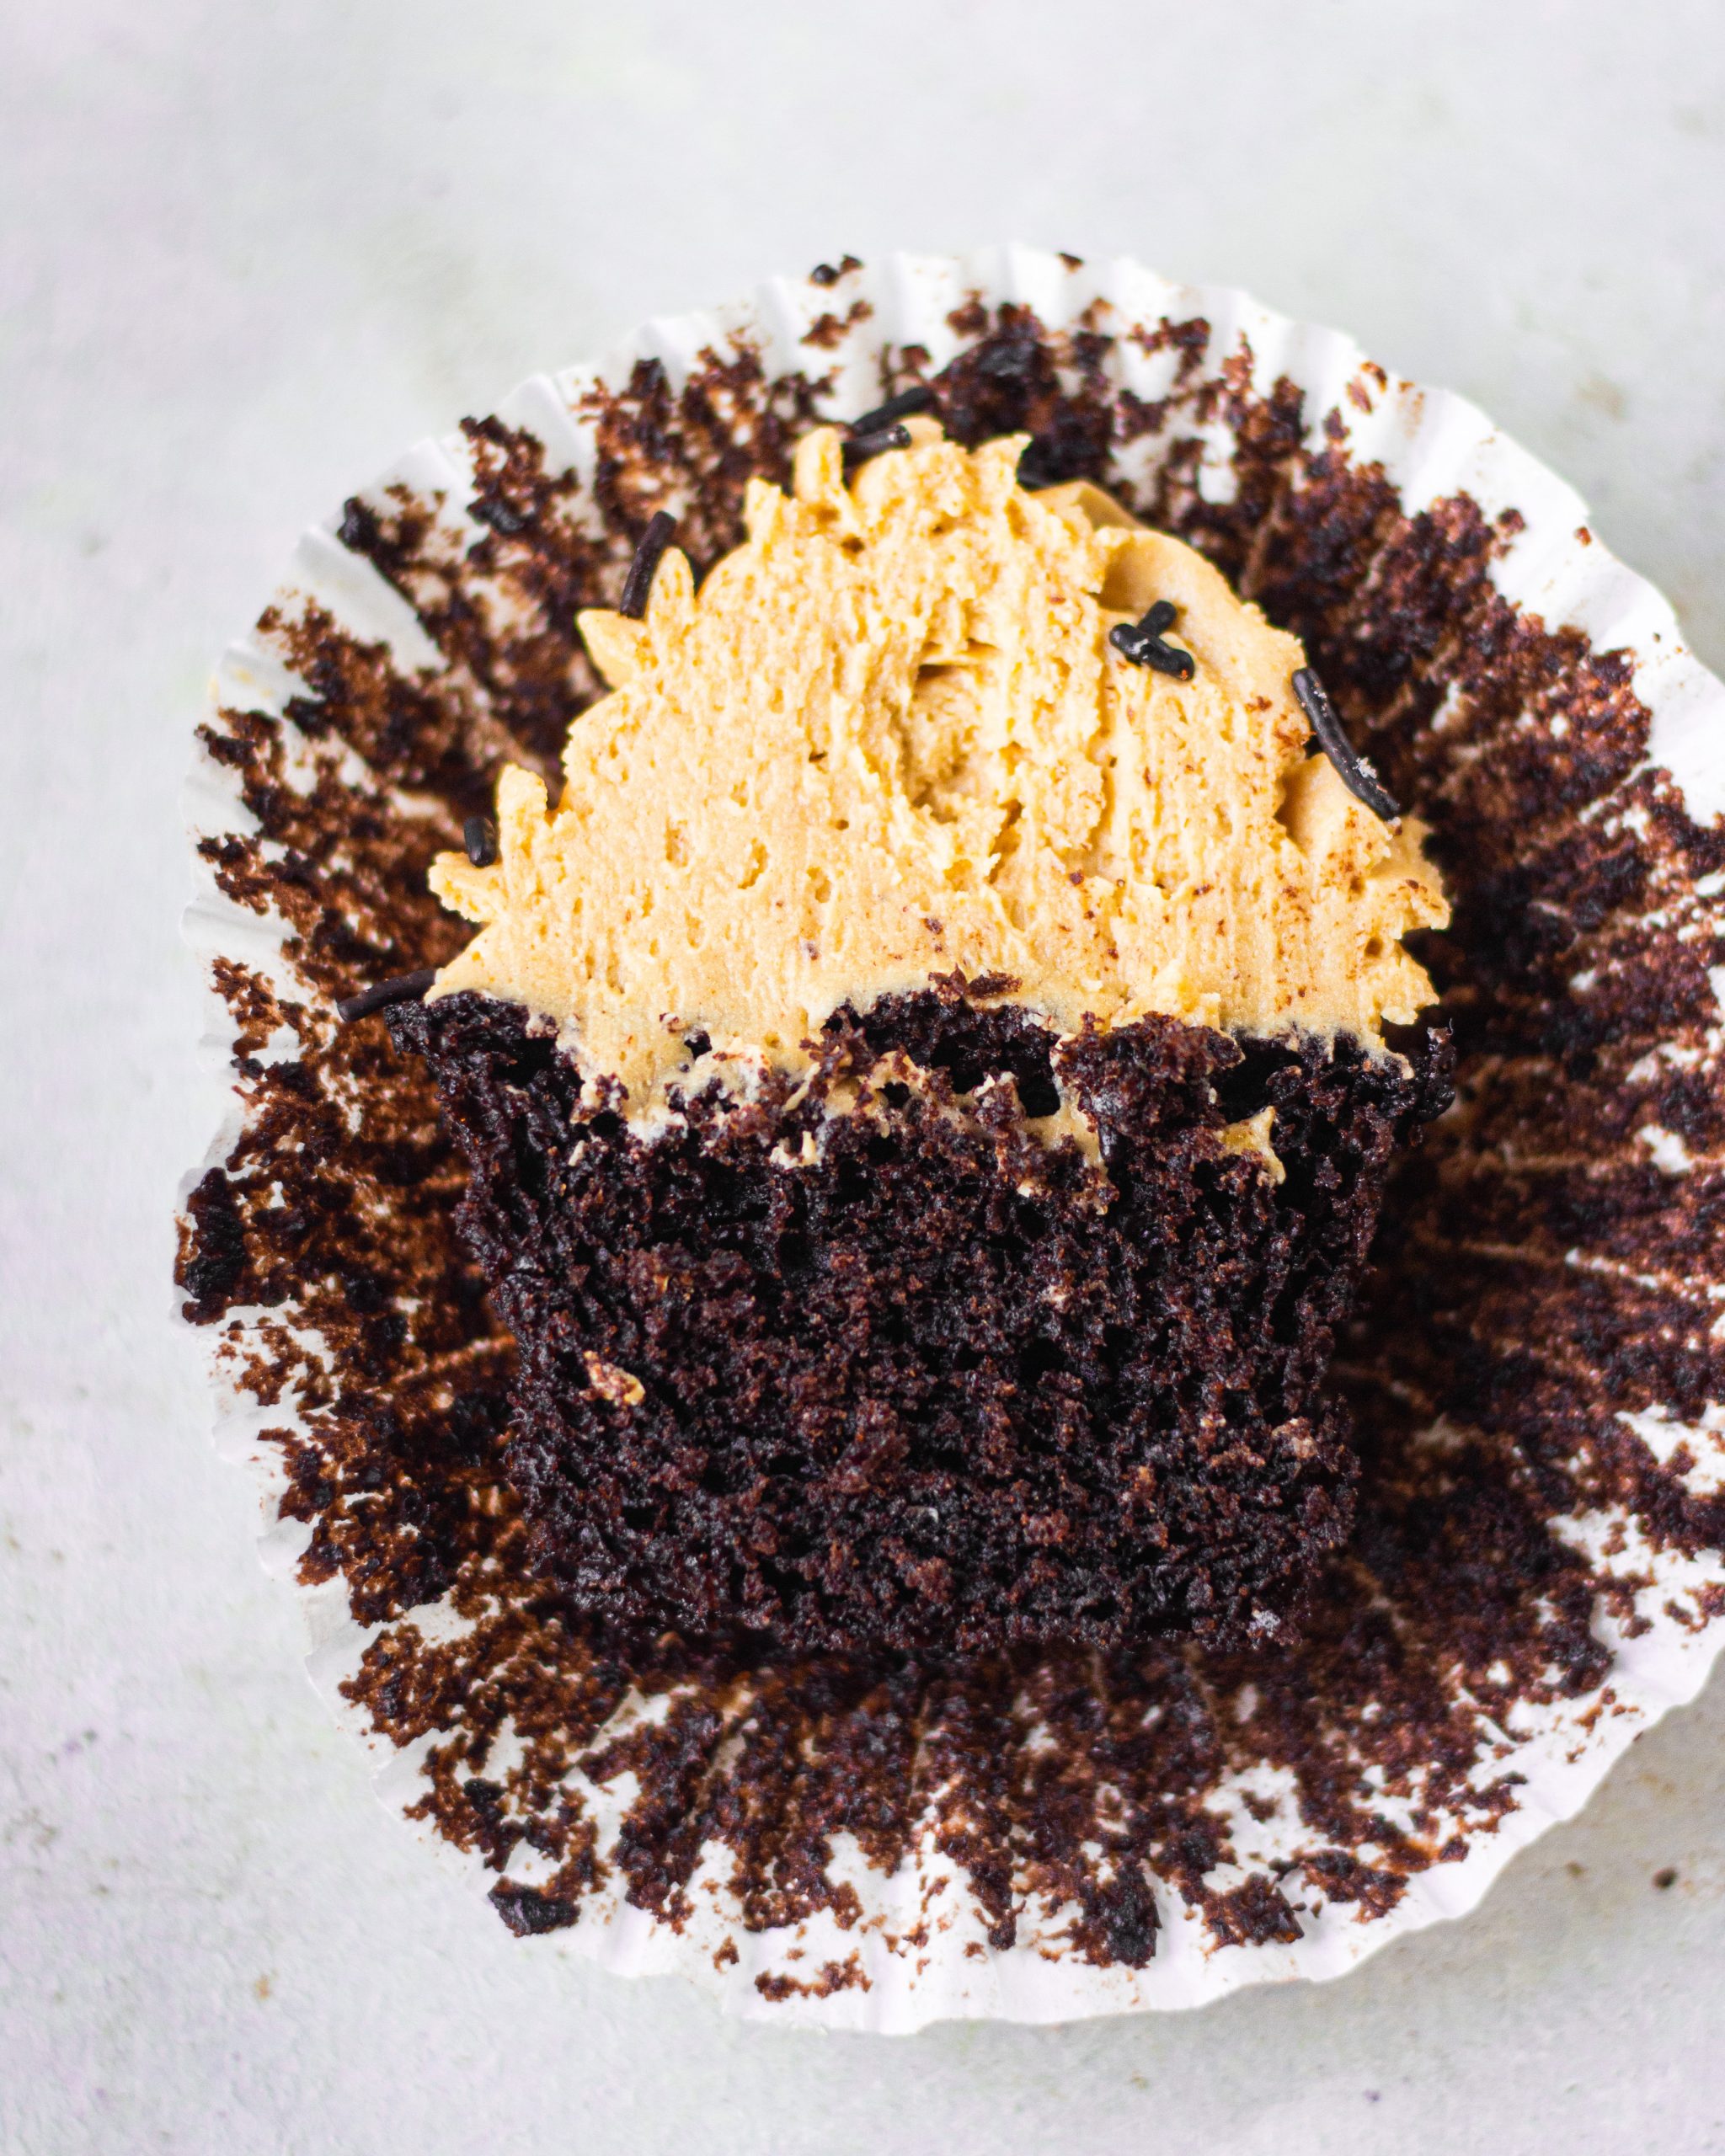
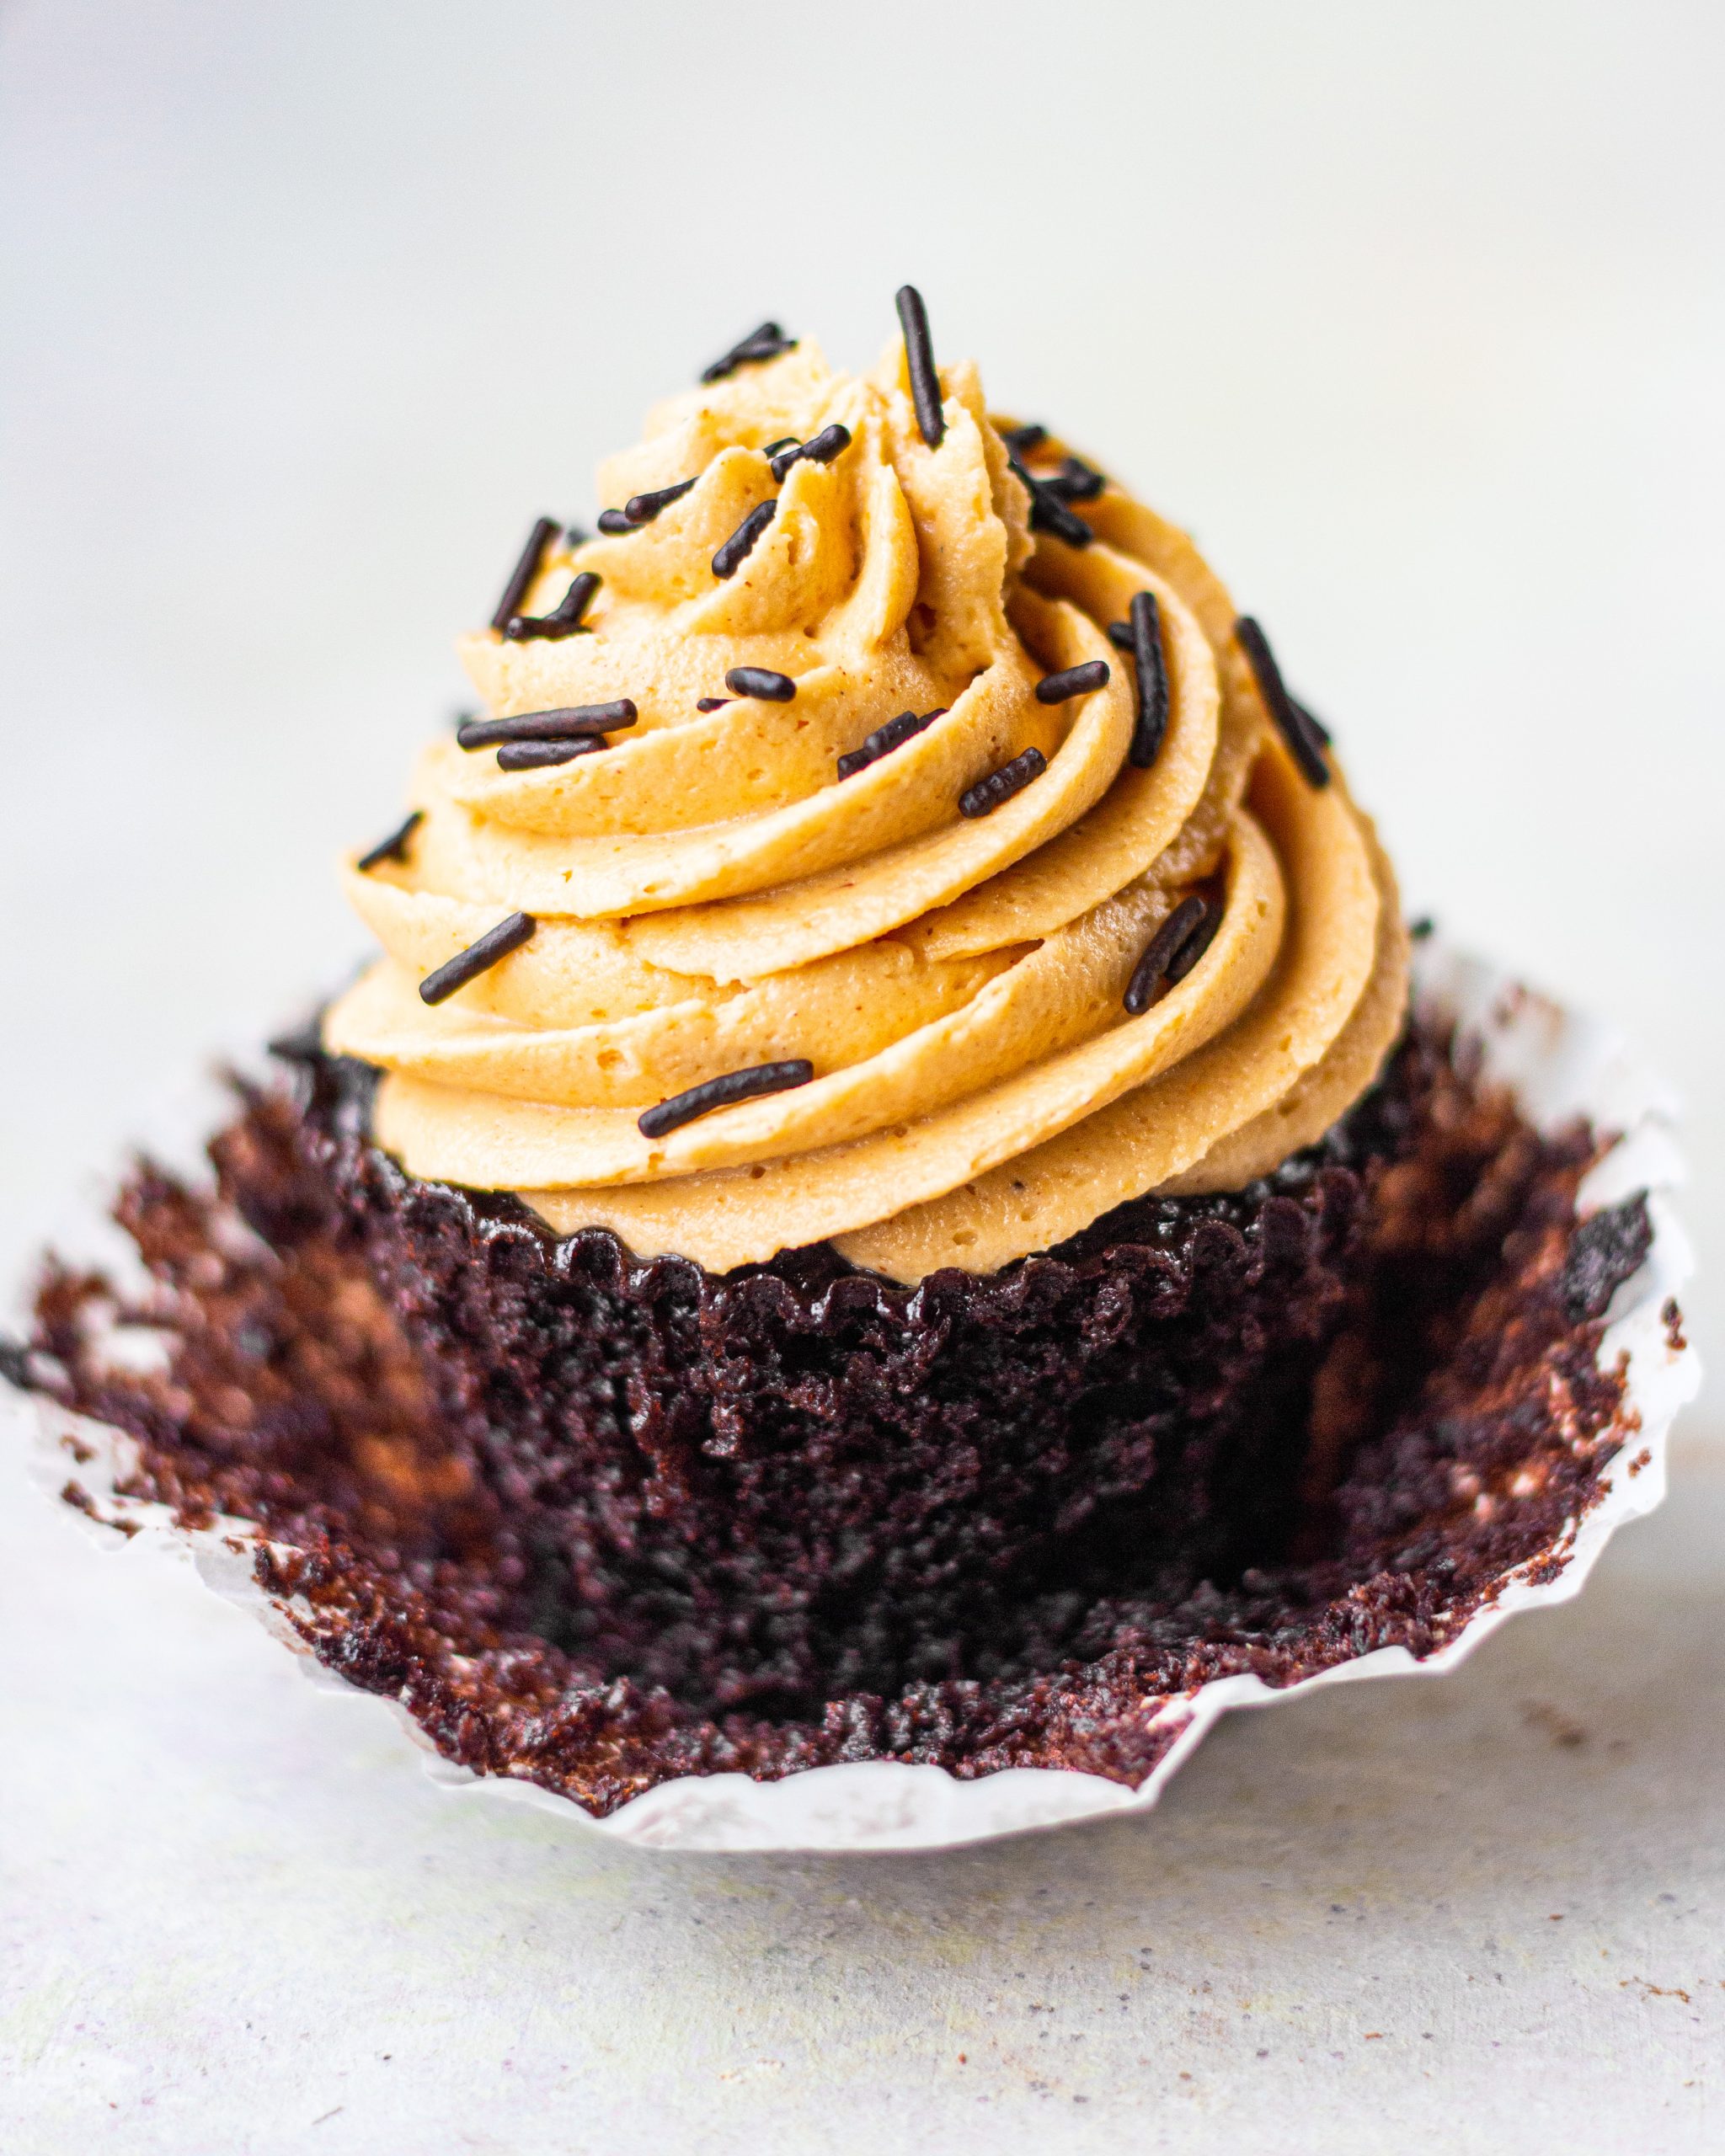
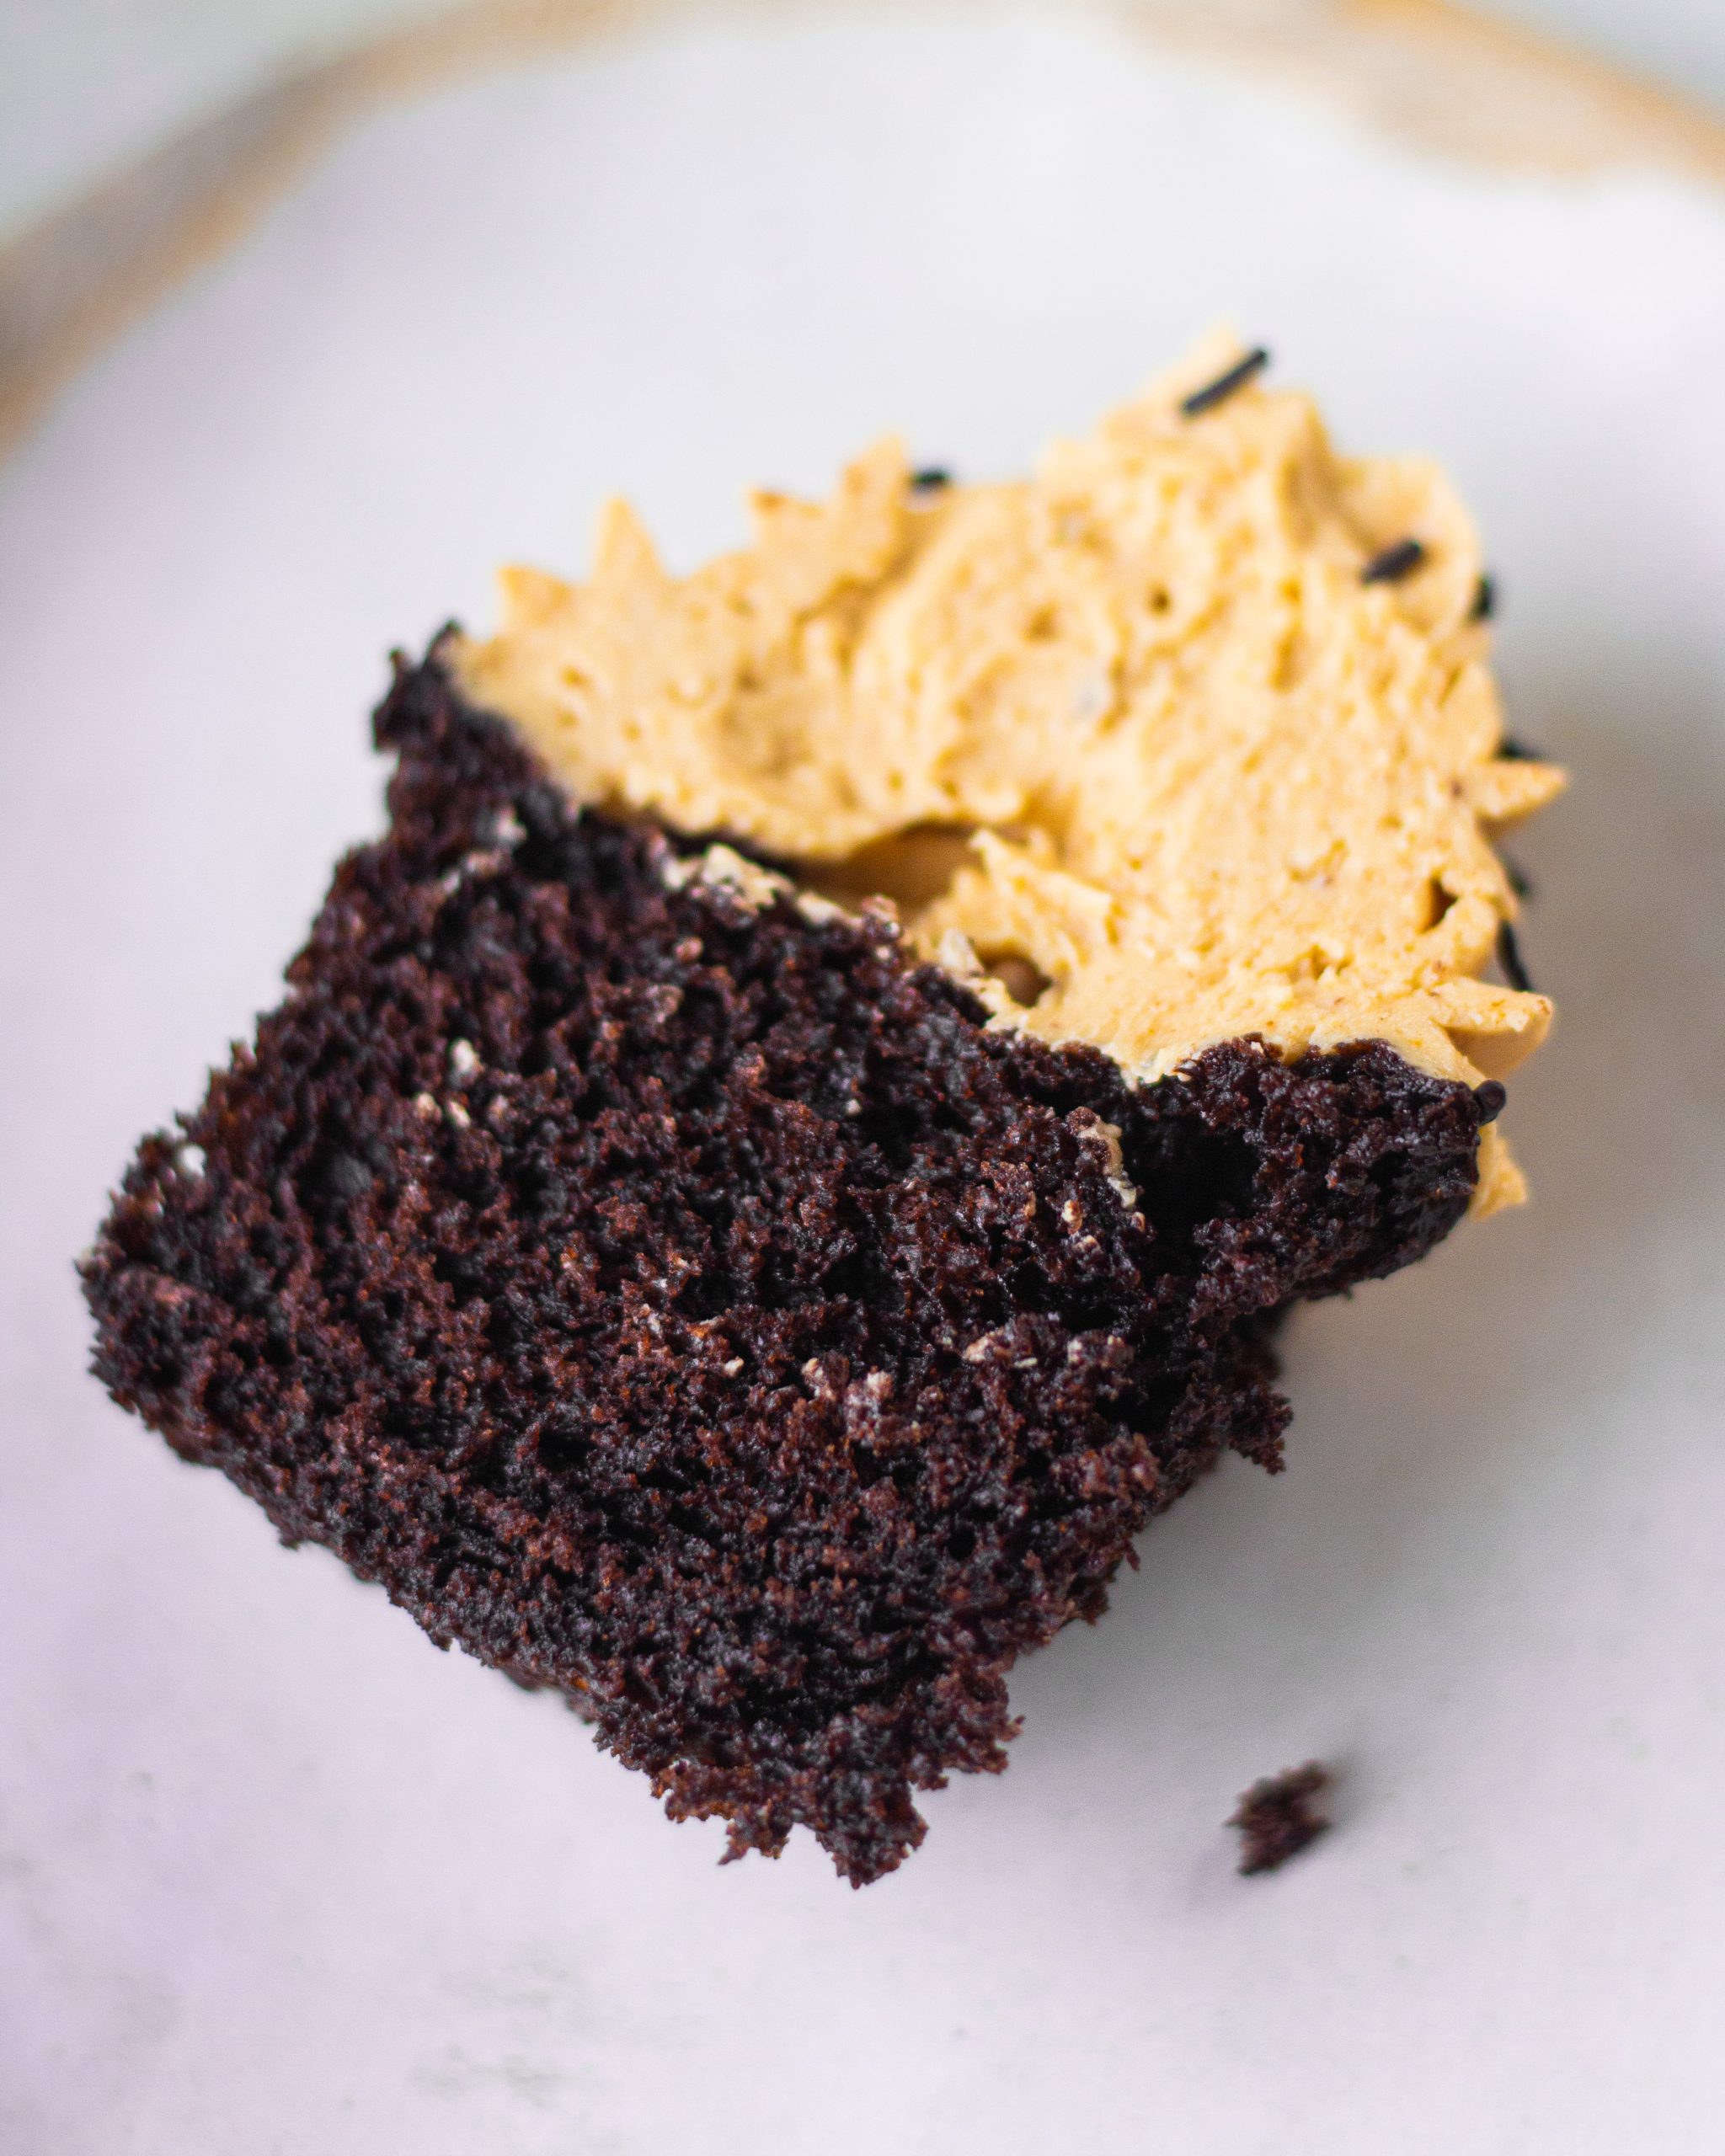
Peanut butter frosting
Now, in my opinion peanut butter and chocolate are a match made in heaven. And you have to try this super easy creamy only 3 ingredient peanut butter frosting to top your microwave cupcakes. Softened butter, CREAMY peanut butter(please do not use crunchy peanut butter) and icing sugar.
It is as simple as dumping ½ cup of softened butter and ½ cup peanut butter in a bowl. Then using an electric whisk, whisk everything together until it’s nice and fluffy and light. Add in your 1+¼ cup icing sugar, fold it through with a spatula first so it doesn’t fly away when you whisk it. Now give the frosting a final whisk and voila. You have the creamiest bowl of peanut butter frosting ready and waiting for you! Extra tip? Always save some frosting to eat away later with toast or croissant paired with nutella or jam, oh so yummm!
- 6 tbsp vegetable oil
- ¾ cup superfine sugar
- ½ cup yogurt/ hung curd
- ¾ cup maida
- 6 tbsp cocoa powder
- ½ tsp baking powder
- ¼ tsp baking soda
- 3 tbsp milk, room temp
- Line your silicone cupcake moulds with cupcake liners.
- In a bowl add in oil and sugar. Make sure to whisk these two really well, until the mixture becomes light and pale.
- In the same bowl add in yogurt. Mix this in as well.
- Put a large sieve over the same bowl and sift flour, cocoa powder, baking powder, and baking soda.
- Once sifted, fold in dry ingredients into the wet ingredients and mix until there are no flour pockets left.
- Now add in milk, mix everything really well and your batter is ready.
- Using an ice cream scoop, scoop the batter into the cupcake moulds lined with cupcake liners filling up to only half way through.
- Microwave for 40 seconds on the regular heating mode. Allow the cupcakes to cool down before you frost and enjoy!

Hey! How many cupcakes does this recipe yield?