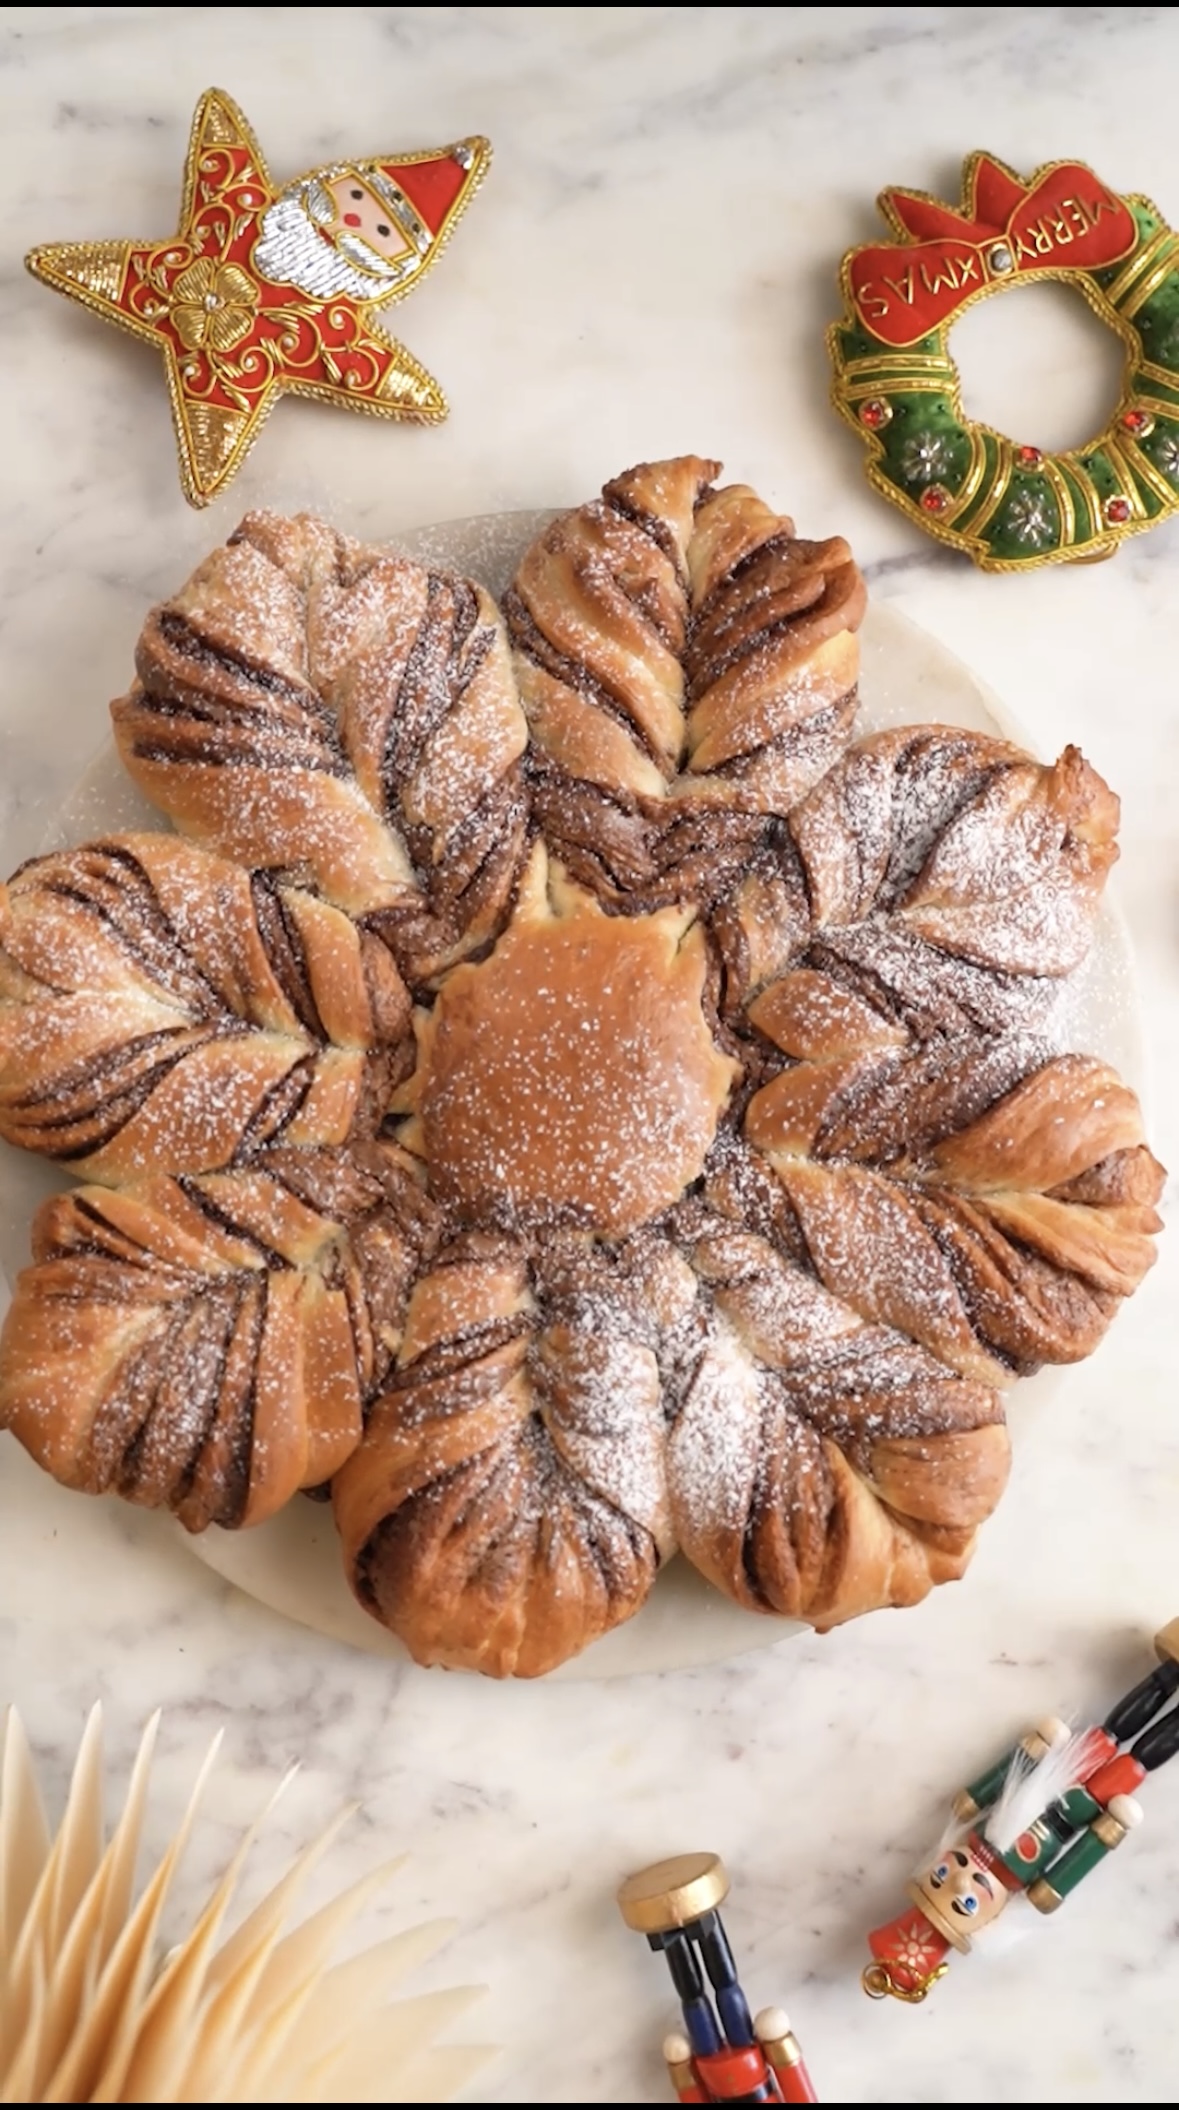
This Christmas snowflake bread is truly my favourite festive bake. I make it every year, and it never stops feeling special. The dough is soft, buttery, and pillowy, the chocolate filling melts perfectly between the layers, and the snowflake shape makes it look far more magical than the effort it takes.
What I love most is the process—rolling, layering, twisting, and watching it transform into a beautiful star before it even goes into the oven. As it bakes, the kitchen fills with that warm, comforting aroma that instantly feels like Christmas. It’s the kind of bread that’s meant to be shared, pulled apart while still warm, and enjoyed slowly with people you love.
WHAT YOU’LL LOVE ABOUT THIS
- Pretty and Christmassy
- Filling can be customised
- Fun to make
- Chocolatey
INGREDIENTS USED TO MAKE SNOWFLAKE BREAD
-
Flour
The backbone of the recipe, flour provides structure and stability to the dough while still allowing it to remain soft and elastic. It helps the bread hold its snowflake shape and gives each layer a tender, pull-apart texture after baking.
-
Yeast
Responsible for fermentation, yeast slowly works through the dough to create air pockets, resulting in a light, fluffy crumb. It also adds depth of flavour, making the bread taste richer and more developed.
-
Sugar
Adds subtle sweetness to balance the buttery dough and chocolate filling. It also feeds the yeast, supporting a good rise and contributing to a beautifully golden crust.
-
Milk
Makes the dough rich and tender, giving the bread a soft, melt-in-the-mouth texture. Milk also enhances flavour and helps create a delicate crumb.
-
Egg
Adds richness and moisture to the dough while strengthening its structure. It helps the bread bake evenly and contributes to a soft interior with a lightly golden exterior.
-
Butter
Brings richness and a luxurious mouthfeel to the bread. It keeps the crumb moist, enhances flavour, and gives the snowflake bread its signature soft and buttery texture.
-
Chocolate filling
The star indulgent element, layered between the dough rounds. As the bread bakes, it melts into the layers, adding sweetness, richness, and a festive touch to every pull-apart strand.
EQUIPMENTS USED TO MAKE CHRISTMAS SNOWFLAKE BREAD
The kind of equipment you use can hugely impact the final product. So, make sure to always use the best of the equipment that is available.
Measuring Cups and Measuring Spoons. are an integral part of any baker’s kitchen and it’s very important to measure ingredients with precision.
I used a whisk and a wooden spoon to combine all the ingredients. This equipment are basics and you can find them at any shop near you. They come in handy in so many recipes.
OTHER RELATED RECIPES FROM THE BLOG
TIPS TO MAKE SNOWFLAKE BREAD
- Use warm, not hot milk: The milk should feel warm to the touch, around lukewarm. Hot milk can kill the yeast, while cold milk will slow down fermentation.
- Knead well before adding butter: Develop the gluten first by kneading the dough until it’s soft and elastic, then add the softened butter. This helps the dough absorb the butter better and stay fluffy.
- Butter must be truly softened: The butter should be soft enough to press easily with your finger. Cold butter won’t incorporate properly and can tear the dough.
- Proof until doubled, not by time: Proofing depends on temperature. The dough should visibly double in size and feel light when pressed, even if it takes more or less than an hour.
- Roll all circles evenly: Try to roll each portion into the same size circle. Even thickness ensures uniform baking and a neat snowflake shape.
- Spread filling evenly and lightly: Avoid overfilling, especially near the edges, as excess filling can leak out while twisting and affect the final shape.
- Keep the top layer filling-free: The final circle should have no filling so the twists seal properly and look clean after baking.
- Cut clean, equal strips: Use a sharp knife or pizza cutter to make even cuts. Equal strips help the snowflake bake evenly and look symmetrical.
- Twist gently, not tightly: Twist the strips away from each other with a light hand. Over-twisting can tear the dough or cause it to lose its shape.
- Seal the ends properly: Pinch the ends of each twisted pair firmly so they don’t open up during proofing or baking.
- Do a second short proof: Let the shaped bread rest for 20–30 minutes. This relaxes the dough and gives a softer final texture.
- Brush lightly with egg or milk wash: A light brush is enough. Too much wash can drip into the layers and affect the shape.
- Bake until evenly golden: Bake until the bread is uniformly golden brown on top and sounds hollow when tapped lightly—this ensures it’s fully baked inside.
- 2+1/3 cup flour
- 2 tsp yeast
- 3 tbsp sugar
- ¾ cup warm milk
- 1 egg
- ¼ cup softened butter
- ½ cup chocolate filling
- In a bowl add flour , sugar milk , yeast give it a mix .
- Then add egg and milk and knead it well for about 8-10 minutes till you achieve a soft dough.
- Lastly add softened butter and knead again for 3-4 minutes till the butter is fully incorporated.
- Transfer the dough to a greased bowl and let it proof for 1 hour or until doubled in size.
- Once the dough has risen , knock it down and transfer to clean flour dusted surface. divide into 4 equal portion and roll each portion into a flat circle.
- place the first circle onto the baking tray and spread filling around the base , place the second rolled put circle on top and repeat the process.
- Put the 4th circle on top. Top layer doesn’t have any filling on it.
- Make a small–medium circular indent in the centre of the stacked dough.
- From the edge of that indent, cut long strips all around the circle.
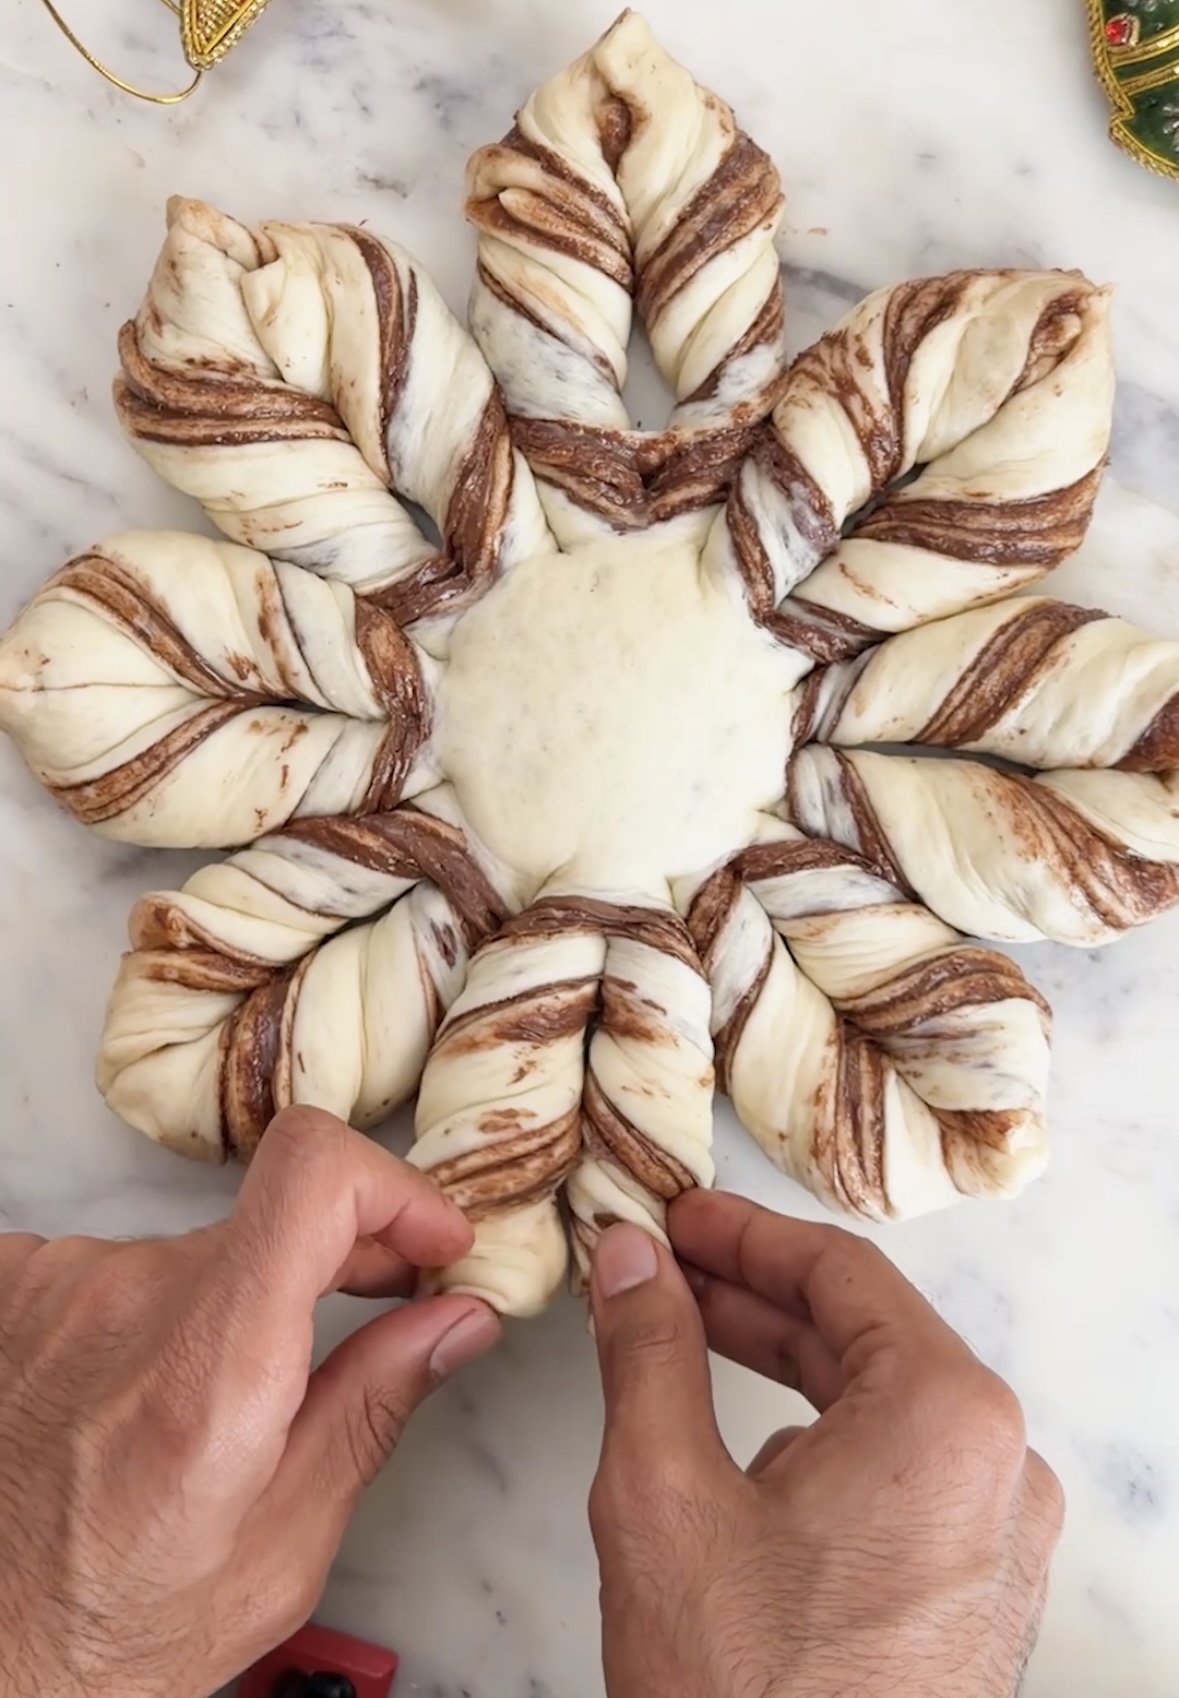
- To form the star, take two adjacent strips and twist them away from each other.
- Then pinch the ends together to seal.Repeat for all strips. Let the shaped dough rest for 30 minutes.
- Brush the bread lightly with egg wash or milk wash.
- Bake at 175°C for about 30 minutes, or until golden brown.
 Hello. I'm Shivesh Bhatia, a food blogger and food stylist from Delhi, India. Welcome to Bake With Shivesh, where I'll help you create magic in your kitchens with my simple recipes.