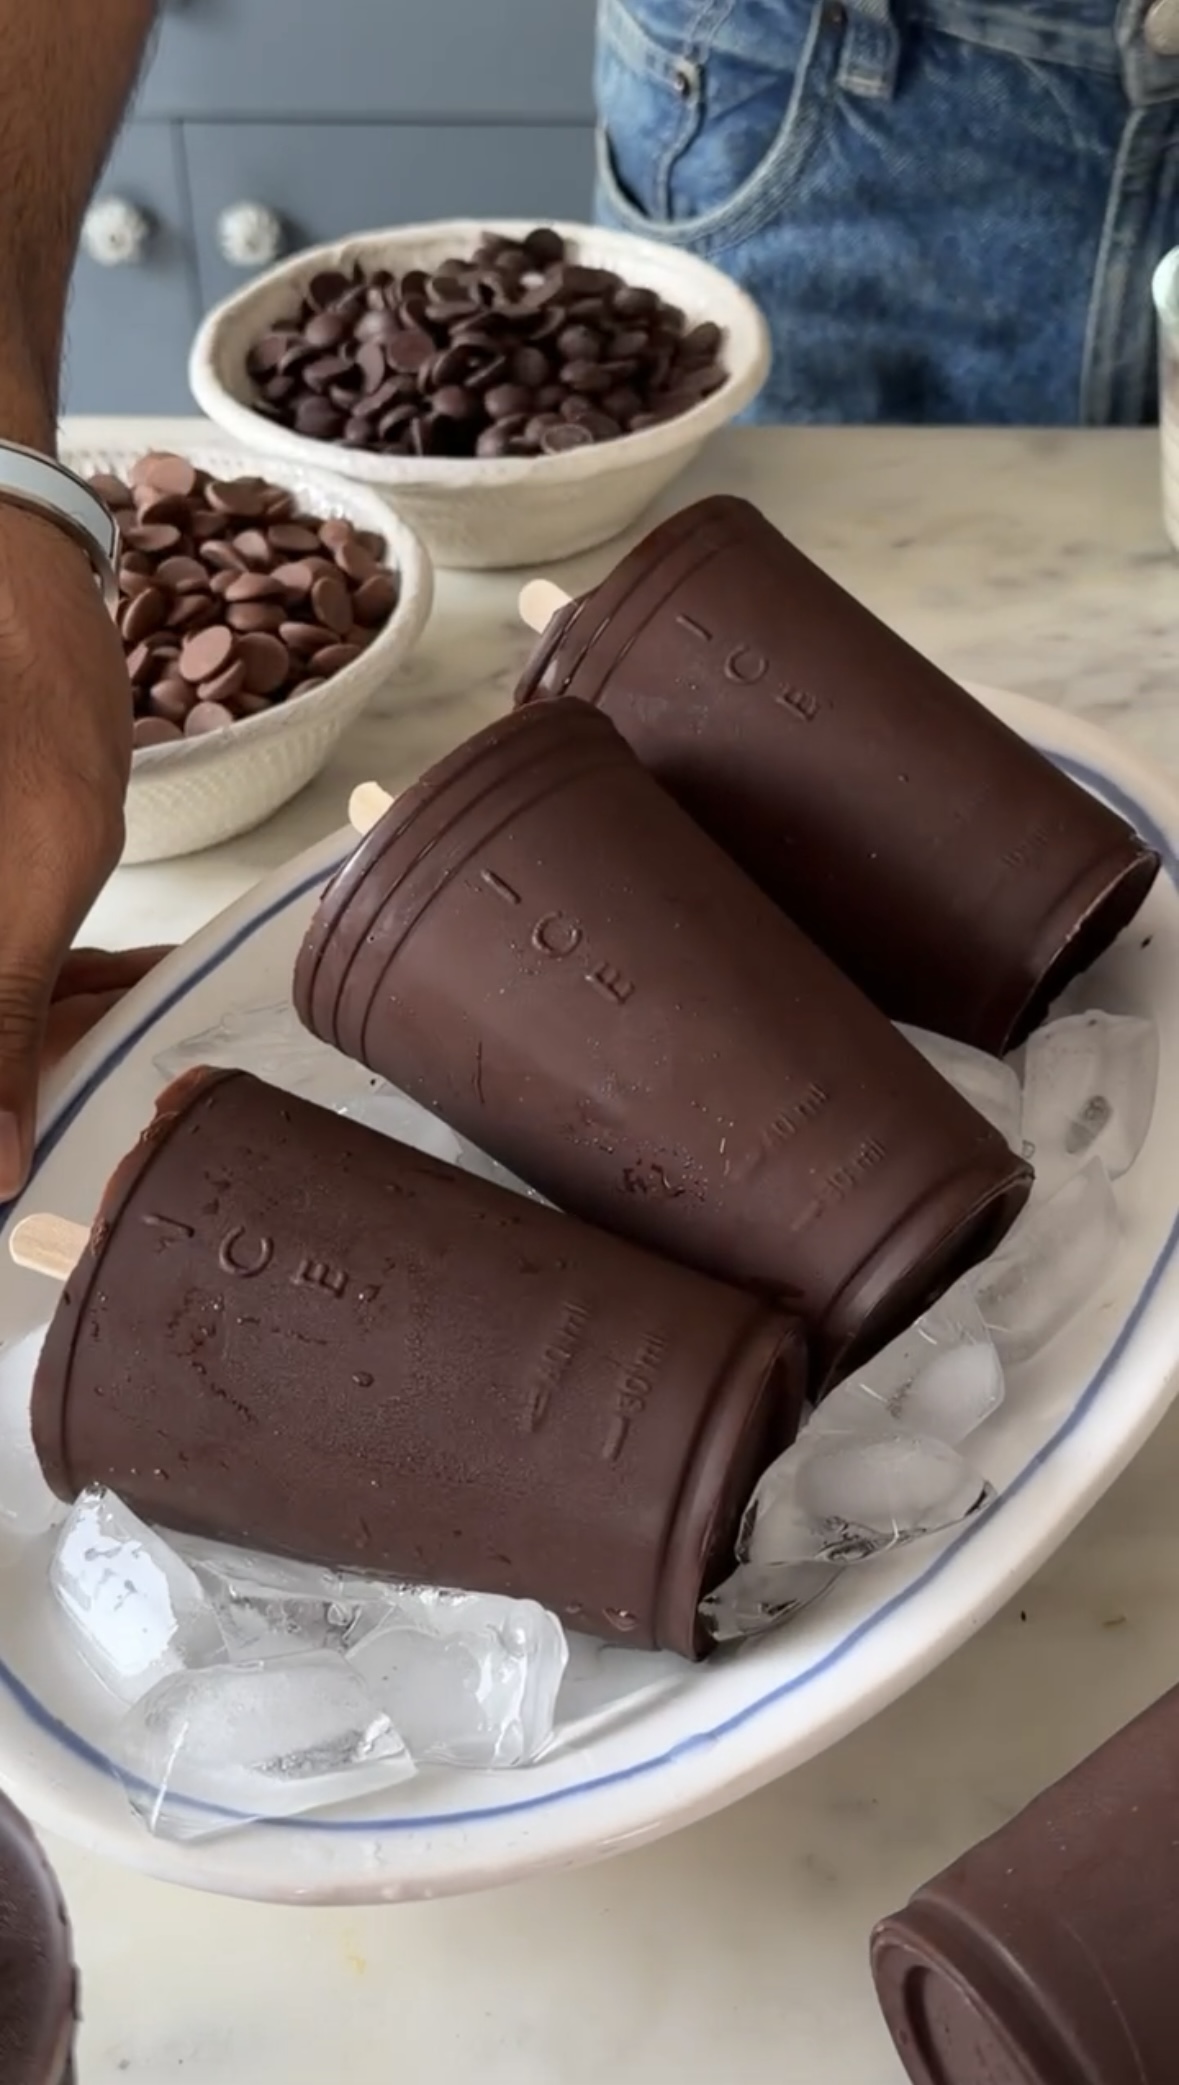
There’s something strangely satisfying about making ice cream in the most unexpected way possible, and these homemade chocobar ice creams do exactly that. Instead of using expensive silicone moulds or fancy equipment, this recipe uses simple plastic cups that are coated with melted dark chocolate, filled with a creamy vanilla ice cream mixture, frozen, and then carefully torn away to reveal the final chocobar shape underneath. It feels a little nostalgic, a little chaotic, and honestly the kind of kitchen trick that makes homemade desserts even more fun.
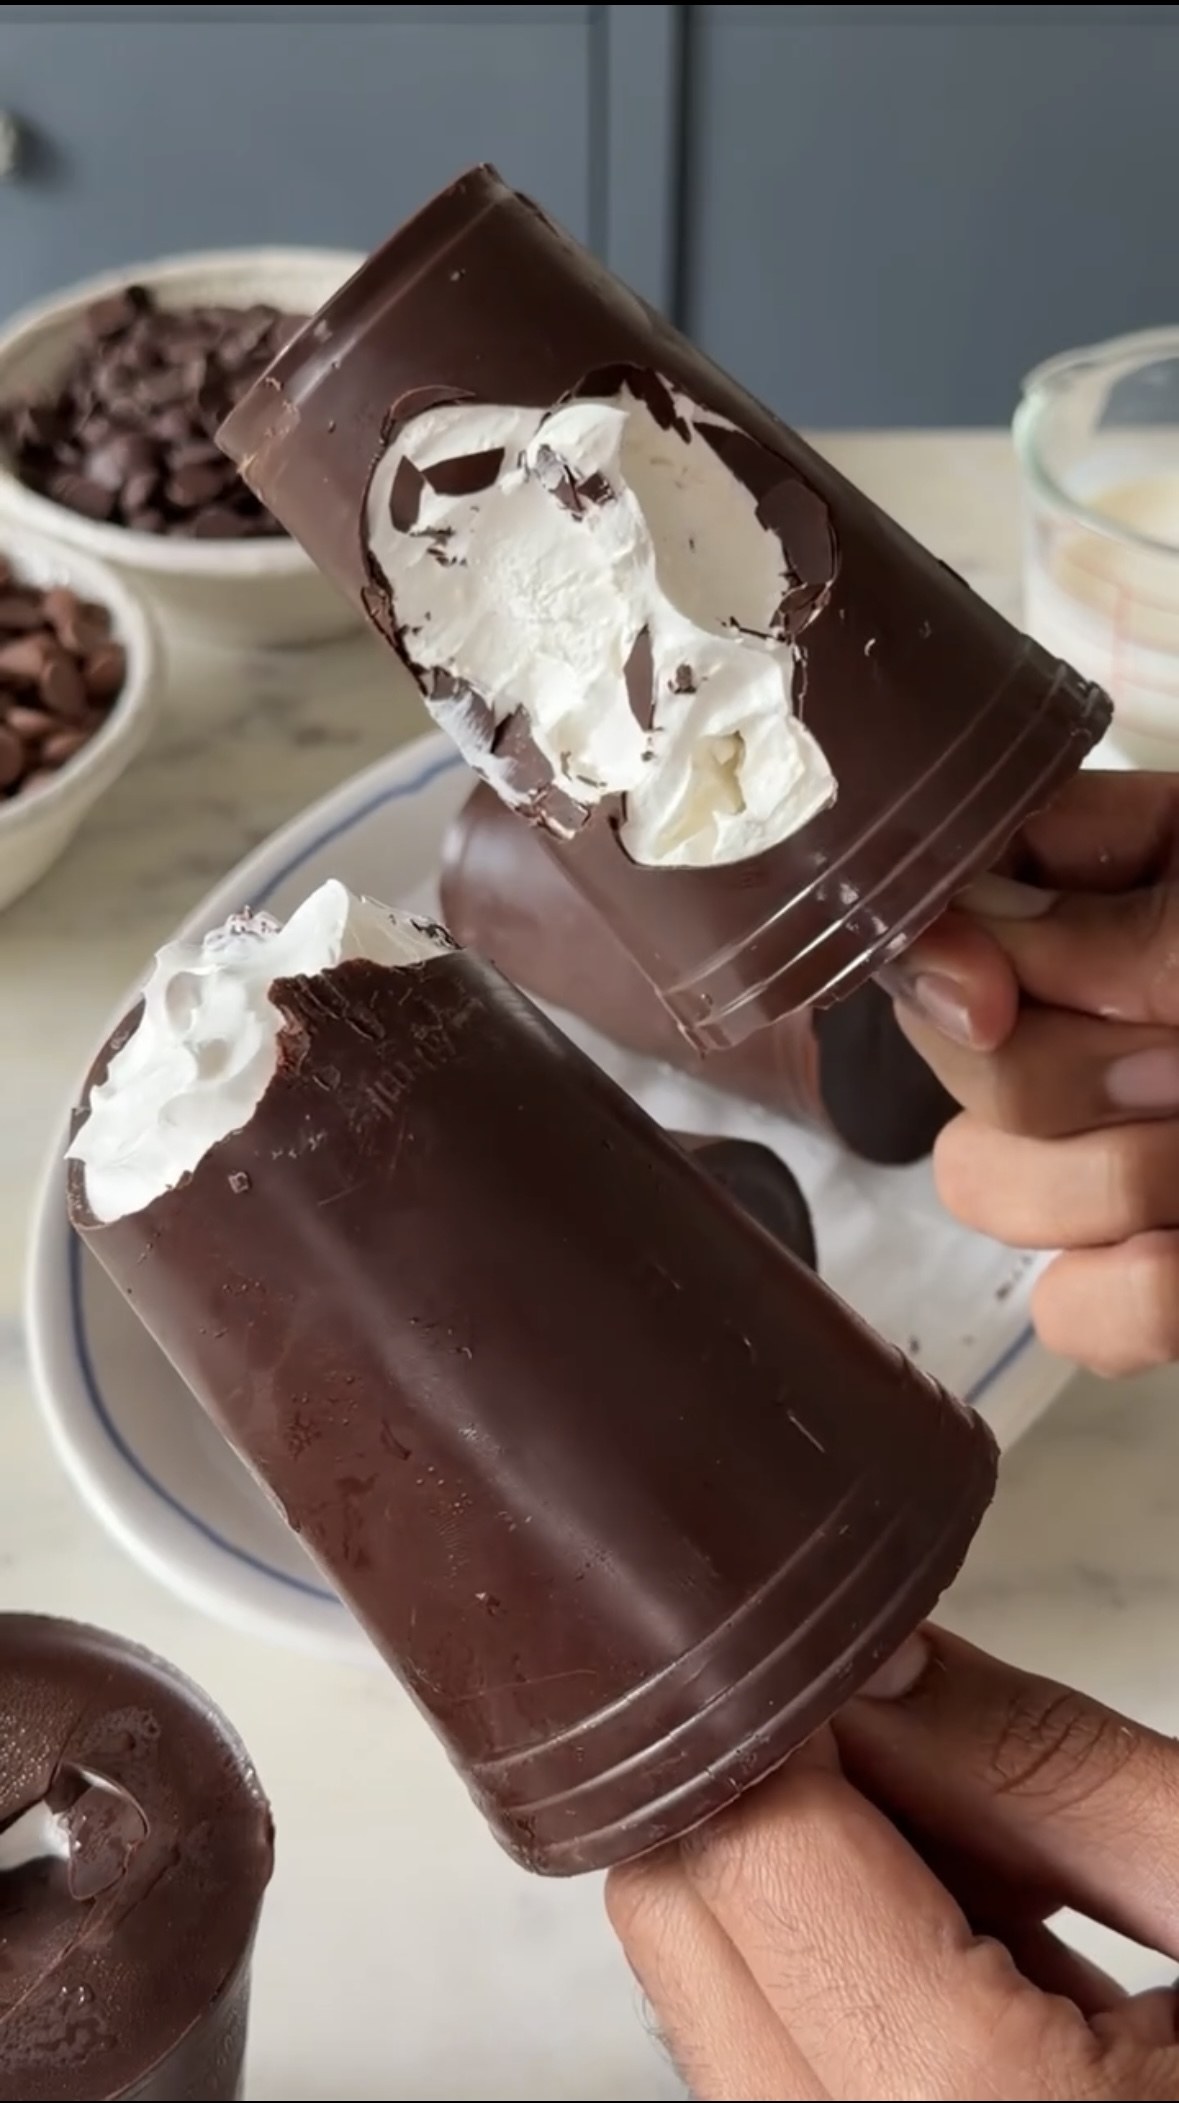
What makes these so special is the contrast between the crisp chocolate shell and the soft vanilla center inside. The dark chocolate coating hardens into that signature snap the moment you bite into it, while the whipped cream, condensed milk, and vanilla come together to create a smooth, airy ice cream filling that tastes rich without feeling too heavy. And because the mould is literally peeled away at the end, there’s something extra exciting about the reveal—it almost feels like unwrapping a store-bought chocobar, except this one is fresher, creamier, and made entirely at home.
It’s the kind of dessert that instantly reminds you of summer afternoons, freezer raids, and childhood ice creams that disappeared way too quickly. Simple ingredients, no complicated techniques, and a result that somehow feels both homemade and bakery-style at the same time—that’s the charm of these chocobar ice creams.

INGREDIENTS USED IN MAKING CHOCOBAR IN PLASTIC CUPS

Condensed Milk
Condensed milk is sweetened with sugar and has a rich, caramelized flavour. It adds sweetness while also helping create a softer frozen texture. Because it contains both sugar and milk solids, it keeps the ice cream creamy and scoopable rather than turning rock solid in the freezer. It also adds richness and gives the vanilla base that classic melt-in-the-mouth quality associated with homemade no-churn ice creams. I have used Nestle Milkmaid to make this recipe but you can use any kind of condensed milk that is readily available to you.
Whipping Cream
The main ingredient that gives the ice cream its entire structure and base is the whipping cream. When whipping cream is beaten, it incorporates air, resulting in a light and fluffy texture. This aeration is key to making the ice cream filling light and airy, rather than dense and heavy. The fat content gives the ice cream its luscious mouthfeel.
The fat in the whipping cream helps to inhibit the formation of large ice crystals, which can make the ice cream grainy. This ensures a smoother, more consistent texture.
Vanilla extract
Vanilla may seem like a small ingredient, but it plays a huge role in flavour. Since the filling itself is a simple vanilla ice cream base, the vanilla helps give it warmth, sweetness, and that comforting classic ice cream taste. It enhances the creaminess of the whipped cream and condensed milk while balancing the slight bitterness of the dark chocolate coating. I use sprig vanilla extract in my recipes.
Dark Chocolate
The dark chocolate forms the outer shell of the chocobar and is what gives it that classic crackly bite when frozen. Once melted and coated inside the plastic cups, it hardens into a thin chocolate layer that surrounds the vanilla ice cream filling. Using dark chocolate balances the sweetness of the ice cream base and adds a slightly rich, bittersweet flavour that makes the dessert taste more indulgent. It also creates the beautiful contrast between the crisp exterior and creamy center.
EQUIPMENTS USED FOR MAKING CHOCOBAR IN PLASTIC CUPS
Not a lot of equipment is required to make this Choco bar ice cream . However, a few kitchen staples that should always be in the kitchen are mentioned below.
Measuring Cups and Measuring Spoons are the first thing that anybody who in cooking or baking needs. The right quantities will help in the desired outcome so these two things are a must.
An electric whisk is necessary to whip all the ingredients into an airy mixture. Spatulas are useful to scrape down the filling.
Finally, plastic cups that are a little flimsy and easy to tear are the main components to make this recipe.
RELATED RECIPES FROM THE BLOG
TIPS TO MAKE THIS CHOCOBAR IN PLASTIC CUPS
- When coating the plastic cups, rotate and tilt them properly so the chocolate reaches all sides evenly. Thin uncovered spots can crack or break once unmoulded. Make sure the entire cup is nicely coated with a thick layer of chocolate.
- Whipped cream should hold soft to medium peaks. Overwhipping can make the texture grainy or buttery, which affects the smoothness of the ice cream filling.
- Once the vanilla mixture is poured into the cups, gently tap them on the counter. This removes air pockets and helps the filling settle evenly inside the chocolate shell.
- Create a small tear in the cups before starting the recipe. This prevents the chocolate shell from cracking while demoulding.
- The chocolate shell softens fast once out of the freezer, especially in warmer weather. Unmould one chocobar at a time and return the others to the freezer until needed.
- 1½ cups dark chocolate, chopped (approx. 250–270g)
- 3 cups whipped cream
- ½ cup + 2 tbsp condensed milk
- ½ tsp vanilla essence
- Add the chopped dark chocolate to a microwave-safe bowl and melt it using short 30-second bursts, stirring in between until smooth. You can also melt it using a double boiler.
- Make a slight cut in the plastic cups. Pour a little melted chocolate into each plastic cup and rotate the cup to coat the sides evenly from the inside. Let the excess chocolate drip out if needed. Make sure its a thick layer. Place the cups in the freezer for 10–15 minutes until the chocolate layer sets.
- In a large bowl, add the whipped cream, condensed milk, and vanilla essence. Fold gently until the mixture becomes smooth, light, and fully combined. Avoid overmixing so the mixture stays airy.
- Remove the chocolate-coated cups from the freezer and fill them with the vanilla ice cream mixture. Tap the cups lightly on the counter to remove any air bubbles and smoothen the top.
- Insert ice cream sticks into the center of each cup and pour some more chocolate on top to seal the ice cream cups. Place them back into the freezer for 6-8 hours or overnight until fully set and firm.
- Once frozen, carefully tear the plastic cups (from the previous cut) away from the ice cream to release the chocobars. Work gently to avoid cracking the chocolate shell.
- Serve immediately.
If you like my Chocobars in Plastic Cups recipe and happen to make them in your kitchen, do tag me on Instagram and share pictures with me using #Bakewithshivesh. Happy Baking!

Leave a Reply